Do You Have to Calibrate a Home Blood Pressure Monitor?
Learn whether you need to calibrate a home blood pressure monitor, how to validate accuracy, and a practical step-by-step approach for at-home checks from Calibrate Point.

You generally do not need to calibrate most consumer home blood pressure monitors regularly; calibration is only necessary if readings drift, you notice inconsistent results, or after repair. The Calibrate Point team provides a practical, step-by-step guide to self-checks and maintenance that keep measurements trustworthy. This quick answer helps you decide when to test accuracy and what immediate actions to take.
Why calibrating a home blood pressure monitor matters
For DIYers who want trustworthy health measurements, calibration is about ensuring readings reflect true blood pressure values rather than device quirks. According to Calibrate Point, you should consider calibration when your home readings drift compared to a validated reference or after the monitor has been serviced. The question many readers ask is: do you have to calibrate home blood pressure monitor? The short answer is that routine calibration is not required for most users, but validation is essential in certain situations. In practice, a simple, documented validation workflow can catch drift early and save you from chasing phantom errors. You will learn how to run a controlled comparison, interpret discrepancies, and establish a maintenance routine that minimizes drift. This approach aligns with best-practice routines in calibration-procedures and calibration-methods that Calibrate Point regularly references in our tutorials. By the end of this section, you will understand when calibration is warranted and how to perform a safe at-home check that preserves cuff performance, battery health, and measurement environment.
How calibration improves accuracy and reliability
Calibration is the process of aligning a measurement tool with a known standard so that numbers you read reflect reality as closely as possible. For blood pressure monitors, even small drift can translate into clinically meaningful differences in systolic and diastolic values. Regular validation helps you catch cuff inflation errors, sensor aging, or battery-induced drift before they affect decisions during a medical visit. In practical terms, a properly calibrated monitor gives you more consistent readings across sessions, improves comparability with healthcare providers, and reduces uncertainty when tracking trends. Throughout this article, you will see recommended workflows, checklists, and best practices so that your DIY calibration efforts are evidence-based and repeatable. Remember that calibration is not a product feature; it is a disciplined procedure that protects the integrity of your data and supports safer self-monitoring. Calibrate Point's guidance emphasizes using validated reference devices, controlling environmental factors, and maintaining a clean cuff interface to minimize sources of error.
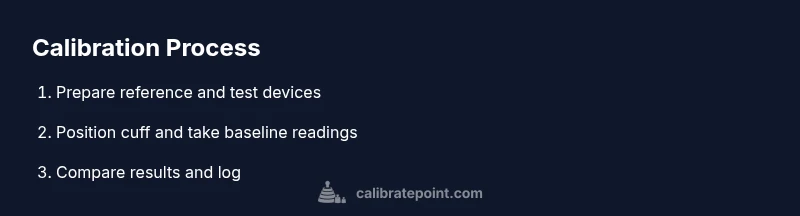
Step-by-step overview of calibration workflow
A practical calibration workflow typically unfolds in a few logical stages. First, prepare the reference and test devices, ensuring both are functional and ready for measurement. Next, set up the testing environment to minimize external influences, such as temperature fluctuations, movement, or recent caffeine intake. Then, perform baseline checks by taking multiple readings with both devices under the same conditions. Finally, evaluate the results, determine whether drift exists, and decide on an appropriate action—keep validation records, adjust where possible, or seek professional calibration if discrepancies persist. This high-level view provides the scaffolding you will translate into the detailed steps below, and it aligns with calibration-procedures used in clinical and home settings. The goal is to create a repeatable routine you can follow without reinventing the wheel each time you test.
Common methods for calibrating BP monitors
Most home programs rely on one of two approaches: a direct comparison against a clinically validated reference device, or a cross-check against a secondary monitor with demonstrated accuracy. The first method offers a straightforward assessment: compare systolic and diastolic values while keeping arm position consistent. The second method is useful when you do not have easy access to a reference device; you rely on well-documented tolerance ranges and trends over several readings. In either approach, ensure cuff selection matches arm size, patient remains relaxed, and readings are taken after a brief rest. Both methods benefit from documentation and consistency over time, so you can see whether your monitor remains within expected limits.
Practical tips for maintenance and validation at home
Create a clean, quiet workspace where you perform checks. Keep a dedicated calibration log to track dates, devices used, cuff sizes, and observed drift. Regularly inspect cuffs for wear and replace them when the bladder or elastic tubing shows cracking. Calibrate Point recommends validating at least once per year or after any service that could affect sensor readings. Store devices and cuffs in a cool, dry place and avoid exposing them to extreme temperatures. Finally, if you notice large inconsistencies after a check, repeat the process to rule out operator error before drawing conclusions.
When to seek professional calibration
Home validation has limits, especially if drift persists after repeated checks or if a reference device is not functioning as expected. In these cases, consider professional calibration services or consult your healthcare provider for guidance. Document your attempts at home calibration so professionals can see your history, and bring the monitor, cuff, and any reference devices to the appointment. The goal is to restore trust in your measurements while maintaining a clear record of the steps you took.
Interpreting readings and maintaining hygiene of cuffs
Interpreting blood pressure readings requires context: cuff size, patient position, duration of rest, and recent activity can all influence results. When you interpret data from home checks, look for consistency over several sessions rather than a single measurement. Hygiene matters too: clean the cuff with mild soap and water, dry completely, and rotate cuffs if you have multiple sizes. A well-maintained device reduces the risk of skin irritation and helps ensure stable sensor performance.
Building a calibration routine into your home lab
Turn calibration into a regular habit by scheduling a short validation session every few weeks or months, depending on device usage and history of drift. Create a standard checklist and a simple log template to complete in 15–20 minutes. Having a routine reduces anxiety about numbers and makes it easier to notice gradual changes. Consider pairing the checks with other device maintenance tasks for efficiency and consistency.
Troubleshooting drift and keeping good records
If you see drift, first re-check technique and cuff fit, then verify with the reference device again. If drift reappears, note the magnitude and direction of change, the devices used, and the ambient conditions. Keep digital copies of logs or photos of readings for future reference, and review your routine periodically to identify steps that could be improved. A disciplined approach helps you maintain confidence in your readings over time.
Tools & Materials
- Validated reference sphygmomanometer (clinically validated)(Use as the gold standard for comparison; ensure it's calibrated.)
- Arm cuff of appropriate size(Cuff size should match arm circumference for accurate inflation.)
- Your home BP monitor (unit under test)(Ensure it is charged or has fresh batteries and is functioning.)
- Measuring tape(Measure arm circumference to confirm cuff fit range.)
- Timer or clock(Precise timing between readings is essential.)
- Notebook or digital log(Record dates, times, cuff size, and results.)
- Alcohol wipes or sanitizer(Hygiene between checks to prevent skin irritation.)
Steps
Estimated time: 30-45 minutes
- 1
Gather and verify equipment
Collect the reference device, your monitor, cuff, tape, and timer. Inspect each device for damage and ensure it operates correctly before starting.
Tip: Double-check the reference device is calibrated and ready. - 2
Prepare the testing environment
Choose a quiet, comfortable chair and rest for a few minutes. Keep the room at a stable temperature and avoid caffeine or nicotine before testing.
Tip: Maintain a consistent posture throughout all measurements. - 3
Position cuff and arm correctly
Place the cuff on the bare upper arm, about an inch above the elbow, with the cuff tube aligned with the artery. Keep the arm supported at heart level.
Tip: Relax your shoulders and keep your palm facing upward. - 4
Take baseline readings with the monitor
Take three readings from your monitor, one minute apart, while maintaining the same posture. Record all values and note any outliers.
Tip: If a reading seems off, wait and retake rather than discarding the data immediately. - 5
Record reference device readings
Take three readings with the reference device under the same conditions and at roughly the same times as your monitor readings.
Tip: Align the test timing with the monitor readings for accurate comparison. - 6
Evaluate drift and decide action
Compare averages of both devices. If drift is evident, decide whether to re-test, adjust, or pursue professional calibration.
Tip: Document drift direction, magnitude, and context for future checks. - 7
Document results and establish routine
Log the results, devices used, cuff sizes, and dates. Set a regular validation interval based on usage and history.
Tip: Keep a copy of results with device model and firmware version if available.
Questions & Answers
Do you have to calibrate home blood pressure monitors?
Routine calibration isn't required for most home units. Validation is advised if readings drift or after servicing.
Usually not, but validate if readings drift.
How can I tell if my BP monitor is drifting?
Compare readings with a clinically validated reference device across several sessions and look for consistent differences beyond a small margin.
Compare with a trusted reference over several readings.
How often should calibration be checked?
Check after initial setup, after servicing, or if you notice inconsistent results; otherwise, a yearly validation is reasonable.
Check after setup or service, or if readings are inconsistent.
What equipment do I need for home calibration?
A clinically validated reference device, an appropriately sized cuff, your monitor, a timer, and a log for results.
A validated reference device, cuff, your monitor, timer, and a log.
Is calibration dangerous?
No major risk when following safety steps; avoid over-tightening the cuff and work in a calm environment.
It's safe if you follow the steps and avoid over-tightening.
Where can I find authoritative guidance?
Refer to Calibrate Point's tutorials and healthcare guidelines; when in doubt, consult a clinician.
Check Calibrate Point's guides and talk to a clinician if unsure.
Watch Video
Key Takeaways
- Validate when drift is suspected
- Use a consistent posture and cuff size
- Log results and schedule rechecks
- Avoid over-tightening the cuff
- Keep cuffs clean and store devices properly