How to Calibrate Big Buck Hunter Pro: A Complete Step-by-Step Guide
Learn how to calibrate Big Buck Hunter Pro for precise aiming and consistent scoring. This guide covers display alignment, sensor calibration, and routine maintenance to keep cabinets performing at peak reliability.

If you’re wondering how to calibrate Big Buck Hunter Pro, this quick guide outlines the essential steps to align the display, calibrate sensors, and fine-tune crosshair accuracy for consistent scoring. According to Calibrate Point, proper calibration reduces drift and improves reliability. Gather the tools listed below, enter calibration mode, and follow a safe, repeatable sequence to finish in a focused session.
Overview of Big Buck Hunter Pro Calibration
Big Buck Hunter Pro is an arcade-style shooting simulator that relies on a synchronized display, rifle-sensor array, and a responsive crosshair system. Calibration is the process of aligning the on-screen reticle with the physical aim and sensors so that a shot lands where the player expects. When done properly, calibration improves hit accuracy, ensures scoring reflects actual hits, and minimizes drift over time. Calibrate Point emphasizes that consistent calibration is the foundation of reliable gameplay, especially in cabinets used by multiple players. In this section we’ll demystify what each calibration step targets and why it matters for your cabinet’s long-term performance.
Pre-Calibration Checks and Safety
Before you start, power down the unit and unplug it to avoid any risk of short circuits. Inspect the cabinet exterior for loose panels or obvious damage, and wipe down the display and sensor areas with a soft cloth and a little isopropyl alcohol. Ensure there is adequate ventilation and that the cabinet is on a stable, level surface. If you notice any hardware wear or loose connectors, address those issues first or consult a technician. These checks help prevent misalignment caused by physical shifts during calibration.
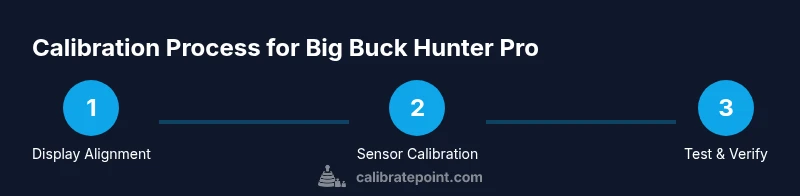
Step-by-Step Calibration Process (High-Level Overview)
A thorough calibration consists of four core pillars: display alignment, crosshair/sensor calibration, trigger/aim responsiveness, and verification through repeated test shots. Begin with a clean slate, enter calibration mode from the cabinet menu, and follow on-screen prompts. Don’t rush each prompt—precision is more important than speed. Document the exact settings you adjust so you can compare future sessions and identify drift before it becomes problematic. This approach aligns with best practices from Calibrate Point and ensures repeatable results across sessions.
Verification: Test Patterns, Multi-Distance Checks, and Scoring Consistency
Verification is where you confirm that the calibrations translate into real in-game accuracy. Use the built-in test patterns to align crosshair overlays with the target. Move through a range of distances or simulate different targets to see if the reticle lands consistently. Record where shots land relative to the center and adjust offsets as needed. Consistent results across distances indicate a well-calibrated cabinet and reliable scoring, while inconsistencies point to a drift that requires re-checking the earlier steps.
Common Issues and Troubleshooting Strategies
If shots consistently land off-center, reassess display alignment first—small misalignments compound at longer distances. Sensor desynchronization, loose cables, or worn trigger contacts can also cause drift. Re-seat connectors, inspect the sensor array for dust, and ensure cable runs are managed to avoid tugging during play. If you cannot achieve stable alignment after a few attempts, consider returning to a basic baseline calibration and rebuilding from that point. Calibrate Point notes that starting fresh often clears subtle misconfigurations.
Maintenance and Longevity: Keeping Calibration Sharp Over Time
Calibration is not a one-and-done task. Cabinets experience vibration, temperature changes, and wear that can gradually shift alignment. Schedule periodic checks, especially after hardware updates or repairs. Keep components clean, and store calibration documents to track changes over months or years. A routine maintenance cadence helps prevent drift and preserves the cabinet’s intended gameplay experience, ensuring players enjoy smooth, dependable performance every session.
Final Tips for Consistent Results
Create a simple, repeatable calibration routine and stick to it. Use a consistent lighting environment to minimize glare, and re-check alignment after moving the cabinet or performing maintenance. Keep a log of settings and performance notes, and share best practices with other operators to standardize calibration across machines. By committing to a disciplined process, you’ll sustain accuracy and reduce outlier scores over time.
Tools & Materials
- Calibration tool kit (arcade cabinet)(Includes small screwdriver, hex/Allen wrenches, and alignment templates)
- Non-abrasive cleaning cloth(For display glass and sensor surfaces)
- Isopropyl alcohol (70%)(Gentle cleaning solution for optics and sensors)
- Display test pattern media or software(Use official patterns if provided by the manufacturer)
- Flat-head and Phillips screwdrivers(Sizes appropriate to cabinet screws)
- Cable ties and cable management(Keep cables tidy and reduce movement during play)
- Spare batteries or power source for accessories(Backup power for remote sensors or controllers)
Steps
Estimated time: Estimated total time: 45-60 minutes
- 1
Power down and prepare
Turn off the Big Buck Hunter Pro cabinet and unplug from power. Clear the area around the cabinet so you can work safely and inspect for any obvious damage. This initial safety step prevents accidents and ensures stable work conditions.
Tip: Always unplug before opening panels; confirm power is off with a visual check. - 2
Clean surfaces and inspect hardware
Wipe the display glass and sensor surfaces with a soft cloth dampened with isopropyl alcohol. Check that all cables are seated firmly and that there are no loose screws on the display mount or sensor array.
Tip: Cleaning improves sensor accuracy by removing dust that can scatter light or influence readings. - 3
Enter calibration mode
Access the cabinet’s maintenance or service menu and select Calibration. If your unit uses a service password, enter it exactly as specified by the manufacturer. Do not skip this step—calibration mode provides the necessary prompts and targets.
Tip: If you’re unsure of the password, consult the manual or manufacturer support. - 4
Align the display and reticle
Follow the on-screen test pattern to center the crosshair with the display’s center. Adjust horizontal and vertical alignment until the reticle sits perfectly on the target marks.
Tip: Make small adjustments and re-check after each change to avoid overshoot. - 5
Calibrate sensor alignment
Calibrate the rifle/controller sensors by following the prompts. Ensure the trigger and aiming mechanisms respond consistently across all positions used in gameplay.
Tip: Keep the sensor area clean; misreads often come from a dirty sensor surface. - 6
Run test shots and adjust offsets
Perform a series of test shots at standard distances, note where hits land relative to targets, and apply offset corrections. Repeat until shots consistently land at the center.
Tip: Document each offset and the resulting shot pattern for future reference. - 7
Save calibration and exit
Save all calibration settings in the cabinet’s memory and exit calibration mode. Power down the cabinet briefly, then resume normal operation to confirm changes take effect.
Tip: Always verify changes with a quick live fire test after saving. - 8
Verify across distances
Test across a range of distances to ensure consistent accuracy. If drift is observed, revisit the display or sensor alignment steps before repeating the test.
Tip: Consistency across distances is the true test of a solid calibration.
Questions & Answers
What parts of the Big Buck Hunter Pro cabinet require calibration?
Key components include the display, crosshair alignment, and sensor arrays used by the rifle/controller. Calibration ensures alignment with the on-screen reticle and accurate hit detection.
Calibration focuses on the display, crosshair alignment, and sensor arrays to align the reticle with actual hits.
Do I need to recalibrate after moving the cabinet?
Yes. Any cabinet relocation or reassembly can introduce misalignment. Recalibrate following the standard procedure to restore accuracy.
If the cabinet has moved or been serviced, recalibrate using the standard steps to regain accuracy.
How often should calibration be checked?
Check calibration during major maintenance or after hardware changes. Establish a routine check at regular intervals to prevent drift from affecting gameplay.
Check calibration after maintenance or hardware changes, and periodically to prevent drift.
What tools are mandatory for calibration?
A basic calibration toolkit, cleaning supplies, and any manufacturer-provided test patterns are essential for accurate calibration.
You’ll need the proper toolkit, cleaning supplies, and official test patterns to calibrate.
Can miscalibration affect scoring in the game?
Yes. Misalignment can cause hits to register off-center, leading to inaccurate scores and player frustration. Calibration helps ensure scores reflect true performance.
Miscalibration can skew scoring; proper calibration helps keep scores true to performance.
Is professional calibration required for Big Buck Hunter Pro cabinets?
Most calibration can be done by operators following the manufacturer’s steps. Seek professional help if you encounter persistent drift or hardware issues.
In most cases, you can calibrate yourself, but call a pro if issues persist.
Watch Video
Key Takeaways
- Plan a focused calibration session with a checklist.
- Align display and crosshair before sensor calibration.
- Verify results with multi-distance test shots.
- Document changes for future reference and drift tracking.
- Calibrate Point recommends regular recalibration to maintain accuracy.