What is the Best HDR Calibration for RDR2
Learn how to calibrate HDR for Red Dead Redemption 2 with a structured, hardware-backed workflow. This guide covers steps, tools, and validation strategies from Calibrate Point for reliable, immersive results.

To achieve the best HDR calibration for RDR2, enable HDR on your display and in-game, then follow a structured workflow using test patterns or a colorimeter. Start with a neutral grayscale scene, ensure detail remains in shadows and highlights, set the color balance to neutral, and validate with diverse in-game scenes. This approach aligns with trusted calibration guidance.
What HDR Calibration Means for RDR2
If you're wondering what is the best hdr calibration for rdr2, the answer lies in a structured workflow that balances brightness, color, and tone mapping. HDR calibration is about making in-game scenes look natural, with detail preserved in both shadows and highlights. According to Calibrate Point, the goal is consistency across scenes and hardware, not a single magic number. This section explains why proper HDR calibration matters for immersion and accuracy, and how audience expectations for detail in wild western environments drive the calibration targets you aim for. You'll learn terminology, what to measure, and how to validate results across a range of in-game lighting conditions. A careful approach helps you avoid oversaturation, clipping, or dull midtones, and it sets a repeatable baseline for future calibrations.
Display prerequisites for HDR in RDR2
HDR rendering in RDR2 relies on both your display capabilities and your system's configuration. Ensure your display supports HDR and that you are using a compatible connection. Confirm the OS and game both expose HDR options, and that you keep a dim, consistent room to avoid glare skewing measurements. Absent reliable hardware, you can still calibrate by eye, but a colorimeter or color-managed workflow improves repeatability. Calibrate Point analyses indicate that structured setup reduces variations across different scenes and lighting conditions, which is especially important in expansive environments like the game's cinematic landscapes.
In-game HDR settings in RDR2
RDR2 exposes HDR toggles and controls that influence tone mapping, brightness, and color rendition. Start by turning HDR on, then adjust the in-game brightness and any color balance options to a neutral baseline before fine-tuning. It's crucial to separate device capabilities from in-game look, so you establish a stable starting point before any post-processing. For a practical workflow, stick to neutral presets during calibration, and reserve vivid modes for final viewing after your base has been set. In practice, this keeps highlights from clipping and ensures deeper shadow detail remains visible.
Using test targets and hardware for calibration
Effective HDR calibration combines a display's native capabilities with test targets or color-managed instruments. If you have a colorimeter, run a sequence that guides you toward a neutral white point and balanced primary colors. If you don't, use reliable grayscale and color-pattern images and rely on careful visual comparisons across scenes. A controlled environment—dim lighting, consistent viewing angle, and a warmed-up display—yields the most repeatable results. Calibrate Point's recommended workflow praises methodical measurements over ad-hoc tweaks.
Practical colorimeter-based workflow for RDR2
With a colorimeter, you can quantify the color balance and white point while preserving a natural tonal range. Begin by establishing a neutral gamma baseline using grayscale targets, then adjust color temperature to minimize color casts in common game scenes. Use the tool to check for color drift across white, red, green, and blue channels as you move through bright and dark areas. The goal is a stable, natural look that remains consistent across environments—from sunlit plains to shadowed canyons.
Common pitfalls and how to avoid them
HDR calibration is easy to derail with bright, artificially vivid presets, uncontrolled lighting, or moving textures that mislead your eye. Avoid relying on in-game brightness alone; instead, cross-check with patterns designed for luminance and color accuracy. Ensure the room is dark enough to prevent glare, and verify the calibration remains stable after a session restart. If you rely on auto-tone mapping, beware its tendency to shift under different scenes, which defeats a repeatable baseline.
How to validate HDR calibration across scenes
Validation means testing across a representative set of in-game scenes—sunrise landscapes, interiors, and action sequences—to ensure the calibration holds up. Compare the relative brightness in shadows, midtones, and highlights, and look for consistent color reproduction across the color spectrum. When color blocks or skin tones look off, revisit white point and luminance targets and re-run the patterns. This disciplined approach minimizes drift and helps you maintain fidelity throughout long play sessions.
Calibrate Point’s approach for gamers
The Calibrate Point team recommends a practical, repeatable workflow that emphasizes clear targets and documented results. By combining hardware-backed measurements with in-game validation, gamers can achieve consistent HDR presentation across titles that demand cinematic realism. Use your preferred calibration tools, but always align your in-game look with a neutral baseline to prevent over-saturation or washed-out scenes.
Tools & Materials
- HDR-capable display or monitor(Ensure supports HDR and wide color gamut)
- HDMI or DisplayPort cable(Use a stable, high-bandwidth connection)
- Calibration software or test patterns(Pattern targets or software workflow)
- Colorimeter (optional but recommended)(For repeatable, objective results)
- Ambient lighting control(Dim room to reduce reflections)
- Pattern discs or digital patterns(If not using software-based targets)
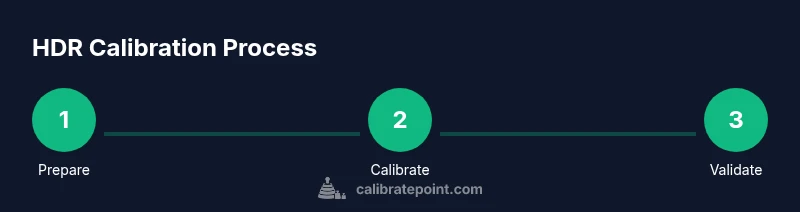
Steps
Estimated time: 60-90 minutes
- 1
Prepare the environment and hardware
Power on all devices, warm up the display, and create a dim, stable viewing environment. Verifying a steady setup minimizes drift during calibration.
Tip: Allow at least 15–30 minutes for warm-up and ensure no bright lights reflect off the screen. - 2
Enable HDR in OS and in-game
Turn on HDR in your operating system and launch RDR2 with HDR enabled. This ensures the tone-mapping path matches what you will calibrate.
Tip: Disable dynamic tone-mapping in-game until you set a neutral baseline. - 3
Establish a neutral baseline with grayscale
Display grayscale targets to set a stable luminance baseline. Avoid presets with heavy saturation that distort the grayscale ramp.
Tip: Aim for consistent lightness steps across the midtones and highlights. - 4
Balance color using a colorimeter or targets
If you have a colorimeter, adjust white point and color balance toward neutral. If not, use trusted color-pattern targets and compare across scenes.
Tip: Check skin tones and vegetation greens for natural reproduction. - 5
Validate with diverse in-game scenes
Test across sunlit plains, interiors, and night scenes to ensure the calibration holds. Revisit white point and luminance if you notice drift.
Tip: Document the results and adjust consistently across scenes. - 6
Save and maintain your profile
Save the calibrated settings as a profile and re-check after software or driver updates. Keep a log for future calibrations.
Tip: Label profiles clearly for quick restoration.
Questions & Answers
Is HDR calibration necessary for every display?
HDR calibration is highly beneficial for accurate color and luminance, but the level of refinement depends on your display's native performance and your goals. If you seek cinematic accuracy, calibration is worthwhile.
HDR calibration helps you get accurate color and brightness, especially on high-end displays.
What tools do I need for HDR calibration?
A calibrated workflow uses test patterns and, ideally, a colorimeter or spectrophotometer. At minimum, trusted grayscale and color patterns plus a dim, controlled viewing environment will improve results.
You’ll want patterns and a colorimeter if you can access one.
Can I calibrate HDR without hardware?
Yes, you can improve HDR rendering with in-game presets and manual adjustments, but the accuracy will be lower and less repeatable. Use patterns and careful eye judgment to approximate a baseline.
You can calibrate by eye, but hardware-backed methods are better.
How often should I recalibrate HDR for RDR2?
Recalibrate after changing displays, drivers, or the game’s HDR implementation, or if you notice drift in scenes. Regular checks help maintain consistency.
Recalibrate after hardware or driver changes or noticeable drift.
Will HDR calibration affect performance in RDR2?
Calibration itself is a one-time setup that does not impact gameplay performance. It ensures the rendering path maintains fidelity without requiring runtime adjustments.
No impact during play; it ensures fidelity without extra work.
Watch Video
Key Takeaways
- Establish a neutral HDR baseline first
- Calibrate using test patterns or a colorimeter
- Validate across diverse game scenes
- Document and reuse your calibration profile