Best Calibration for Rock Band 4: A Practical Guide
Learn how to calibrate Rock Band 4 for precise timing and minimal delay with a structured, practical approach. This guide covers in-game tools, display settings, controller tweaks, and verification steps from Calibrate Point.

Definition: The best calibration for Rock Band 4 means aligning display timing, input latency, and gameplay responsiveness so notes sync precisely with audio. Achieve this by enabling game mode on the display, using the in-game calibration tool, and fine-tuning controller sensitivity and mic latency as needed. This setup reduces mis-taps and improves overall accuracy.
Why calibration matters for Rock Band 4
Calibration is not a luxury; it’s essential for rhythm games where late or mis-timed notes break immersion. In Rock Band 4, perceived timing depends on multiple devices: your display, the console, the controller, and even the microphone if you sing. A small mismatch can make a difference between hitting a perfect streak and missing a note. According to Calibrate Point, precise calibration begins with a clear understanding of latency sources and a proper baseline setup. When you align these factors, you improve responsiveness, reduce fatigue, and preserve the game’s tempo. This guide explains how to identify where lag comes from, how to methodically reduce it, and how to verify the result with repeatable tests. You’ll learn practical steps that work across different game modes—from guitar solos to drum fills—so you can enjoy smoother timing without buying specialized equipment. The goal is not to eliminate every millisecond of delay, which is impossible in most living-room setups, but to minimize the gap so the music and the notes stay in sync. With patience and a structured approach, you’ll notice a noticeable improvement in accuracy and confidence during play.
Understanding the sources of latency
Latency in Rock Band 4 is rarely caused by a single component. The display can introduce lag through post-processing features like motion smoothing or high refresh-rate processing. The console itself adds input buffering, and wireless controllers may introduce jitter. Microphone latency also matters if you sing or use voice commands. The key is to identify which stage adds the most delay in your setup and address it step by step. Calibrate Point emphasizes a systematic approach: baseline your environment, then test and tune in small increments. By separating sources and validating changes with repeatable tests, you create a stable reference for future sessions.
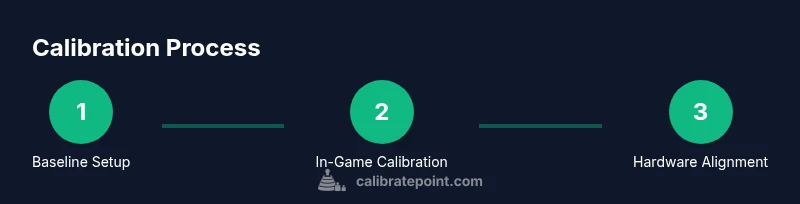
Baseline setup: environment and gear
A reliable calibration starts with a clean, consistent setup. Use a display that supports a true game mode or low-latency setting, a wired connection where possible, and a stable power source to avoid fluctuations. Keep HDMI cables short enough to minimize interference and ensure your Rock Band 4 disc or digital version is up to date. Have your preferred controller handy and a quiet space to minimize background noise if you use the mic. Document your baseline configuration (display mode, input type, and controller type) so you can reproduce the setup later.
In-game calibration workflow
Rock Band 4 includes internal calibration tools designed to align timing within the game’s own framework. Start from the main menu, navigate to settings, select calibration, and run the test sequence. Record the offset values and compare them to your previous baseline. Make small adjustments in the same direction to reduce perceived lag. If the game allows per-instrument calibration, perform separate tests for guitar, drums, and vocals as needed. After completing the in-game steps, recheck your setup against a known rhythm pattern to confirm improvements.
Tuning display and controller hardware
Display tuning can dramatically reduce perceived delay. Enable game mode, disable post-processing features like motion smoothing, and verify that the panel’s input lag is as low as possible. For controllers, ensure batteries are fresh or, for wired setups, that the USB connection is stable. If you use a microphone for singing, consider adjusting the mic latency or using a dedicated USB microphone with a known performance profile. Small changes in this area can yield noticeably smoother timing and more consistent note hits.
Measuring success: quick tests and benchmarks
Verification is essential. Use a consistent song with a steady rhythm and perform multiple runs to check repeatability. Compare hit accuracy and the rate of perfects across attempts. If notes begin to drift in one direction, make a minor adjustment and re-test. Keep a simple log of settings and results so you can track improvements over time. Remember, the goal is stable play rather than perfect millisecond alignment in every situation.
Troubleshooting common issues
If notes feel off after calibration, revisit your baseline. Re-enable game mode, re-run the in-game calibration, and ensure there are no competing devices causing interference. Check cables for wear, confirm firmware is current, and test with another controller to rule out hardware faults. In some cases, ambient lighting or screen glare can alter perceived timing, so adjust the room lighting if needed. Persistent misalignment may require alternating between instruments to determine whether the issue is instrument-specific or environment-related.
Practical setup checklist
Create a concise, repeatable checklist: 1) Confirm game mode on display. 2) Run the game’s calibration tool. 3) Test with a reference song and document offsets. 4) Adjust mic, controller, and display settings in small increments. 5) Re-test across several songs and tempo ranges. 6) Save and label your configuration for future sessions. This disciplined approach reduces the likelihood of drifting timing from one session to the next.
What’s next: long-term maintenance and updates
Calibration is not a one-off task. Regularly check for display firmware updates, Rock Band 4 patches, and controller battery health. When you upgrade gear or change room lighting, re-run the calibration flow to re-establish a reliable baseline. Keep a simple log of changes and results to track progress over time. The goal is sustainable timing consistency across sessions.
Tools & Materials
- TV/monitor with game mode(Enable 'Game' or 'Low Latency' mode to reduce processing delay)
- HDMI cable (HDMI 2.0 or higher)(Use high-speed cable for stable signal)
- Rock Band 4 disc or digital copy(Ensure latest patch installed)
- Guitar/drums controller(Fully charged or wired depending on setup)
- External microphone (optional)(Useful for voice chat calibration)
- Stable internet connection(For updates and online features)
- Notepad and pen or digital notes(Record offsets during testing)
Steps
Estimated time: 15-45 minutes
- 1
Prepare the play space
Clear nearby cables, set comfortable seating, and ensure light levels won't cause glare on the display. Gather the necessary controllers and confirm all devices are powered on. This creates a stable testing environment for accurate calibration.
Tip: Use a dedicated testing song with a steady tempo to reduce variables. - 2
Enable game mode on the display
Open the TV settings and select the game/low-latency profile. Disable picture-processing features like motion smoothing. This minimizes processing delay that can skew calibration results.
Tip: If your display doesn’t show a dedicated 'Game' mode, set to 'PC' or 'Low Latency' if available. - 3
Test basic input and wiring
Connect controllers firmly and test basic button presses in a neutral menu. Confirm there’s no lag from input devices themselves before moving to calibration tests.
Tip: Use a wired connection for the controller when possible to reduce wireless jitter. - 4
Run the in-game calibration
Launch Rock Band 4’s calibration tool and follow on-screen prompts. Record the recommended adjustments and compare against your baseline. Accept small adjustments gradually to avoid overshooting.
Tip: Calibrate instrument-by-instrument if the game allows it. - 5
Adjust mic latency and sensitivity
If you sing, calibrate mic latency and sensitivity within the game or via the driver. Test vocal timing with a steady chorus to ensure alignment with instrumental tracks.
Tip: Keep mic gain moderate to prevent clipping during loud sections. - 6
Verify with practice mode
Play a few practice tracks to validate timing. Look for consistent hits across different sections and tempos. If drift occurs, repeat calibration with smaller adjustments.
Tip: Document the final offsets for future sessions.
Questions & Answers
What is the best order to calibrate Rock Band 4?
Start with display, then console, then controllers, then mic settings. This helps address the largest delays first and provides a stable baseline for finer adjustments.
Begin with your display, then the console, and finally your controllers and mic settings, so you build a stable baseline.
Does using a different TV monitor affect calibration?
Yes. Different displays have varying input lag. Consistency across the same TV or monitor helps maintain reliable calibration results.
Different screens can change timing, so keep your setup consistent.
Can I calibrate without the in-game tool?
The in-game tool provides a standardized test. Without it you rely on subjective checks; use external references if available and carefully document changes.
You can, but the in-game tool is strongly recommended for consistency.
Is mic latency adjustable in Rock Band 4?
Rock Band 4 allows some mic latency settings. If you sing, calibrate mic latency separately and test with vocal sections.
Yes, you can adjust mic latency and test with singing.
What should I do if notes are still off after calibration?
Recheck the setup, re-run the calibration, and test across multiple songs. If issues persist, the problem may be hardware-related or room-specific.
If issues persist, revisit settings and re-test across songs.
Do I need to calibrate differently for drums and guitar?
Basic calibration covers general timing, but drums can be more sensitive to bounce and pad response. If available, perform per-instrument tests and adjust accordingly.
Drums may need instrument-specific tweaks if supported.
Watch Video
Key Takeaways
- Identify latency sources clearly
- Enable game mode and run in-game calibration
- Test with repeated patterns for consistency
- Document baseline settings for future sessions
- Verify results with practical play across songs