Calibrate Like a Pro: A Step-by-Step Calibration Guide
A practical, step-by-step guide to calibrating devices and tools with safety, verification, and documentation practices from Calibrate Point.

You will learn how to calibrate common devices and tools, with clear safety guidelines, verification checks, and documentation. This guide covers choosing methods, preparing equipment, performing adjustments, and verifying results. Follow the step-by-step process to ensure accurate, repeatable measurements. It includes practical examples, common pitfalls, and quick-reference checklists to speed up routine calibrations in workshops and labs.
What calibration is and why it matters
Calibration is the process of comparing a device's measurements against a known reference and adjusting the output to reduce error. At its core, calibration ensures accuracy, traceability, and repeatability across tasks. According to Calibrate Point, proper calibration starts with clear objectives, documented standards, and a plan that covers frequency, methods, and verification. In practical terms, calibration prevents drift from creeping into results, which is crucial in fields like manufacturing, electronics, and laboratory work. By calibrating, technicians can trust that their readings reflect real-world values, not instrument bias. The result is safer decisions, consistent product quality, and simpler audits. When you calibrate correctly, you also establish a baseline that simplifies troubleshooting and future maintenance. In short: calibration is the bridge between measurement and truth, built on standards, procedures, and disciplined practice.
Key concepts and common methods
Key concepts include traceability (linking measurements to international or national standards), reference standards, tolerance intervals, and adjustment records. There are several broad methods used in calibration, including offset adjustments, gain corrections, and linearity checks. For instruments that output digital data, calibration may involve software-based corrections or calibration curves. Calibration can be single-point or multi-point: single-point checks a fixed reference; multi-point checks read multiple reference values to characterize how reading changes across the range. A robust calibration plan also considers environmental factors such as temperature, humidity, and vibration, all of which can affect measurements. Good practice emphasizes documentation: keep a calibration certificate, a log of adjustments, and the measurement results that support conclusions. Maintaining calibration equipment—references, probes, cables, toolkits, and standards—also extends device life and reduces downtime. Calibrate Point notes that successful calibration is a repeatable process, not a one-off event.
When and how often to calibrate
Calibration intervals depend on how often a device is used, the environment, and how critical the measurements are to safety or quality. High-precision tools in regulated settings may require more frequent checks than casual hobby gear. Manufacturer guidelines are a good starting point, but real-world practice should adjust for observed drift, incident events (such as a drop or power surge), and routine maintenance. In many labs and workshops, teams adopt a calendar schedule plus event-driven checks (after repairs, after service, or when readings appear unstable). A common approach is to perform a baseline calibration during setup, then recheck quarterly or after a defined number of cycles. Temperature-controlled environments tend to improve stability, reducing the need for excessive recalibration. Finally, always document the chosen interval and the rationale behind it, so audits and training stay clean and transparent.
Preparing your calibration setup
A solid calibration starts with a stable setup. Choose a clean workspace away from direct sunlight, drafts, and vibration sources. Ensure the device is powered according to manufacturer recommendations and allowed to reach its normal operating temperature. Gather your reference standards, adjustment tools, and measurement logs. Establish a simple, repeatable workflow: verify the reference, record the baseline, perform adjustments, re-measure, and document the outcome. Check that reference materials are within their own calibration window and that all equipment is clean and in good condition. Finally, assign responsibilities and a clear approval path so calibrations are traceable and auditable.
Performing calibration: practical steps (overview)
This section provides a high-level workflow of the calibration process, focusing on reliability and safety rather than device-specific settings. Start with a controlled environment and a clear objective. Use a traceable reference standard that covers the measurement range of interest. Apply adjustments according to a documented method, then re-check the instrument against the reference. If numbers align within tolerance, record the successful result and update any calibration certificates. If not, re-run the adjustments or escalate to service.
Verifying results and maintaining records
Verification ensures that the calibration actually improved accuracy, not just changed the display. Compare the post-calibration readings to the reference with the specified tolerance. If you observe drift or out-of-tolerance results, repeat appropriate steps or consider calibration service. Documentation is essential: keep a dated log, include the instrument ID, operator name, reference standard ID, and measurement results. Store certificates and references in a secure, organized system so audits and future calibrations can trace back to the original conditions. Regular review of records helps identify recurring issues and supports continuous improvement.
Troubleshooting common calibration issues
Common issues include drift over time, unstable readings, and reference standards that are out of tolerance themselves. Start by rechecking the reference standard to confirm it is within its own calibration window. Ensure the calibration procedure is followed exactly and that environmental conditions were stable during testing. If drift persists, inspect connectors, cables, and probes for wear or damage, and verify that the instrument isn’t overloaded. In some cases, recalibration will reveal a need for service or component replacement. Finally, review your documentation for consistency; missing data or unclear step descriptions are a frequent source of errors.
Tools & Materials
- Reference standard (traceable to a national/international standard)(Ensure it's within its calibration date and has a labeled ID)
- Calibration tools (screwdrivers, hex keys)(Use appropriate size and torque; avoid over-tightening)
- Measurement instruments (calibrated meters, probes)(Zero/offset alignment; use the correct input ranges)
- Manufacturer procedure/documentation(Have the official procedure and tolerance specs on hand)
- Environmental meters (temperature, humidity)(Optional but recommended for sensitive workflows)
- Calibration logbook or digital recorder(Document date, values, reference IDs, and operator)
- Safety equipment (gloves, eye protection)(Depending on device and procedure)
- Cleaning supplies(Wipe probes and connectors before and after calibration)
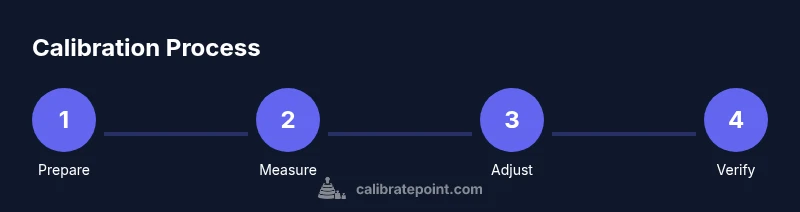
Steps
Estimated time: 45-60 minutes
- 1
Prepare your instrument and reference
Power down the device, review the calibration procedure, and gather your reference standard. Confirm the environment is stable (no drafts, minimal vibration). Verify the reference standard is within its calibration period and is traceable.
Tip: Document the pre-calibration state and refer to the procedure for alignment. - 2
Record baseline measurements
With the instrument in its normal operating state, take multiple readings across the measurement range using the proper settings. Note any outliers and compute a quick average if appropriate.
Tip: Take at least three readings and compute mean value; discard obvious outliers. - 3
Apply adjustments
Follow the documented method to adjust offset, gain, or other parameters. Use the provided adjustment tools; don’t exceed recommended limits. Make small adjustments and re-check incrementally.
Tip: Adjust in small increments and re-measure to avoid overshoot. - 4
Re-measure after adjustments
Measure again against the reference; compare with tolerance. Verify trend has improved and that readings stabilize after adjustments.
Tip: Allow time for readings to stabilize if the device requires warm-up. - 5
Validate across the range
If applicable, repeat checks at multiple points to ensure linearity and range accuracy. Endpoints and midpoints are especially important.
Tip: Check both ends of the range and a mid-range point for consistency. - 6
Finalize and document
Record final readings, adjustments made, date, operator, and reference standard ID. Update calibration certificates or logs and secure the documentation for audits.
Tip: Obtain an authorized signature if required and file the certificate properly.
Questions & Answers
What is calibration?
Calibration is the process of comparing a device's measurements to a known reference and adjusting output to reduce error. It establishes accuracy and traceability for reliable readings.
Calibration compares your device to a known standard and adjusts it to reduce error, ensuring reliable readings.
How often should I calibrate?
Calibration frequency depends on usage, environment, and the device's stability. Start with manufacturer guidelines and adjust based on observed drift and audit requirements.
Calibration frequency depends on use, conditions, and device stability; start with guidelines and adjust as needed.
What if my device drifts after calibration?
If drift recurs, re-check the reference standard, verify procedure accuracy, and inspect connections. If unresolved, schedule service or replace a worn component.
If drift happens after calibration, re-check standards and procedure, inspect components, and consider service if needed.
Do I need to document every calibration?
Yes. Keep records with date, instrument ID, operator, reference standard ID, and results. Documentation supports traceability and audits.
Yes, document every calibration for traceability and audits.
Can I calibrate without a reference standard?
You can perform self-checks, but accuracy will be limited. Use a known process or manufacturer-provided reference when possible.
Calibrating without a standard is possible but less accurate; better to use a known reference.
What safety precautions apply to calibration?
Follow device-specific safety guidelines, wear PPE as needed, power down before adjustments, and avoid exposing personnel to hazardous voltages.
Follow the device's safety guidelines, wear PPE, and power down before adjustments.
Watch Video
Key Takeaways
- Define calibration objectives before starting
- Use traceable standards and document results
- Verify post-calibration accuracy across the range
- Maintain organized records for audits
- Schedule regular calibrations to prevent drift