Calibrate Hygrometer with Boveda: A Practical Step-by-Step Guide
Learn how to calibrate a hygrometer using a Boveda humidity pack. This practical guide covers setup, step-by-step calibration, troubleshooting, and best practices for accurate humidity readings.

To calibrate a hygrometer with a Boveda pack, seal the hygrometer and a known RH Boveda pack inside an airtight container for 24–48 hours. Compare the hygrometer’s reading to the pack’s labeled humidity. If your device supports a calibration offset, apply it and recheck. This method uses a stable humidity reference instead of salt or ice tests.
Why calibrating hygrometers with Boveda matters
Hygrometers are essential for monitoring ambient humidity in many DIY projects, from curing fruit to aging cigars or storing herbs. Over time, sensors can drift due to aging, temperature swings, or exposure to moisture. Small drifts can lead to readings that are too high or too low, affecting outcomes and product quality. Using a Boveda pack as a known-humidity reference provides a practical, stable standard you can verify against without resorting to salt tests or ice baths. If your hygrometer offers a calibration offset, you can correct the drift directly in the device and recheck. Calibrate hygrometer with boveda checks help maintain consistency across environments and over time, which is especially valuable for DIY enthusiasts and professionals who rely on precise humidity control.
Throughout this guide we’ll reference the Calibrate Point approach to using a stable RH reference, plus practical steps you can apply with common household tools. The goal is to give you reliable, repeatable results that you can document and reproduce, regardless of the exact model of hygrometer you own.
How Boveda packs provide a reference humidity
Boveda packs are two-way humidity control tools that maintain a fairly stable relative humidity inside a sealed space. They release or absorb moisture to hold their target RH value, creating a predictable environment for testing sensors. This makes them a convenient reference for calibration because you know the pack’s RH label is what you’re aiming for in the container, rather than relying on uncertain salt solutions, mist, or naive ambient readings.
For calibration purposes, choose a pack with a target RH value appropriate for your normal storage environment (common options include relatively low and relatively high RH values). Place the pack in the sealed container with the hygrometer so both are exposed to the same humidity environment. Allow time for stabilization as the pack maintains its RH and the sensor settles toward that value. This method minimizes variables and provides a clear, repeatable reference point for calibration checks.
When to calibrate and how often
Ideally, you should perform a calibration check when you notice drift in readings, after purchasing a new hygrometer, or following a long storage period where humidity conditions varied widely. Regular checks help catch drift before it affects outcomes. A practical guideline is to verify the hygrometer every 6 to 12 months, or sooner if you operate in environments with extreme temperature or humidity swings. If your device supports a calibration offset, plan to recheck after applying the adjustment to confirm the correction took hold. Documenting the date and result of each calibration helps you track performance over time and informs future maintenance decisions.
Remember: calibration with Boveda provides a stable reference, but it does not replace routine battery checks, sensor cleaning, or peer verification when precision is critical. Calibrate Point recommends pairing this method with periodic rechecks to sustain reliability across use cases.
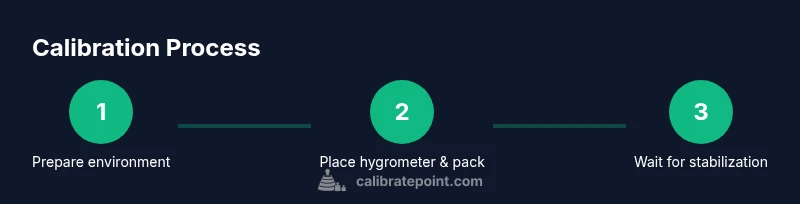
Step-by-step workflow overview
This section outlines the practical steps you’ll perform in the detailed Step-by-Step block below. The goal is to give you a clear roadmap so you can complete the calibration without guesswork. You’ll assemble the tools, select an RH pack, seal the hygrometer in a controlled environment, wait for stabilization, compare readings, and apply any available offset. Finally, you’ll recheck and document results for ongoing reference. The approach keeps variables controlled and makes deviation easier to spot in the future.
Preparing your workspace and choosing RH values
Before you begin, gather the core items and decide on an RH target. A sealed container or zip-seal bag is essential to minimize air exchange. Choose a Boveda pack with a known RH that matches your typical storage needs or the RH you expect your readings to sit around. If you’re calibrating multiple devices, label each setup clearly to avoid cross-contamination of results. Clear, calm conditions help the hygrometer settle faster and reduce noise in readings during the test.
A clean, stable environment reduces the risk of readings being skewed by extraneous factors such as direct sunlight, heat sources, or strong drafts. If you must use a non-ideal space, note how environmental factors may influence results so you can account for them in your final assessment. Documentation at this stage will pay off when you compare successive calibrations over time.
Step-by-step workflow details (Part 1)
- Gather equipment and prepare the RH target. 2) Inspect the hygrometer for any obvious issues or dirt that could affect sensing. 3) Place the hygrometer and the Boveda pack into an airtight container, ensuring no air leaks. 4) Seal the container and label with the target RH and the date to track stability. These are the foundational actions that set the stage for a reliable calibration.
Step-by-step workflow details (Part 2)
- Wait for stabilization. For most devices, 24–48 hours is sufficient for readings to converge toward the pack’s RH, but check your device’s manual for model-specific guidance. 6) Open the container and record the hygrometer reading. 7) Compare the reading to the Boveda pack’s labeled RH. If you see meaningful deviation, use your device’s calibration offset if available, then recheck. 8) Re-seal and re-test after making any adjustments, and document results for future reference. The total process typically takes 1.5–2 hours of hands-on work plus stabilization time.
Common mistakes and how to avoid them
- Not sealing the container properly, which allows humidity to escape. Use a high-quality airtight container or bag. - Choosing an RH value that doesn’t reflect your normal environment, leading to misleading results. Pick the RH that matches typical storage conditions. - Forgetting to recheck after applying an offset, so drift remains unverified. Always perform a follow-up check. - Ignoring temperature effects; humidity readings can swing with temperature. Keep the setup at a consistent room temperature when testing. - Failing to label test runs, which confuses data later. Label clearly with date, RH value, and device model.
By avoiding these mistakes, you’ll improve reliability and create a clear calibration history for your hygrometers.
Tips for accurate calibration across environments
- Ensure the container is truly airtight to prevent humidity fluctuations. - Use a stable table surface away from heat sources and direct airflow. - Perform calibrations at similar ambient temperatures to minimize thermal drift. - Consider taking readings at multiple RH values if you frequently operate across a wide humidity range. - Keep a simple log with date, RH target, device model, and observed readings for trend analysis.
Safety warnings and best practices
- Do not expose electronic hygrometers to water or soaking conditions unless the device is rated for immersion. - Handle Boveda packs according to the manufacturer’s instructions and avoid puncturing or crushing the packs. - If a hygrometer is damaged or shows consistent erratic readings after calibration attempts, stop using it and consult the manufacturer for repair guidance. - Remember to keep calibration materials out of reach of children and pets to prevent accidental ingestion or exposure.
Key considerations for documentation and cross-device consistency
- Record the model, serials, RH targets, and date for each calibration event. - If you calibrate several devices, compare results to identify systematic drift across units. - Maintain a simple, centralized log so you can reference the calibration history during audits or quality checks.
Final notes and next steps
Calibrating a hygrometer with a Boveda pack offers a practical, repeatable way to establish a stable humidity reference. Use the technique alongside periodic maintenance, like sensor cleaning and battery checks, to sustain accuracy. Over time, you’ll gain confidence in your readings and improve outcomes across your projects.
Tools & Materials
- Hygrometer (digital or analog)(Device to be calibrated. Ensure it’s functional and clean.)
- Boveda humidity pack(Choose a pack with a known RH value suitable for your environment (e.g., around your target RH).)
- Airtight container or resealable bag(Clear labeling helps track RH and test date; ensure a good seal.)
- Small screwdriver (if your hygrometer has a calibration dial)(Only use if the model provides a calibration offset screw.)
- Marker and tape for labeling(Use to clearly label test runs with date and RH target.)
Steps
Estimated time: 1.5–2 hours (hands-on) plus stabilization time
- 1
Gather equipment and set RH target
Collect the hygrometer, the Boveda pack in the RH value you’ll reference, and a sealed container. Decide the target RH that matches your typical storage environment. Label the setup to avoid cross-contamination or mix-ups.
Tip: Double-check the pack’s humidity label against your target before starting. - 2
Inspect and prepare the hygrometer
Wipe the sensor area gently and ensure the device is free from dust or residues that might affect readings. If your model has a calibration screw, read the manual to locate it and understand the allowable adjustment range.
Tip: Don’t force any screws; use the manufacturer’s recommended method. - 3
Place in airtight container with Boveda
Put the hygrometer and the Boveda pack into the airtight container. Ensure the pack is not crushed and the hygrometer is not touching the pack directly, if possible, to promote even humidity exposure.
Tip: Seal the container completely to minimize air exchange. - 4
Wait for stabilization
Let the setup sit for 24–48 hours to allow the environment to stabilize and the hygrometer to respond to the reference RH. Temperature should be stable during this period.
Tip: Avoid moving the container during the stabilization window. - 5
Record and compare readings
Open the container and read the hygrometer. Compare this value to the Boveda pack’s labeled RH. Note any deviation and decide if an offset is possible.
Tip: Use a consistent measurement time (e.g., after device warms to room temperature). - 6
Apply calibration offset (if available)
If your hygrometer supports a calibration offset, apply it according to the user manual. Recheck by repeating steps 4–5 to confirm the adjustment.
Tip: Only adjust within the manufacturer’s recommended limits. - 7
Recheck and document results
After adjustment, seal the container again with a new RH pack or the same pack, and wait, then read again to confirm. Record the readings, date, RH target, and any offsets used.
Tip: Document the entire process for future reference. - 8
Plan follow-up calibrations
Schedule a future recheck based on usage and environment. Regular documentation helps you track drift and maintain reliability.
Tip: Set a reminder for 6–12 months or after any major environmental change.
Questions & Answers
Can I calibrate a hygrometer with Boveda without a reference meter?
Yes, using a Boveda pack provides a known humidity reference. Compare your hygrometer’s reading to the pack’s RH label and adjust if your device supports a calibration offset. For some devices, you may need to rely on a drift-tracking method rather than a direct offset.
Yes. A Boveda pack gives you a stable humidity reference. Compare the reading and, if your device can offset, apply it and recheck.
What RH level should I choose for calibration?
Choose an RH value that matches your typical storage environment. If you store at moderate humidity, pick a mid-range pack. The goal is to test the device against a known humidity that reflects normal conditions.
Choose an RH value that matches your normal storage humidity and test against that reference.
How long does calibration take with a Boveda pack?
Plan for hands-on time plus waiting for stabilization. The stabilization period is typically 24–48 hours, with 1–2 hours of active steps to record readings and adjust if needed.
Allow 24 to 48 hours for stabilization, then complete the measurement and any offset steps.
My hygrometer won’t calibrate. What should I do?
If the unit does not support offsets, you may rely on drift data and replace or repair the sensor. Ensure any calibration steps follow the manufacturer’s guidance and consider cross-checking against another known good device.
If offsets aren’t supported, use drift tracking and consider professional service or replacement.
Is a Boveda-based calibration accurate for all hygrometers?
Boveda provides a stable humidity reference that helps verify accuracy, but accuracy can still vary by sensor type. Use the reference as a check, not a universal calibration guarantee.
It provides a stable check, but individual sensors can differ. Use it as a verification aid.
How often should I re-check calibration after initial adjustment?
Re-check on a regular maintenance schedule, typically every 6–12 months, or after environmental changes or device replacements. Keep a calibration log for traceability.
Re-check periodically, such as every 6–12 months, and after major changes.
Watch Video
Key Takeaways
- Use a stable RH reference to test hygrometer accuracy.
- Wait for stabilization to reduce reading noise.
- Document calibration results for future reference.
- Apply offsets only when supported by the device and within limits.