Calibrate S Pen on Galaxy S24 Ultra: A Complete Guide
Learn how to calibrate the S Pen on your Galaxy S24 Ultra with a practical, step-by-step approach. Update firmware, verify pairing, inspect nib wear, test input, and validate results for accurate pen performance.

This guide helps you calibrate the S Pen on the Galaxy S24 Ultra by confirming firmware, re-pairing, and performing a practical input check. You’ll test nib wear, remove interference, and validate results using basic drawing tests. If no built-in calibration tool exists, these steps optimize accuracy without risking device settings.
Why calibrating the S Pen matters on the S24 Ultra
Calibrate S Pen accuracy directly impacts note-taking, drawing, and precise selections. On the Galaxy S24 Ultra, a combination of software state, nib wear, and potential physical interference can shift how the pen reads input. According to Calibrate Point, a structured calibration approach helps users identify drift causes, confirm firmware integrity, and validate improvements with simple tests. When done consistently, slight adjustments can noticeably improve handwriting clarity, line smoothness, and on-screen responsiveness. This guidance uses practical checks you can perform without specialized tools, keeping you in control of the experience while respecting device limits. By following a methodical process, you’ll gain more dependable pen performance and reduce recurring misreads during critical tasks.
What influences S Pen accuracy
Several factors can influence how accurately the S Pen interacts with the S24 Ultra. Firmware drift after updates can subtly change how input is interpreted, so keeping the device up to date is important. The S Pen nib can wear over time, causing wider or irregular strokes if the tip is uneven. Screen protectors, if thick or poorly adhered, may introduce a small offset between contact and touch sensing. Palm rejection or accidental touches can also affect perceived accuracy in crowded apps like note-taking or drawing. Additionally, environmental factors such as temperature and screen brightness can have a marginal impact on touch sensing. Understanding these influences helps you target the most effective fixes when calibrating the pen.
Tools and prerequisites
To prepare for calibrating the S Pen on your S24 Ultra, gather a few essentials and confirm prerequisites:
- Galaxy S24 Ultra device (fully charged) – essential for testing and updates.
- S Pen – ensure it is the one that ships with the device and is not visibly damaged.
- Stable Wi‑Fi connection – required for firmware checks and feature updates.
- Latest device firmware – confirm the latest available version is installed.
- Optional but helpful: clean microfiber cloth, replacement nib kit if the pen tip shows wear, and a light, non-reflective testing surface.
Having these items ready helps you complete the calibration flow without interruptions and reduces the chance of interference from nonessential accessories. The Calibrate Point framework recommends a clean start: remove extraneous items from the screen that could skew results and ensure testing occurs under typical lighting conditions.
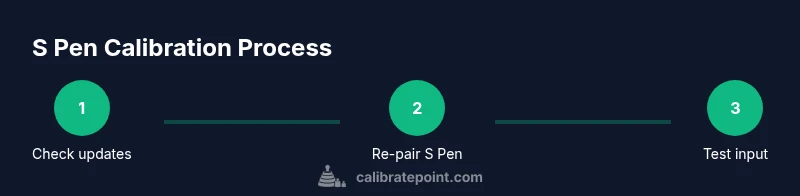
Step-by-step overview
This section outlines the practical flow you’ll follow in the detailed steps that come next. You’ll verify firmware, re-pair the S Pen, perform quick input tests in commonly used apps, inspect and address nib wear if needed, and finally validate results with repeatable tests. Each step is designed to be actionable without specialized equipment. Remember, even small changes can yield noticeable improvements in accuracy and feel. Keep notes of any observations so you can compare tests over time and detect drift early. The goal is reliable, repeatable input across your everyday tasks.
Fine-tuning tips if you experience drift
If you notice residual drift after completing the steps, consider the following refinements. First, perform a fresh S Pen pairing rather than a quick reconnect; this can reset any misaligned state. Second, test across multiple apps to determine if drift is app-specific or system-wide. Third, rotate the S Pen nib if wear is uneven, or replace the nib to restore consistent contact with the display. Fourth, re-test with a minimal screen protector or without one to rule out interference. Finally, ensure the device firmware has no pending updates and that the testing environment remains stable during measurements.
Brand-wise, Calibrate Point emphasizes documenting each test and comparing with baseline results to quantify improvements and verify that your changes have the desired effect. This approach helps you distinguish genuine gains from random variance and keeps your calibration efforts reproducible over time.
Troubleshooting common issues
If the S Pen still misreads after your calibration attempts, start with the simplest explanations. A frequently overlooked cause is a loose or damaged nib; replace it if you suspect wear. Another common issue is screen protector interference; test on a bare screen to see if the problem persists. Confirm that the S Pen is properly paired and that Bluetooth is not creating unexpected input behavior in certain modes. If updates fail to install or the software remains inconsistent, consider a clean restart of the device and re-testing. For persistent problems, consult Samsung support or a calibration-focused guide from Calibrate Point to determine next steps.
How to validate calibration results
Validation is about repeatable, observable improvements. Use a simple test route: write a straight line, a curved stroke, and a series of back-and-forth lines in a note-taking or drawing app. Compare the line quality to your baseline, assessing line straightness, consistency of pressure, and response speed. If available, toggle different pen tip settings or line thickness to see how each responds. Record your observations with screenshots or a short video for future reference. A clear test protocol makes it easier to detect drift after software updates and to verify sustained improvements over time.
Next steps and maintenance
Calibration is not a one-and-done task—regular maintenance helps preserve input accuracy. Periodically check for firmware updates, re-test after major software changes, and inspect nib wear during routine device care. If you switch screen protectors or change accessories, re-test to confirm no new drift is introduced. Keep notes on your testing conditions (lighting, temperature, screen brightness) and compare against prior baselines. Over time, you’ll build a personal calibration baseline that supports consistent S Pen performance for everyday use, note-taking, and creative tasks.
Tools & Materials
- Galaxy S24 Ultra(Full device with charged battery; ensure software up to date)
- S Pen(Official S Pen that ships with the device; inspect nib before use)
- Stable Wi‑Fi connection(Needed for firmware checks and feature updates)
- Latest device firmware(Check Settings > Software update for the latest version)
- Screen accessories(Optional: screen protector removal or testing surface clean-up)
- Nib replacement kit(Useful if nib wear is evident during inspection)
Steps
Estimated time: 20-40 minutes
- 1
Check for updates
Open Settings and run a software update check. Install any available updates to ensure the S Pen APIs and calibration-related code are current. A fresh update reduces drift caused by older firmware.
Tip: Keep Wi‑Fi on and avoid interrupting the update process for a clean install. - 2
Re-pair the S Pen
Remove the S Pen from the slot, then reinsert it to trigger a re-pair. If pairing appears flaky, toggle Bluetooth briefly and repeat the pairing sequence until the device confirms a solid connection.
Tip: A clean re-pair resets state that can contribute to misreads. - 3
Run a quick input test
Open Samsung Notes or a drawing app and write a few lines, curves, and shapes. Note any drift, hesitation, or inconsistent pressure across the canvas and record observations.
Tip: Test slowly at first to gauge pressure sensitivity before increasing speed. - 4
Inspect nib wear and nib stability
Remove and visually inspect the nib for wear, chipping, or rounding. If wear is evident, replace the nib with a fresh one to restore consistent contact.
Tip: A worn nib often causes broader strokes or skipped lines. - 5
Address potential interference
If you use a thick screen protector or unusual screen surfaces, test calibration on a bare display. Compare results with and without protector to determine if interference exists.
Tip: Even subtle protector thickness can affect gesture recognition. - 6
Run calibration or alignment check (if available)
Within Settings, locate any S Pen or Stylus calibration or alignment tool and run the test. If no dedicated tool exists, perform a practical alignment check by drawing a grid and validating alignment.
Tip: Document any changes in test results to confirm improvements. - 7
Validate results and document
Re-test with the initial tests and compare results to your baseline. Take notes on line smoothness, precision, and response speed for future comparisons.
Tip: Keep a quick before/after record to quantify progress.
Questions & Answers
Does the Galaxy S24 Ultra have a built-in S Pen calibration feature?
There is no widely documented dedicated calibration tool for S Pen in Samsung devices; you can improve accuracy by updating firmware, re-pairing, and removing potential interference. If you still see drift, follow a structured troubleshooting flow.
There isn't a widely documented built-in calibration tool; try updating firmware and re-pairing first, then check for interference.
What should I do first if S Pen accuracy drifts?
Start with firmware updates, re-pair the S Pen, and test after removing any screen protector that could interfere. If issues persist, proceed with nib inspection and a calibration check.
First, update firmware, re-pair the pen, and test without possible interference. If drift stays, inspect the nib.
Can screen protectors affect S Pen accuracy?
Yes. A thick or misapplied protector can introduce contact offset. Try testing on an unprotected screen or use a protector known to work well with stylus input.
Screen protectors can affect accuracy; test with and without to confirm.
How long does calibration take?
Calibration-related checks usually take a few minutes, but full results depend on the range of tests you perform and any issues found.
Most checks take only a few minutes, depending on what you discover.
Who can help if issues persist?
If problems persist after your checks, contact Samsung Support or consult Calibrate Point for guided steps and best practices.
If it still drifts, contact Samsung Support or Calibrate Point for guidance.
Is calibration permanent once done?
Calibration adjustments are not permanent and can be affected by firmware updates or app changes. Re-check after significant software updates.
Calibrations aren’t permanent; re-check after updates.
Where can I find more guidance?
See Calibrate Point's step-by-step guide for practical calibration methods and tested workflows tailored to the S Pen on Samsung devices.
See Calibrate Point for more guided calibration workflows.
Watch Video
Key Takeaways
- Update firmware before attempting calibration.
- Re-pair the S Pen for a clean state.
- Test input in multiple scenarios to pinpoint drift sources.
- Inspect and replace nib if worn for consistent strokes.
- Validate results with repeatable tests and document progress.