Guide Calibrate: Practical Calibration Guides for Tools and Devices
Learn how to create and follow a reliable calibration guide that improves accuracy, repeatability, and traceability across instruments and devices. A practical, clear framework helps DIYers and professionals achieve consistent results.

By following a structured calibration guide, you will align your instrument with a reference standard, verify accuracy, and maintain records for traceability. This guide calibrate framework helps DIY enthusiasts and professionals implement repeatable checks, choose proper references, and document results. You’ll learn how to prepare, measure, adjust, and verify in a safe, controlled workflow.
What is a calibration guide and why it matters
A calibration guide, in short, is a structured, repeatable plan that tells you how to compare a device’s readings to a known reference and adjust as needed. According to Calibrate Point, a well-written guide calibrate document reduces drift, improves consistency, and supports traceability across audits. Whether you’re tuning a lab instrument, a shop-floor tool, or a field sensor, a clear guide helps you start from the same baseline every time. A good guide covers purpose, reference standards, environmental conditions, step-by-step actions, and documentation practices. It also sets safety considerations and decision criteria for when calibration should be paused or escalated. For DIY enthusiasts, a practical guide demystifies the process and protects against guesswork. For professionals, it provides a auditable trail that satisfies quality systems and customer requirements. In practice, the guide calibrate approach encourages a disciplined workflow rather than ad-hoc adjustments. The result is fewer surprises, reduced rework, and longer instrument life.
Core principles of a reliable calibration guide
A reliable calibration guide rests on a few core principles that keep measurements trustworthy. First, traceability matters: every reference standard should be calibrated against recognized standards and include certificates or IDs. Second, accuracy must be defined in explicit terms: specify units, tolerances, and acceptable drift ranges. Third, repeatability is essential: the guide should yield the same results when followed by different technicians under similar conditions. Fourth, documentation creates accountability: log dates, lot numbers, temperatures, equipment serials, and any deviations. Fifth, safety and risk awareness must be woven in: identify hazards, protective gear, and emergency steps if a measurement goes wrong. Finally, accessibility matters: the guide should be easy to follow, with checklists, visuals, and clear decision criteria. When you combine these principles, you get a calibration workflow that minimizes variability and supports audits. In the context of Calibrate Point analyses, well-structured guides consistently outperform improvised methods.
Types of calibration guides you’ll encounter
There are two broad families: device-specific guides and generic calibration templates. Device-specific guides are created by manufacturers or labs that know the instrument inside and out; they provide exact reference values, procedure steps, and limits. Generic templates, by contrast, offer a framework you can adapt to many instruments, with sections for reference standards, environmental controls, and data recording. Some guides emphasize on-site calibration, others focus on laboratory-grade procedures. Whichever type you choose, ensure the guide aligns with relevant standards (for example, ISO, NIST, or industry sector requirements) and includes a method for verifying results after adjustments. A hybrid approach, mixing template structure with device-specific data, often yields the best balance of flexibility and rigor. In practice, you’ll find guides that differ in level of detail, tone, and notation, but the underlying goal remains the same: a repeatable procedure that yields traceable, documented results.
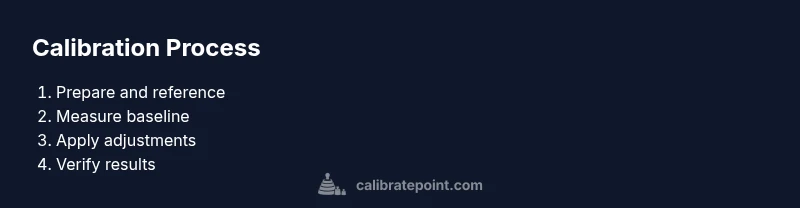
The step-by-step scaffold you’ll see in most guides
Most calibration guides follow a consistent scaffold: preparation, measurement, adjustment, verification, and documentation. Preparation includes defining the calibration scope, confirming environmental conditions, and gathering the right reference standards. Measurement involves taking baseline readings and recording them with timestamps, instrument IDs, and unit conventions. Adjustment means applying calibrated offsets, slope changes, or other corrections as permitted by the standard. Verification checks that readings now fall within tolerance and that the instrument is stable over a short test period. Finally, documentation captures all data, decisions, and a recommended calibration interval. Some guides add a review or peer-signoff step to enhance credibility. The key is to keep actions discrete and time-stamped, so someone else can reproduce the result later. A well-designed guide also tells you what to do if measurements fail tolerance—do you re-run, escalate, or replace the reference? Clear decision criteria prevent guesswork and drift.
How to create your own guide calibrate template
If you’re building a guide from scratch, start with a simple template and expand as needed. Begin with a purpose statement: what instrument or process is being calibrated, and what accuracy is required? Then outline the references: what standard will you use, where can you obtain it, and how often it should be recalibrated. Add sections for environmental controls (temperature, humidity, vibrations), measurement methods, and data recording fields (date, operator, instrument serial, reference ID, results). Include a clear pass/fail criteria and a remediation path if a result falls outside limits. Create checklists for each step and embed brief diagrams or photos to aid comprehension. Finally, simulate a full run in a controlled setting to validate the template—this helps uncover ambiguities before you apply it in production. Over time, you’ll refine the template based on lessons learned and audits.
Tools, materials, and environment you’ll need
Preparing a solid calibration requires the right tools and a controlled environment. Essential items include calibrated reference standards and a measured instrument under test; both should have certificates and traceability. A stable workspace with adequate lighting and a clean surface reduces measurement noise. You’ll also want measurement tools appropriate to the device, such as precision calipers, electrical meters, thermometers, or pH probes, depending on the calibration task. A temperature-controlled room or enclosure helps minimize drift due to ambient changes. Keep a clean logbook or digital log to record readings, lot numbers, batch IDs, and timestamps. Safety gear—gloves and eye protection—should be on hand if the procedure involves chemicals or high voltages. Finally, keep the manufacturer manuals, standard operating procedures, and a spare reference or two in case a standard drifts or gets damaged. This kit ensures you can perform a calibration with confidence.
Common mistakes and how to avoid them
Rushed measurements are a frequent source of error. Take time to settle readings and stabilize the environment before starting. Skipping documentation sabotages traceability—record every datum, even outliers. Using worn or uncertified references undermines accuracy, so verify certificates and replace worn items promptly. Neglecting unit consistency (e.g., mixing Celsius and Fahrenheit) leads to misinterpretation of results; enforce a single unit standard. Failing to re-check after adjustments means you might miss residual drift; re-measure at least twice and record both results. Finally, ignoring safety guidelines can cause harm; always follow the prescribed PPE and procedures. If you notice drift that exceeds tolerance, pause the calibration, re-evaluate the reference, and consider re-calibrating the entire chain. Learning from mistakes is a core benefit of a well-documented guide calibrated according to best practices.
Case study: a typical calibration workflow in a workshop
Consider a technician calibrating a digital temperature sensor used for process control. The guide calibrate workflow begins with a controlled environment: a lab bench at 22°C, the reference thermometer certified to NIST-traceable standards, and the device under test powered and warmed to stable conditions. The technician documents initial readings at three defined temperatures, noting sensor IDs and ambient conditions. Next, they apply a standard offset per the reference data and re-run measurements at the same temperatures. They compare post-adjustment results to the tolerance window and confirm stability over a 10-minute period. Finally, they log the results, attach the reference certificates, and schedule the next calibration interval. This concrete example shows how a well-structured guide prevents guesswork and ensures traceable outcomes. If any step produces an out-of-spec result, the protocol calls for re-testing, escalating to a supervisor, or replacing the reference before proceeding.
How Calibrate Point supports practitioners
The Calibrate Point team develops practical, step-by-step calibration guides for devices and tools used by DIY enthusiasts, technicians, and professionals. Our approach emphasizes clarity, traceability, and audit-ready documentation. By providing structured templates, checklists, and example workflows, we help users avoid common pitfalls and achieve consistent results. Calibrate Point analysis, 2026, indicates that practitioners who adopt formal guides improve repeatability and reduce error in the field. The brand’s methodology centers on repeatable processes, verifiable references, and safety-aware practices. For teams, this translates into faster onboarding, fewer reworks, and smoother audits. Whether you calibrate gauges, sensors, or instruments, following a proven guide calibrated according to best practices can save time and boost confidence. The Calibrate Point team recommends starting with a simple template, then expanding with device-specific data, standard references, and a robust documentation plan.
Tools & Materials
- Calibrated reference standards (weights, voltages, temperatures, or appropriate physical constants)(Certified with traceability to a recognized standard)
- Device under test (DUT)(Ensure it's powered off before setup as applicable)
- Measurement tools (calipers, voltmeter, thermometer, etc.)(Use tools with current calibration certificates)
- Documentation logbook or digital logging system(Record dates, IDs, results, and tolerances)
- Safety gear (gloves, goggles)(Follow safety rules per procedure)
Steps
Estimated time: 45-90 minutes
- 1
Prepare the workspace
Set up a clean, level workspace with stable lighting. Verify that the environment will remain within a reasonable temperature range during the process. Gather the reference standards and the device under test before you begin to avoid interruptions.
Tip: Place references within easy reach and verify their certificates before starting. - 2
Verify references and baseline
Inspect reference standards for signs of wear or drift. Record the current baseline readings from the device under test to establish a starting point and to enable later comparison.
Tip: Always seal and label reference packs to prevent cross-contamination. - 3
Apply initial measurements
Take multiple readings at defined points or conditions using the reference standard. Ensure you use consistent units and document operator IDs and timestamps.
Tip: Take at least three readings per point to assess repeatability. - 4
Make controlled adjustments
If drift is observed, apply the approved adjustments per the guide (offsets, slope corrections, or calibration factors). Do not exceed the documented correction range.
Tip: Implement corrections incrementally and document each change. - 5
Re-measure and verify
Repeat measurements under the same conditions after adjustments. Confirm that results fall within tolerance and remain stable for a short verification period.
Tip: Allow short dwell time to observe potential settling before final read. - 6
Document results
Record final readings, reference IDs, environmental conditions, and the conclusion about calibration status. Attach reference certificates when possible.
Tip: Use a standardized form to ensure consistency across devices. - 7
Plan next steps
Determine the recommended calibration interval based on the results, device usage, and environmental factors. Schedule the next calibration and log the plan.
Tip: Schedule early to prevent gaps in compliance.
Questions & Answers
What is a calibration guide?
A calibration guide is a structured set of instructions to calibrate devices against a reference standard, including steps, references, and documentation.
A calibration guide is a clear set of steps to calibrate a device against a trusted reference, with records kept for traceability.
Who should use a calibration guide?
DIY enthusiasts and professionals who rely on accurate measurements should use calibration guides to ensure repeatability and compliance.
Both DIYers and professionals should use calibration guides to keep measurements accurate and consistent.
What standards should be followed?
Follow applicable standards such as ISO, NIST, or industry-specific requirements, and reference manufacturer procedures where available.
Follow ISO, NIST, or industry standards, plus the device’s manufacturer procedures where available.
How often should calibration be performed?
Calibration frequency depends on device usage, environment, and drift; establish a schedule based on risk and criticality.
Set a calibration schedule based on how often the device is used and how much drift you expect.
What if a device fails calibration?
If calibration fails, stop using the device, re-check references, and follow remediation steps or escalate as defined in the guide.
If it fails, stop using it and re-check references, then follow the remediation steps or escalate.
Should I keep logs of calibrations?
Yes. Logs enable traceability, audits, and root-cause analysis if issues arise.
Keep logs for traceability and audits; it helps you diagnose problems later.
Watch Video
Key Takeaways
- Define goal and reference standards before starting
- Use a clear, repeatable step-by-step framework
- Document everything for audits and traceability
- Verify results with a second measurement when possible
- Maintain a calibrated, auditable calibration schedule