How to Calibrate the Apple Pencil: A Practical Step-by-Step Guide
Learn how to calibrate the Apple Pencil to regain precision in notes and drawing apps. This step-by-step guide covers setup, steps, tips, and troubleshooting.

You will learn how to calibrate the Apple Pencil to restore precise input on iPad. This guide covers checking compatibility, preparing your devices, performing calibration across common apps, and verifying accuracy. Expect practical steps, tips for different models (1st and 2nd generation), and troubleshooting guidance so your handwriting, drawing, and tapping respond consistently.
Why calibrate the Apple Pencil
If you’re wondering how to calibrate apple pencil, you’re addressing two common issues: input lag and misalignment between tip contact and on-screen ink. While Apple does not expose a traditional calibration routine, you can improve accuracy by ensuring the pencil is properly paired, running the latest iPadOS, and testing in multiple apps. A disciplined calibration workflow helps you maintain consistent line quality, pressure response, and tilt sensing across tasks such as note-taking, drawing, and annotation. In this guide, Calibrate Point shares practical steps to maximize reliability on supported iPad models and pencil generations. The goal is steady, predictable input, not a single magic button.
Compatibility and prerequisites
Calibration accuracy depends on using a compatible device and current software. Check that your iPad model supports the Apple Pencil and that you’re running a recent version of iPadOS. Ensure the Pencil is charged and securely attached (for magnetic connection on the newer generation). In addition, confirm you have a suitable drawing or note-taking app with pen input support. While there isn’t a formal calibration button, a clean pairing and updated software foundation set the stage for better precision.
Preparation and checks
Before attempting calibration-like steps, prepare the hardware and environment. Fully charge the Apple Pencil, update your iPadOS, and re-pair the Pencil if you notice drift or misalignment. Work on a flat, non-glossy surface with adequate lighting, and open a simple test canvas in a drawing or note app to observe how strokes align with your input. Keep the test area free of screen protectors that might interfere with touch input and ensure the Pencil tip is in good condition. These preparations help you measure improvements more clearly and avoid false positives.
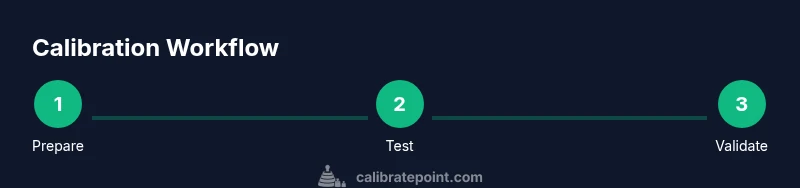
Calibration steps overview
There isn’t a single calibration button for the Apple Pencil in iPadOS. The practical approach is a small, repeatable sequence: verify pairing and software, test strokes in a neutral canvas, re-pair if drift appears, and validate the results across multiple apps. By standardizing the process, you isolate variables and determine whether perceived issues are device-related or app-related. The following step-by-step section provides concrete actions aligned with this approach.
Validation and troubleshooting
After performing the preparation and steps, validate results with controlled tests. Draw straight lines, curves, and shapes to check alignment and consistency across angles and pressure. If you still notice drift, retry pairing, restart the iPad, and test with a fresh drawing canvas. Cross-check with multiple apps to determine whether the issue is app-specific or system-wide. Persistent problems may indicate a hardware tip wear or screen issues that require further attention.
Best practices for ongoing accuracy
To maintain reliable input, recheck device compatibility after OS updates, periodically re-pair the Pencil if you notice drift, and keep the Pencil tip clean. Document any observed patterns and re-test after major app updates. Routine checks help ensure that your calibration remains consistent over time and across workflows.
Tools & Materials
- Apple Pencil (2nd generation)(Magnetically attaches to iPad; ensure pairing remains intact.)
- iPad with compatible model(Verify model supports Apple Pencil and is running a recent iPadOS.)
- Updated iPadOS(Install the latest software update for best results.)
- Drawing app with pressure/tilt support(Useful for validating accuracy across apps (notes, design apps).)
- Clean microfiber cloth(Wipe screen and pencil tip before testing.)
Steps
Estimated time: 25-40 minutes
- 1
Check compatibility and update
Verify your iPad model supports the Apple Pencil and that iPadOS is up to date. This creates a solid baseline before any calibration-related testing.
Tip: Keep the device connected to power during the update to prevent interruptions. - 2
Charge and re-pair if needed
Charge the Pencil fully and re-pair it with the iPad if you notice drift. This often resolves minor connectivity quirks that masquerade as calibration issues.
Tip: Temporarily forget the Pencil in Bluetooth settings, then reattach magnetically to trigger pairing. - 3
Open a calibration-friendly canvas
Launch a blank canvas in a drawing or note app with a neutral background. This helps you clearly observe alignment between your strokes and ink.
Tip: Use a simple straight line test at multiple angles for consistency. - 4
Perform a cross-app test
Draw the same shapes in two or three apps to see if the pencil behaves consistently across software. Apparent app-specific issues point to software configuration rather than hardware.
Tip: Take notes on any lag, offset, or misalignment you observe. - 5
Validate with tilt and pressure
Test edge cases like light strokes, heavy strokes, and tilting the Pencil to confirm pressure and tilt behave as expected in real work.
Tip: If pressure response feels inconsistent, check app-specific settings for pen dynamics. - 6
Document results and plan follow-ups
Record the outcomes of your tests and schedule periodic rechecks, especially after OS or app updates.
Tip: Create a simple log to compare before/after results over time.
Questions & Answers
Does the Apple Pencil have a built-in calibration feature?
There is no dedicated calibration menu in iPadOS for the Apple Pencil. Improvement comes from ensuring proper pairing, up-to-date software, and consistent testing across apps.
There isn’t a dedicated calibration option; focus on pairing, software updates, and app-wide testing to improve accuracy.
Why does my pencil drift after some use?
Drift can result from weak pairing, software hiccups, or a worn tip. Start by re-pairing and updating and then test across apps to isolate the cause.
Drift often comes from pairing issues or software hiccups; re-pair and update, then test in multiple apps to identify the cause.
Is calibration different for Apple Pencil 1st vs 2nd generation?
The calibration approach is largely the same: ensure compatibility, pairing, and software readiness. Differences lie in how each generation attaches or charges, affecting practical steps.
Calibration steps are similar across generations; differences are mostly in pairing and charging behavior.
How long should calibration take?
A thorough check across preparation and testing typically takes about a quarter of an hour to forty minutes, depending on device condition and app variety.
Expect about twenty-five to forty minutes for a thorough check, depending on your setup.
Will calibration affect pressure sensitivity or tilt?
Calibration mainly improves alignment and response reliability. Pressure and tilt behavior are app and hardware dependent; adjust in-app settings if available.
Calibration improves consistency; pressure and tilt are often configurable per app and may require app-specific adjustments.
What should I do if calibration doesn’t help?
If no improvement is observed after re-pairing and updates, contact device support and consider testing with a different Pencil tip or testing on another iPad to isolate hardware issues.
If there’s no improvement, try different tips and consider hardware checks or professional support to identify a faulty component.
Watch Video
Key Takeaways
- Verify compatibility and update OS before testing
- Re-pair the Pencil if drift is observed
- Test across multiple apps for consistency
- Document results and re-test after updates