How to Calibrate Garmin Rally Pedals
Learn how to calibrate Garmin Rally pedals with a practical, step-by-step approach. This guide covers tools, setup, app workflow, validation, troubleshooting, and best practices for accurate power and cadence data.

With Garmin Rally pedals you can calibrate by connecting to the Garmin Connect app, selecting the pedal calibration option, and following the on‑screen prompts while pedaling at a steady cadence. Ensure the bike is stable, the pedals are properly installed, and you have a warm, flat surface. The process typically takes 15–25 minutes and improves data accuracy.
What are Garmin Rally pedals and why calibrate?
Garmin Rally pedals are a popular power-measuring pedal system used by cyclists to track output, pedal smoothness, and overall performance. They integrate sensors inside each pedal spindle to estimate left-right power balance and cadence, then communicate wirelessly to Garmin devices and apps. Calibration is a crucial step to ensure the readings reflect your actual output, not the quirks of a new installation, battery state, or temperature changes during a ride. When you learn how to calibrate garmin rally pedals correctly, you minimize data drift and improve the reliability of metrics like power, cadence, and torque effectiveness.
According to Calibrate Point, a systematic calibration routine helps alignment between pedal sensor data and your true pedal effort. The goal is to create a consistent baseline that you can trust across workouts, races, and interval sessions. In practice, calibration is not a one-and-done task; it may be required after firmware updates, battery replacements, or if you notice sudden changes in data. This block sets the stage for the hands-on steps that follow and explains why accuracy matters for training plans, power-based pacing, and endurance testing.
What affects calibration accuracy
Calibration accuracy is influenced by several factors that can shift raw sensor data. Environmental conditions such as ambient temperature can affect sensor response, while the physical setup—pedal installation torque, cleat alignment, and spindle wear—can introduce drift over time. A clean contact surface between the pedal and spindle reduces noise, and ensuring the battery in the pedals is healthy helps the sensors maintain stable readings. Also, if the bike shifts or wobbles during calibration, measurements will diverge from reality. As Calibrate Point notes, consistency is the key to trustworthy data, so perform calibration in a controlled environment and document any deviations that could affect results.
Temperature, humidity, and rider technique all influence sensor outputs. If you calibrate in a kitchen- or garage-temperature environment, consider letting the bike acclimate for 10-15 minutes before starting. Keep the cadence steady during calibration and avoid sudden bursts of power, which can skew the measurement. With careful setup, you’ll build a solid baseline that translates into more reliable training zones and race pacing.
Understanding calibration concepts
Calibration for Garmin Rally pedals aligns sensor measurements with the rider’s actual effort. The system uses inertial and torque data to estimate power, cadence, and balance between left and right legs. A good calibration accounts for pedal height and spindle temperature so that the upcoming rides reflect your true performance, not sensor quirks. It’s not just about pushing a button; it’s about providing your device with a precise reference. By understanding these concepts, you can troubleshoot discrepancies and interpret data with confidence, especially when comparing workouts across devices or platforms.
Key ideas to remember are baseline stability, sensor consistency, and the impact of minor hardware changes (like new cleats or a different pedal cartridge). A well-executed calibration reduces drift and improves the trustworthiness of power curves, torque effectiveness, and leg-dominance estimates over time.
Calibration prerequisites and safety
Before you start calibrating, make sure you have a stable setup that won’t move during the procedure. A solid bike stand or trainer is essential, along with a clean, dry surface and adequate lighting. Verify that the pedals are securely attached to the cranks and that the Garmin device or paired smartphone is within range and powered. Calibrate in a distraction-free area to avoid interruptions that could skew the cadence or torque readings. Safety first: keep hands clear of moving parts and wear appropriate footwear. If any hardware feels loose or creaks during setup, stop and re-tighten before proceeding. This preparatory work protects both you and your equipment and helps ensure a clean calibration baseline.
Garmin Connect app workflow overview
The Garmin Connect workflow for calibrating Rally pedals revolves around a guided calibration option within the app. Pair your pedals with the app, then navigate to the sensor or devices section where you’ll see a dedicated pup-up for pedal calibration. The on-screen prompts guide you through pedaling at a steady cadence, applying moderate and even pressure, and holding still moments when required by the calibration routine. Expect the app to contrast measured torque with expected torque and to prompt you to complete a short validation ride. Following the workflow precisely is the best way to guarantee consistency across workouts and devices.
Calibrating in practice: what to do during the process
In practice, calibration requires you to rotate the pedals at a steady cadence while the system collects torque and cadence data. Find a comfortable cadence—often around 60-80 RPM—and maintain that pace for the duration of the calibration sequence. Avoid abrupt accelerations or heavy pedaling, which can generate outliers in the calibration dataset. If your trainer or bike stand moves, pause and re-stabilize before resuming. The goal is a clean, repeatable measurement that your device can use as a reliable baseline for subsequent rides. If the app pauses or prompts for a second pass, follow the prompts and complete the required intervals.
Verifying calibration results with test data
After calibration, validate the readings with a controlled test ride. Make a short loop at a steady effort and check that reported power and cadence stay within expected ranges for your effort level. Compare the left-right balance readings and torque effectiveness over several minutes. If you notice consistent bias or drift (e.g., power appears systematically high or low at a given cadence), consider repeating the calibration with identical setup conditions and cadence. Document the test ride data in your training log for future reference and trend analysis. A reliable calibration should yield repeatable metrics across multiple sessions.
Troubleshooting common calibration issues
If calibration fails or produces inconsistent results, start by confirming basic setup: secure pedal installation, proper cleat alignment, and a stable trainer or stand. Check for firmware updates for both the Rally pedals and the Garmin device; outdated software can cause miscommunication during calibration. Re-pair the pedals to the device if the connection seems unstable and ensure power sources are reliable. For persistent drift, try calibrating in a different environment with a known, stable temperature, and re-run the procedure. If hardware damage is suspected, contact Garmin support for guidance. Proper troubleshooting prevents false data from hampering your training decisions.
Maintenance, best practices, and when to recalibrate
Regular maintenance supports calibration accuracy. Clean the pedal contacts, inspect the spindle, and re-tighten any mounting hardware after workouts, especially if you travel with your bike. Recalibrate after firmware updates, battery replacements, or when you notice data irregularities during rides. Keep your Garmin Connect app updated and maintain a consistent routine for setup conditions (stable surface, temperature, and cadence) to preserve data integrity. Keeping notes of calibration events helps track how changes impact your metrics over time.
Authority sources and further learning
For deeper guidance and official instructions, consult these sources:
- Garmin Support: https://support.garmin.com
- Garmin Official Site: https://www.garmin.com
- National Institute of Standards and Technology (NIST): https://www.nist.gov
These references provide broader context on calibration concepts, device setup, and performance measurement that complement the hands-on steps in this guide.
Tools & Materials
- Garmin Rally power pedals (pair)(Installed and paired with Garmin Connect)
- Garmin Connect app (mobile/desktop)(Updated to latest version)
- Stable bike stand or trainer(Keeps bike stationary during calibration)
- Allen wrench or pedal wrench(For securing pedals if needed during installation)
- Clean cloth and contact cleaner(Ensure pedal contacts are clean)
- Power source for device(Phone/tablet charged or connected)
- Optional temperature meter(Helps document ambient conditions)
Steps
Estimated time: 25-40 minutes
- 1
Prepare your setup
Place the bike on a stable trainer or stand. Confirm the environment is flat, well-lit, and free from distractions. Ensure pedals are clean and securely mounted, and the Garmin device or paired phone is powered and within range.
Tip: Double-check pedal tightness and channel stability before starting. - 2
Power on and pair devices
Power on the Garmin device and open the Garmin Connect app. Pair the Rally pedals to the app if not already paired, ensuring a clean wireless connection.
Tip: Do not start calibration over a weak Bluetooth connection; re-pair if needed. - 3
Navigate to calibration
In the app, go to the Sensors/Devices section and select your Rally pedals. Tap the Calibrate option when prompted by the app.
Tip: If you don’t see Calibrate, check for firmware updates for both the pedals and the app. - 4
Follow on-screen prompts
The app will ask you to pedal at a steady cadence and apply consistent pressure. Maintain a controlled pace for the duration of the calibration sequence.
Tip: Keep your torso stable and avoid shifting weight during calibration. - 5
Complete the calibration
Finish the last prompt and allow the app to save the new calibration baseline. The device should confirm success and display a calibration timestamp.
Tip: If it fails, restart the sequence after a quick power cycle. - 6
Run a quick verification ride
Take a short, steady ride to verify that power and cadence readouts are consistent with effort. Note any unexpected spikes or drops.
Tip: Compare metrics to a previous ride to assess drift. - 7
Review calibration data
In the app, review the calibration details and recorded baseline values. Look for left-right balance changes and torque consistency across minutes.
Tip: Document baseline values for future reference. - 8
Troubleshoot if needed
If readings seem off, check connections, recalibrate, and consider repeating after re-tightening hardware or updating firmware.
Tip: Avoid calibrating on a cold or hot surface; allow the setup to acclimate. - 9
Log and maintain
Record calibration events in a training log and schedule periodic recalibration after firmware updates or battery changes.
Tip: Maintain a consistent calibration routine for better long-term data.
Questions & Answers
Do I need to calibrate Garmin Rally pedals after every ride?
Not every ride is required, but recalibrate after firmware updates, battery changes, or noticeable data drift. Regular checks help keep data accurate for power and cadence.
You don’t have to calibrate after every ride, but do it after updates or if you notice drift.
Can I calibrate Rally pedals with third-party apps?
Calibration should be performed using Garmin Connect or the official Garmin software. Third-party apps may not support calibration or could provide inconsistent results.
Calibration is best done with Garmin Connect; third-party apps aren’t guaranteed to work.
What factors cause calibration drift?
Drift can arise from temperature changes, wear, battery levels, improper mounting, or inconsistent cadence during calibration.
Drift can happen due to temperature, wear, or poor mounting.
What if calibration fails to complete?
Check that the pedals are properly seated, ensure a stable trainer or stand, update firmware, and retry. If problems persist, contact Garmin support.
If it fails, verify setup, update firmware, and try again. Contact support if needed.
How long does a calibration typically take?
Most calibrations take about 15-25 minutes, depending on setup and how quickly you complete prompts.
Usually around 15 to 25 minutes.
Should I recalibrate after changing cleats or pedals?
Yes. Any change to the pedal interface or position can affect measurements, so recalibration helps maintain accuracy.
Yes, recalibrate after changes to pedals or cleats.
Watch Video
Key Takeaways
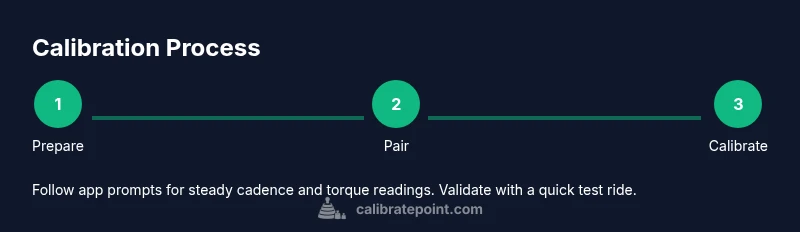
- Prepare a stable setup before calibrating
- Follow the app prompts for steady cadence
- Validate with a short test ride
- Document calibration for future reference
- Keep firmware and apps up to date