How to Calibrate a PEX Crimp Tool: A Step-by-Step Guide
Learn how to calibrate a PEX crimp tool with go/no-go gauges, tests, and best practices. This practical guide from Calibrate Point covers setup, verification, and documentation to ensure leak-free connections in 2026.

By the end of this guide you will know how to calibrate a PEX crimp tool to ensure reliable, leak-free connections. You'll learn how to identify your tool, select the right gauges, and perform a validated adjustment using go/no-go tests. Prepare a clean workspace, the correct PEX sizes, and a calibration log to document results.
Why calibrating a PEX crimp tool matters
If you’re asking how to calibrate pex crimp tool, you’ll quickly see that accuracy translates to reliable, leak-free connections. A miscalibrated tool can produce under- or over-crimped rings, compromising the seal and the overall plumbing system. This discrepancy leads to leak risk, water damage, and callbacks on the job site. Adopting a rigorous calibration routine reduces these risks and creates a repeatable process you can rely on across projects in 2026. Calibrate Point emphasizes documentation, traceability, and consistent results so technicians can defend their work in field audits and permits.
PEX crimp tool anatomy and how it affects calibration
A PEX crimp tool consists of a pair of jaws, a rotating jaw carrier, a calibrated anvil, and a tightening or adjustment screw. Jaw wear or misalignment shifts the crimp diameter, even if the setting appears correct. Understanding each component helps you diagnose calibration issues quickly. When you adjust, you’re not just changing a number—you’re aligning the tool’s mechanical path to the PEX ring, which directly impacts joint reliability on every installation.
Size compatibility, dies, and go/no-go gauges
If you're learning how to calibrate pex crimp tool, different PEX sizes require matching dies and go/no-go gauges to verify crimp quality. Ensure the tool is configured for the correct size (e.g., 3/8" or 1/2" rings) and that the gauges reflect those sizes. Keep a reference chart with nominal diameters and acceptable pass ranges. Mis-match between ring size and gauge leads to false positives or undetected weak crimps, which is precisely what calibration seeks to prevent.
Essential gauges, standards, and reference templates
Gather go/no-go gauges, calipers, and any manufacturer-provided templates for the tool model. These references establish objective pass/fail criteria and make calibration verifiable. Always use fresh gauges and store them properly to avoid wear that can skew results. A clean reference set is as important as a clean tool in achieving accurate crimps.
Workspace setup and pre-checks before calibration
Set up on a clean, well-lit workbench with anti-slip surface and adequate ventilation if you’re using any cleaning solvents. Inspect the tool for obvious wear, cracks, or misalignment. Remove any debris, clamp the tool in a stable vise or stand, and organize your gauges and rings within easy reach. Safety glasses and gloves help prevent injuries when handling metal parts.
Calibration concept: what to measure and how to decide a setting
Calibration is about matching the tool’s actual crimp diameter to the engineered spec. Use a calibrated go/no-go gauge to determine whether a test crimp passes or fails at a given setting. If the go gauge slips through or the no-go gauge binds too easily, adjust the setting following the manufacturer’s procedure and re-test. This iterative process yields a documented setting you can reproduce on site.
Verifying crimp quality after calibration
After establishing a baseline setting, conduct additional tests on multiple rings of the same size and, if possible, on the other supported sizes. Inspect each crimp for uniform diameter, proper ring alignment, and a firm bite without crushing the copper or plastic ring. Document measurements and results so you can compare future calibrations against this baseline.
Maintenance, records, and calibration cadence
Keep a calibration log that records the tool model, date, tested sizes, and the pass/fail results. Schedule follow-up checks according to manufacturer guidance and job-site usage; heavy use or impact should trigger an earlier re-check. Regular maintenance—cleaning, lubrication per the manual, and careful storage—extends tool life and preserves calibration accuracy.
Troubleshooting and common pitfalls
Common issues include jaw wear, misalignment after transport, and using outdated gauges. If results drift, re-check the jaw alignment, verify gauge calibration, and ensure you’re using the correct PEX size dies. Document all steps and avoid rushing the process, which can mask subtle misalignments.
Tools & Materials
- PEX crimp tool (model-specific)(Ensure tool supports 3/8" and 1/2" rings; check for adjustable jaw.)
- go/no-go calibration gauge(Use gauge with the targeted PEX sizes; verify pass/fail criteria.)
- calipers or digital scale(Measure crimp diameter for precision comparison.)
- calibration templates or rings(Provide reference crimps at nominal sizes.)
- calibration log book or digital record(Document date, tool, sizes tested, results, and setpoints.)
Steps
Estimated time: 60-90 minutes
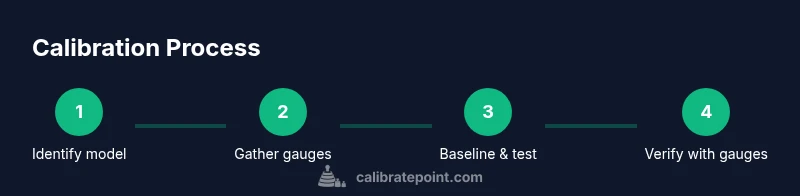
- 1
Identify model and consult manual
Locate the tool's exact model number and read the calibration section of the manual. Confirm that the tool supports the PEX sizes you’ll test and note any model-specific cautions. This step prevents applying the wrong procedure.
Tip: Record the model and revision for future reference. - 2
Gather gauges and references
Collect go/no-go gauges for the targeted PEX sizes and the corresponding calipers. Label each gauge with its size to avoid mix-ups during tests. Having organized references speeds up the calibration workflow.
Tip: Keep an extra gauge or two in the toolkit as backups. - 3
Prepare workspace and safety checks
Set up on a clean, well-lit bench and secure the tool in a stable stand. Wear safety glasses and gloves; remove any debris from jaws. A stable environment reduces measurement error.
Tip: Use a non-slip mat to prevent tool movement. - 4
Set baseline according to the manual
With the tool unsecured, align the jaws to the manufacturer’s baseline setting. Do not force the adjustment; make incremental changes and re-test after each adjustment.
Tip: Document the baseline setting before adjustments. - 5
Perform go/no-go tests on test rings
Crimp test rings at the baseline setting and test with both go and no-go gauges. Record whether each gauge passes or fails and note any binding or looseness.
Tip: Use the same pressure and crimp sequence for consistency. - 6
Adjust and re-test until within spec
If a gauge fails, adjust following the manual, then re-test. Repeat until all go/no-go gauges pass. Validate at least two cycles of testing across sizes.
Tip: Make only small adjustments and re-check after each change. - 7
Validate with a secondary size
Repeat the go/no-go tests on a second PEX size to confirm the setting generalizes. A robust calibration should hold across multiple rings.
Tip: Record cross-size results to support consistency. - 8
Document results and plan next checks
Log the final setting, test results, tool serial, date, and next calibration date. Establish a cadence based on workload and tool usage.
Tip: Set a reminder to re-check within the planned window.
Questions & Answers
What is the first step in calibrating a PEX crimp tool?
Begin by identifying the exact model and consulting the manual for calibration steps. This ensures you follow the correct procedure and avoid improper adjustments.
Start by identifying the tool and referring to the manual, so you follow the correct steps.
How often should calibrations be performed?
Calibrate as recommended by the manufacturer and after any impact, drop, or suspected wear. Regular checks maintain crimp integrity on each job.
Calibrate as recommended by the manufacturer and after any impact.
Can I calibrate without go/no-go gauges?
Go/no-go gauges provide objective pass/fail criteria. If you don’t have them, you can approximate using calipers, but results won’t be as reliable.
You can try, but go/no-go gauges give you objective results.
What signs indicate crimping failure after calibration?
Leaks, visible under-crimp or over-crimp, misaligned rings, or inconsistent diameters are indicators. Re-test with go/no-go gauges to confirm.
Look for leaks or inconsistent crimps and re-test with gauges.
Is calibration different for different PEX sizes?
Yes. Different PEX sizes require matching dies and gauges. Always verify the size before calibration and test across sizes.
Differences exist across sizes; verify size before calibration.
What should I do if calibration cannot reach spec?
If spec cannot be achieved, inspect jaw wear, alignment, and gauge accuracy. Do not use the tool until it passes all tests, and consider service from the manufacturer.
Inspect wear and gauge accuracy; don’t use until it passes tests.
Watch Video
Key Takeaways
- Follow a documented calibration routine for reliability.
- Use go/no-go gauges to validate each size.
- Record results and schedule future checks.
- Keep tools clean and stored properly.