How to Calibrate Samsung Active WaterJet Washer
Learn how to calibrate your Samsung Active WaterJet washer with a step by step method. This guide from Calibrate Point covers safety, tooling, procedures, and verification to optimize jet performance and water usage across loads.

To learn how to calibrate samsung active waterjet washer, follow this practical guide. You will enter service mode, run baseline diagnostics, adjust jet pressure and water flow sensors, and verify results with a test cycle. Gather the right tools, follow the steps, and document outcomes for reliable, repeatable performance across loads.
What calibration covers on a Samsung Active WaterJet Washer
Calibration for a Samsung Active WaterJet washer focuses on aligning the water jet intensity, pressure, and spray pattern with sensors that monitor flow, temperature, and door interlocks. Proper calibration ensures consistent cleaning performance, efficient water usage, and stable cycle times across a variety of loads. According to Calibrate Point, a well executed calibration reduces variability between cycles and helps the system maintain accuracy over time. The process also supports sensor health by validating readings from flow, temperature, and level sensors, which in turn improves fault detection and reduces false error codes. In practice, calibration involves aligning mechanical outputs with the software controlled targets using the service menu, test patterns, and measured data to confirm that the washer operates within design specifications. This section lays the groundwork for safe, effective adjustments that translate into real world gains in performance and reliability.
Safety and prerequisites
Before any calibration work begins, unplug the washer and disconnect power at the outlet to eliminate the risk of electric shock. Wear eye protection and keep the work area dry to prevent slips. Review the service manual for model specific steps, interlocks, and safety warnings. If you encounter a seal or panel that appears damaged, pause and consult a qualified technician. Prepare a clean workspace, label connectors, and have a digital thermometer and a clean cloth ready for wiping any residue. Finally, confirm that the water supply is stable and free of contaminants that could skew test results. This careful preparation reduces the chance of accidental damage and ensures a clean baseline for measurements.
Baseline diagnostics and service mode access
Accessing service mode typically requires a sequence of button presses or a service key, as described in the manual. Run the baseline diagnostics to capture sensor readings and system status. Record any error codes and compare them to the documented reference values. This step establishes the reference against which all subsequent calibration actions will be measured. If the model has a dedicated jet calibration routine, enable it and note the initial jet pattern and flow readings. Documenting the starting point is essential for validating the effect of adjustments and for future maintenance.
Jet pressure and water flow calibration details
Jet pressure calibration aligns the spray intensity and pattern with the electronics control system. Adjust the valve or pump control within the service menu until the test spray height and coverage meet the target pattern. Use a test fixture or grid to observe the spray and record any deviations. Water flow calibration ensures the flow sensor readings match actual delivered flow, preventing over or under delivery. Take readings with a clean filter and verify that the flow remains stable across multiple cycles. Small changes can have big effects on performance, so proceed incrementally and test frequently.
Sensor calibration: temperature and fill level
Temperature sensor calibration ensures sensed water temperature matches actual water temperature at the wash chamber. Use a calibrated thermometer to cross-check readings at multiple set points. Fill level sensor calibration confirms the washer correctly detects water level during fill and abort scenarios. Verify that door interlock sensors respond correctly when a cycle starts and stops. If any sensor diverges from expected values, adjust the corresponding offset in the service menu and retest. Accurate sensor readings translate into consistent wash quality and reduced energy use.
Validation: test cycles and data logging
Run a complete test cycle with a representative load to validate that jet performance, fill levels, and temperature targets align with the calibration goals. Compare results against the baseline data to confirm improvements or identify remaining deviations. Log the readings from each sensor, chart the jet patterns, and note cycle times. If the test results drift beyond acceptable ranges, revisit the relevant calibration step rather than making global changes. This disciplined validation helps ensure durable, repeatable performance.
Common mistakes and troubleshooting
Avoid skipping safety steps or rushing through service mode. Do not bypass interlocks or force hardware changes beyond documented procedures. If you see persistent error codes after calibration, revert to baseline data and re-run diagnostics. Check wiring connections for loose pins and verify that any adaptors used during testing are correct for your model. Finally, ensure that the water supply is clean and free of debris, as contaminants can skew sensor readings and affect jet performance.
Maintenance after calibration and future checks
After calibration, run a final normal cycle and inspect all outputs for consistency. Keep a log of calibration dates, sensor readings, and any deviations observed during daily use. Schedule follow-up checks at defined intervals and update the maintenance log with any service actions taken. Regular calibration checks help sustain performance and extend the life of the Active WaterJet system while supporting energy and water efficiency goals.
Tools & Materials
- Samsung service manual (digital or printed)(Contains calibration procedures and service modes.)
- Phillips screwdriver #2(For control panel access and trim screws.)
- Torx driver set(Useful for internal fasteners in some models.)
- Digital multimeter (optional)(For measuring sensor voltages if needed.)
- Calibrated test water supply or fixture(For stable test conditions and repeatable results.)
- Digital thermometer(Cross-checks water temperature during tests.)
- Cloth and brush for residue removal(Keep test areas clean to avoid measurement errors.)
- Labeling tools and cable ties(Document wiring changes and keep connectors organized.)
Steps
Estimated time: 60-120 minutes
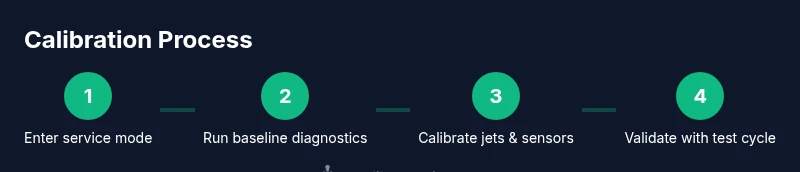
- 1
Enter service mode
Power down and unplug the unit, then access service mode using the model specific key sequence. This enables access to calibration menus and diagnostics necessary for the procedure.
Tip: Have the service manual handy and confirm the exact sequence for your model. - 2
Run baseline diagnostics
Navigate to diagnostics and record sensor readings and status flags. Note any anomalies before making adjustments.
Tip: Capture codes and values as a reference point for later comparison. - 3
Calibrate jet pressure
Use the jet calibration function to adjust spray intensity and pattern. Observe a test fixture or grid to ensure coverage matches the target profile.
Tip: Make small adjustments and test repeatedly to avoid overshooting. - 4
Calibrate water flow sensors
Check the reported flow against actual flow. Correct offsets if readings drift from expected values.
Tip: Test with the same environmental conditions for consistency. - 5
Calibrate temperature sensors
Cross-check chamber water temperature with a calibrated thermometer, and tune sensor offsets as needed.
Tip: Avoid extreme temperatures that could stress components. - 6
Validate fill level sensing
Test the system fill and drain cycles to confirm proper detection of water level and interlocks.
Tip: If misreads occur, recheck wiring and sensor alignment. - 7
Run a full validation cycle
Execute a complete wash cycle with a standard load and compare outputs with the calibration targets.
Tip: Document cycle time, jet performance, and sensor values for traceability. - 8
Exit service mode and document results
Exit service mode, save changes, and log all calibrated values and observations for future maintenance.
Tip: Create a concise calibration report to guide next checks.
Questions & Answers
What exactly gets calibrated in this process?
Calibration targets water jet pressure, flow sensor accuracy, and sensor readings for temperature and fill levels, plus interlocks. The result is consistent cleaning performance and reliable cycle times.
Calibration targets jet pressure, sensor accuracy, and safety interlocks for consistent washing.
Is calibration safe for warranty?
Warranty terms vary by model and region. If you follow the manual and use the official service path, calibration is typically permitted, but some procedures may require authorized technicians.
Warranty depends on terms; follow the manual and seek professional help if unsure.
What tools do I need to calibrate?
You will need the service manual, standard hand tools, and, if required, a digital sensor tester. Tools vary by model, so stick with model specific guidance.
Generally you need the service manual and basic tools plus any model specific meters.
How often should calibration be performed?
Perform calibration if you notice erratic cycles, reduced cleaning effectiveness, or unusual sensor readings. Routine checks during maintenance help sustain performance.
Do it when performance changes or sensors drift.
What if error codes appear during calibration?
Record the codes, consult the service manual, and follow the recommended troubleshooting steps. If codes persist, contact support for guidance.
Note the codes and follow the manual; contact support if needed.
Can I calibrate with the water supply on?
Calibrating usually requires power off for safety. Some steps may be performed with water supply on, but always prioritize safety and follow the manual.
Power off first, then calibrate as the manual directs.
Watch Video
Key Takeaways
- Follow the service manual for mode access and steps
- Calibrate jet pressure and sensor readings in small increments
- Validate results with a test cycle and log outcomes
- Document maintenance actions for future reference