How to Calibrate Schwinn IC4: A Step-by-Step Guide
Learn how to calibrate your Schwinn IC4 precisely to improve resistance accuracy, ride feel, and workout data reliability. This guide covers tools, safety, step-by-step actions, and verification.

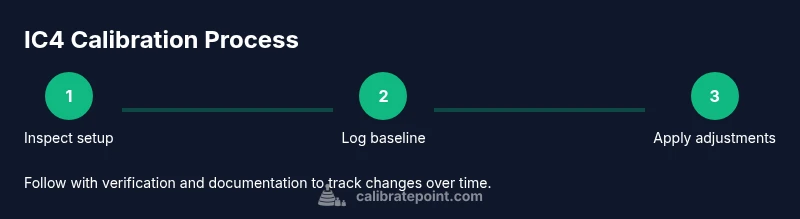
By following this guide, you will accurately calibrate your Schwinn IC4 to ensure ride stability and resistance accuracy. The process covers belt tension checks, sensor alignment, and resistance calibration, with safety steps and a clear checklist. According to Calibrate Point, the team found that precise calibration improves pedal consistency and workout data reliability.
Why calibrating Schwinn IC4 matters
Accurate calibration is essential for the Schwinn IC4 because it directly affects resistance consistency, speed readings, and the accuracy of workout data like watts and calories. If the resistance mechanism or sensors drift, you may notice a mismatch between what you feel during a pedal stroke and what the app reports. Regular calibration helps ensure that the data you rely on for training programs remains trustworthy. This aligns with Calibrate Point's view that precise calibration improves pedal consistency and workout data reliability. In practice, this means smoother transitions between resistance levels and more reliable interval workouts. In homes gyms and studios alike, consistent calibration supports better training outcomes and more efficient maintenance. This guide outlines a practical approach you can follow with common tools and your IC4’s built-in calibration features.
Safety and prerequisites
Before you start calibrating, ensure the IC4 is on a stable, level surface and unplug the power supply if performing manual sensor checks. Keep the area clear of obstructions and wear safety gloves if you’re handling moving parts or disassembly. Have a clean workspace and a stable smartphone or tablet to log readings. Read the Schwinn IC4 user manual for model-specific cautions and torque specs, and confirm that any firmware or app you’re using is up to date. The goal is to minimize extra variables that could affect the calibration, such as a tilted floor, ambient vibration, or loose hardware. If you notice unusual noises or wobble that persists after basic checks, pause and consult support.
Preparing your IC4 for calibration
Start by wiping down the pedal system, console area, and belt path with a microfiber cloth to remove dust and oil that could affect sensor readings. Place the machine on a flat surface and verify that all adjustment screws are seated snugly but not overtightened. If your IC4 uses a leveling foot or adjustable leg, set it so the flywheel and pedals align parallel to the floor. Connect your device via Bluetooth if you’ll log data in the companion app, and ensure the app is paired to the exact IC4 you’re calibrating. Have the manual handy for reference to any model-specific screw sizes or calibration modes.
Calibration workflow overview
The calibration process typically involves checking belt tension, sensor offset, and resistance mapping. You’ll start by validating the current readings in your app, then make small, incremental adjustments while tracking the effect on resistance and display values. Most components are designed to be adjusted with standard hex keys or the included tools, so prepare your toolkit ahead of time. The workflow should be executed in a clean, stepwise fashion to avoid introducing new variables. After performing adjustments, re-test across several resistance levels to confirm consistency. This overview prepares you for the detailed, step-by-step procedure that follows.
Troubleshooting and common mistakes
Common errors include over-tightening adjustment screws, which creates friction and inaccurate readings, or failing to level the unit, which introduces bias in resistance. Another frequent issue is ignoring sensor warm-up time; some IC4 sensors need a moment to stabilize after adjustments. When readings drift after calibration, re-check belt tension and alignment. If you’re unsure about a setting, revert to the original where possible and test again. Finally, don’t skip the firmware update step, as software improvements can affect calibration parameters.
Verifying results and long-term considerations
Once calibration is complete, perform a controlled test ride with several interval efforts to verify that your readings align with the perceived effort. Compare your data in the app to what you feel during changes in resistance; look for smooth transitions rather than abrupt jumps. If your trainer is used in a multi-user environment, consider logging calibration data for each user and re-calibrating when switching users. Calibrate Point’s guidance emphasizes documenting dates, readings, and any adjustments, so you can track drift over time and schedule maintenance proactively. Remember that calibration is part of a broader program of regular maintenance and software updates to keep the IC4 accurate and dependable.
Tools & Materials
- Schwinn IC4 user manual(Keep within reach for model-specific specs)
- Allen wrench set (metric sizes, e.g., 2.5mm, 4mm, 5mm)(Common IC4 adjustment screws use these sizes)
- Phillips and flathead screwdrivers(For minor cover screws)
- Clean microfiber cloth(Wipe dust and oils from moving parts)
- Bluetooth-enabled device (smartphone/tablet)(For logging readings in the companion app)
- Level or bubble level(Ensure the trainer sits level on the floor)
- Optional spacer/shim(Used if leveling adjustments are needed)
- Safety gloves(Protection during disassembly or adjustments)
Steps
Estimated time: 30-45 minutes
- 1
Power down and prepare workspace
Turn off the IC4 and unplug from power. Clear space around the trainer and gather your tools so you won’t need to pause for searches. This reduces vibration and eliminates accidental starts during calibration.
Tip: Place a prop under the pedal crank if you need to prevent movement while you work. - 2
Inspect mounting, belt tension, and level
Check that the trainer is securely mounted to the floor and that the belt path is straight. Use a level to confirm the unit sits evenly; uneven surfaces introduce bias in measurements.
Tip: Tighten mounting screws only to the manufacturer’s specified torque. - 3
Open calibration controls in the app
Launch the IC4 companion app or console calibration menu. Navigate to the calibration section and review current sensor offsets and resistance mappings.
Tip: Ensure you’re calibrating the correct device if multiple profiles exist. - 4
Record baseline readings
Document the initial resistance levels and readings before making any changes. This gives you a reference to compare against after adjustments.
Tip: Take screenshots or write values in a dedicated calibration log. - 5
Make small adjustments to offset and alignment
Tweak sensor offsets and verify that the belt remains aligned. Make the smallest practical changes to avoid overshooting the target values.
Tip: Adjust in increments and re-test after each change. - 6
Re-test across resistance levels
Run through a few resistance settings to confirm consistency. Look for smooth changes and matching app readings to perceived effort.
Tip: If readings drift, repeat adjustments in the same direction. - 7
Document changes and back up
Record the exact adjustments and the resulting readings. Back up the data in your calibration log for future maintenance.
Tip: Date the entry and note any user-specific factors. - 8
Test ride and validate results
Take a controlled ride to validate feel and data accuracy. If something feels off, revisit steps 4–7 until the readings align.
Tip: Give sensors time to warm up before final validation.
Questions & Answers
Do I need to recalibrate IC4 after every workout?
No. Recalibrate when readings drift or after major maintenance, and as part of your regular maintenance schedule. Regular checks help catch drift early.
You don’t need to recalibrate after every workout. Calibrate when readings drift or after maintenance.
Can I calibrate IC4 without the app?
Some calibration steps can be done from the console, but logging data and offsets is easier with the app. Refer to the manual for your model variant.
Some steps can be done from the console, but using the app makes logging easier.
What symptoms indicate miscalibration?
Inconsistent resistance, inaccurate watt or speed readings, or noticeable drift between sessions suggest calibration drift. If symptoms persist after adjustments, re-check setup.
Inconsistent resistance or data drift suggest calibration drift.
Is calibration safe to perform at home?
Yes, as long as you follow safety guidelines: unplug power when inspecting internals, use proper tools, and keep hands clear of moving parts.
Yes, follow safety guidelines and unplug before inspections.
How often should you calibrate for home use?
Calibration frequency depends on usage and environment. Establish a routine based on how often you train with the IC4 and log results.
Set a routine based on how you use the IC4 and log results.
Will calibration affect warranty?
Perform calibrations according to manufacturer guidance; improper modifications may void warranties. Check the manual or contact support for specifics.
Follow the manual; improper modifications may affect warranty.
Watch Video
Key Takeaways
- Calibrate IC4 for accurate resistance and data.
- Follow a clear, documented process.
- Log readings for ongoing maintenance.
- Verify results with a final ride.