How to Calibrate with Orca Slicer: A Practical Guide
Learn how to calibrate with orca slicer for accurate, repeatable prints. This step-by-step guide covers baseline setup, extrusion tuning, temperature tweaks, and verification prints.

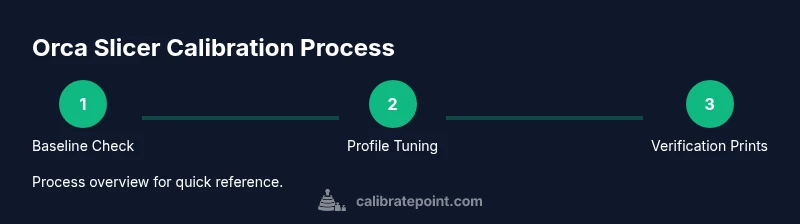
This quick answer outlines the goal: how to calibrate with orca slicer to improve dimensional accuracy, extrusion consistency, and surface finish. Start with a baseline printer setup, then tune Orca Slicer profiles, and finish with verification prints to confirm repeatable results.
How to calibrate with orca slicer: Why calibration matters
Calibration is the bridge between your physical printer and the software that drives it. If you want predictable results, you must tune the entire chain: hardware mechanics, firmware, and slicing profiles. How to calibrate with orca slicer starts with setting baseline expectations and ends with verification prints that prove your changes improved accuracy. According to Calibrate Point, calibration is a repeatable process that aligns these elements to deliver consistent results. When you calibrate, you reduce dimensional drift, improve layer consistency, and minimize defects like under-extrusion or over-extrusion. With Orca Slicer, you can create dedicated profiles for different materials, nozzle sizes, and printer configurations, making it easier to reproduce the same quality across prints. This article uses a practical, step-by-step approach that keeps things accessible for DIY enthusiasts and professionals alike, with concrete actions and checks you can perform in a session or two. Keep a calibration log and compare prints over time to catch regressions early. In 2026, following a structured workflow matters more than ever to stay consistent across projects.
Orca Slicer workflow foundations
Orca Slicer is built around profiles that map to your hardware, material, and nozzle. A solid calibration routine starts by defining a clean baseline profile that you can repeat or adapt for future materials. The Calibrate Point approach advocates separating hardware calibration (mechanics, firmware, and sensors) from slicer calibration (profiles, tolerances, and material settings). By treating these as linked but distinct layers, you avoid chasing issues in one area while ignoring root causes in another. In practice, you’ll keep a master profile for your printer and material family, then clone profiles for new experiments. This separation makes it easier to compare results before and after each change and to revert to a known good state if something goes wrong. Document changes as you go and test each tweak with a standardized process to verify impact and avoid drift over time.
Baseline setup and measurement tools
A reliable calibration starts with a solid baseline. Gather a few essential tools: calipers for dimensional checks, a calibrated filament, a small set of test models, and a computer with Orca Slicer installed. Establish a calm, stable environment—temperature and airflow can affect measurements. Create a simple test plan: print a cube, a simple tower, and an XY line calibration model to establish a starting point for dimensional accuracy and extrusion behavior. Record your baseline measurements (width, height, flatness, and layer consistency) and keep them in a dedicated calibration log. With Orca Slicer, you can compare baseline prints against revised profiles, making changes traceable and repeatable. Calibrate Point emphasizes consistency: always use the same filament batch and stay mindful of printer health (hotend cleanliness, bed adhesion, and extrusion drive).
Hardware calibration: steps/mm and axis alignment
Before tweaking slicer settings, verify mechanical accuracy. Start with axis trueness and belt tension, then check the printer’s steps-per-millimeter (E-steps) and wheel alignment. Print a known-length segment and measure it to determine if the print length matches the model’s intent. If adjustments are needed, update firmware or make hardware corrections, then re-run the baseline test. In Orca Slicer terms, ensure the machine profile reflects the true hardware, so your slicer changes are applied on top of an accurate frame. This separation helps you isolate whether a discrepancy comes from hardware or software settings.
Slicer profile tuning: nozzle size, layer height, and extrusion multiplier
With a reliable baseline, focus on Orca Slicer profile tuning. Set the nozzle diameter accurately in the machine settings, choose a sensible layer height, and establish an initial extrusion multiplier. Use your baseline prints to check wall thickness and fill density; if parts are under-extruded or over-extruded, adjust the extrusion multiplier and verify with another print. Orca Slicer makes it easy to store material-specific profiles, so you can fine-tune for PLA, PETG, or specialty filaments without starting from scratch each time. Maintain a changelog to track how each adjustment affects print quality and dimensional accuracy. This stage is where most users hit a sweet spot of repeatable results when done carefully and methodically.
Temperature and retraction calibration: finding stable conditions
Temperature and retraction settings directly influence surface finish and stringing. Start with a modest temperature window around your filament’s recommended range and compare curved surfaces, bridges, and corners for smoothness. Adjust retraction distance and speed cautiously, watching for light zits or stringing. Orca Slicer profiles let you apply these settings per material, so you can preserve a dedicated profile for each filament family. Keep notes on how different temperatures affect layer bonding and overhangs, and revise your profile accordingly. Calibrate Point reminds readers that small, incremental changes typically yield the most reliable improvements without introducing new problems.
Verification prints: validating improvements with measurements
The final phase is to print a standardized verification model and measure against expectations. Use the calibration cube and a simple X-Y ruler test to quantify dimensional accuracy and wall thickness. Compare results to your baseline and document deviations. If discrepancies persist, revisit the previous steps—sometimes a minor tweak in the extrusion multiplier or nozzle diameter setting in Orca Slicer can restore accuracy. This iterative loop—tweak, print, measure, document—creates a robust calibration that you can reproduce across different projects. For ongoing reliability, publish a short report in your calibration log and save the updated Orca Slicer profile as the new baseline.
Documentation, maintenance, and next steps
With a stable profile in hand, document every change in a centralized calibration log and export the profile for safekeeping. Schedule periodic re-calibration checks, especially when switching filament suppliers, changing nozzle sizes, or upgrading hardware firmware. Orca Slicer supports material-based profiles, so you can keep multiple calibrated configurations ready for quick swaps. The aim is to maintain a living calibration process that evolves with your printer and materials. The Calibrate Point team recommends treating calibration as an ongoing practice, not a one-off task. Regular reviews help ensure long-term print quality and repeatability.
Tools & Materials
- Calipers (digital or vernier)(Measure X/Y/Z dimensions with precision to ±0.02 mm if possible)
- Test filament (1.75 mm PLA recommended)(Use a consistent batch for baseline measurements)
- Calibration/test models (cubes, towers, XY lines)(Include models that reveal wall thickness and layer consistency)
- Orca Slicer software installed(Have the latest profile management features available)
- Bed leveling tools (spirit level, bed) or feeler gauges(Optional but helpful for initial setup)
- Calibration log (digital or notebook)(Record every change and result for traceability)
Steps
Estimated time: 2-3 hours
- 1
Prepare baseline measurements
Gather tools, select a baseline filament, and print a simple calibration model set. Measure each feature (width, height, wall thickness) with calipers, and record results in your calibration log. Ensure your environment is stable to avoid measurement drift.
Tip: Use a single, well-homed printer and a clean nozzle for consistent measurements. - 2
Create a clean Orca Slicer profile
Open Orca Slicer and create a new machine profile and a material-specific profile. Clear any old tweaks and set canonical values for nozzle size, layer height, and flow. Save the profile with a descriptive name for future reference.
Tip: Export the profile as a backup before making further changes. - 3
Calibrate printer steps/mm and axes alignment
Verify that your printer’s steps-per-millimeter are accurate and that axes are square. If needed, adjust firmware or hardware, then re-home and re-check baselines. This ensures that subsequent slicer adjustments operate on a correct mechanical reference.
Tip: After hardware tweaks, re-home and run a fresh baseline print to confirm changes. - 4
Set nozzle diameter and layer height in Orca Slicer
Input the correct nozzle diameter and a practical layer height for your first test print. Align the layer height with your material’s behavior to minimize scalloping and improve surface finish. Save the updated profile.
Tip: Begin with conservative layer heights and adjust upward if needed for speed. - 5
Calibrate extrusion multiplier via test prints
Print a simple cube and measure wall thickness. If walls are too thin or thick, adjust the extrusion multiplier in the profile and reprint. Repeat until measured dimensions align with model specs.
Tip: Make only small changes per iteration to isolate effects clearly. - 6
Tune temperature and retraction within Orca Slicer
Experiment with a narrow temperature window for your filament and adjust retraction settings to minimize stringing without sacrificing layer adhesion. Keep notes on print quality changes after each adjustment.
Tip: Document the exact temperature and retraction values used for easy rollback. - 7
Run verification prints and compare results
Print a calibrated cube and a simple boss/bridge model. Compare actual dimensions to target ones and evaluate surface finish and bead consistency. Use your calipers to quantify deviations and decide if further tweaks are needed.
Tip: If results are inconsistent, re-check hardware and revisit the extrusion profile. - 8
Document and save the final profile
Aggregate settings into a finalized Orca Slicer profile and attach notes describing the tuning path. Save the profile in a centralized location and export a backup. This ensures you can reproduce the results in future projects.
Tip: Create a short summary of changes to simplify future re-calibration.
Questions & Answers
What is Orca Slicer and why calibrate it?
Orca Slicer is a slicer software that translates 3D models into printable instructions. Calibrating it ensures the software’s decisions match the printer’s hardware, producing consistent, accurate results.
Orca Slicer translates models into printer instructions. Calibration aligns the software with the hardware for reliable results.
Do I need hardware calibration before using Orca Slicer?
Yes. Start with hardware checks like axis alignment and steps-per-mm, then tune Orca Slicer profiles to reflect the hardware reality.
Yes. Do hardware checks first, then adjust the slicer profiles to match.
How long does calibration take?
Calibration can take several iterations. The total time depends on printer condition, material, and how precise you want the results. Plan for a dedicated session rather than a rushed setup.
Calibration can take several iterations depending on printer condition and materials.
Can I calibrate using any printer with Orca Slicer?
Most desktop printers can be calibrated with Orca Slicer, but results vary with hardware quality. Follow the documented steps and adapt profiles to your machine.
Most printers can be calibrated, but results depend on the hardware. Adapt profiles to your machine.
What are common signs that calibration is off?
Dimensional drift, inconsistent wall thickness, stringing, blobs, and poor layer adhesion typically indicate calibration drift or hardware issues.
Watch for drift, uneven walls, and stringing as signs calibration needs review.
Should I re-calibrate after changing filaments?
Yes. Different filaments have different flow characteristics. Recalibrate extrusion and profile settings when you switch materials.
Yes, changing filaments usually requires recalibration.
Watch Video
Key Takeaways
- Establish a reliable baseline before changing Orca Slicer settings.
- Document every adjustment for repeatable calibration.
- Verify accuracy with targeted test prints and measurements.
- Follow a structured workflow to avoid guesswork.