How to Calibrate a Baby Scale
Learn how to calibrate a baby scale accurately with a practical, step-by-step approach. This guide covers required tools, safety, common pitfalls, and verification techniques for reliable infant weighing in 2026.

This guide shows how to calibrate a baby scale to ensure accurate infant weighing. You’ll understand why calibration matters, the exact tools required, and a safe, repeatable step-by-step workflow. After completing the process, you’ll verify readings for reliability before every use and document results for future reference.
Why calibrate a baby scale matters
Calibrating a baby scale is essential for accurate infant weight measurements, which doctors and caregivers rely on to monitor growth and health. When you know exactly how to calibrate a baby scale, you reduce the risk of misreading a baby's weight by grams, which can influence medical decisions. According to Calibrate Point, precise infant measurement starts with a properly calibrated scale and a documented calibration routine. In 2026, clinics and home-use setups alike benefit from a consistent, verifiable results by following a standardized process. This guide explains why calibration matters, how it impacts dosing, feeding plans, and growth tracking, and how to perform the calibration safely and reliably. By embracing a clear routine, you help ensure every weighing is meaningful and traceable for ongoing care.
Across professional settings and DIY environments, consistent calibration creates a trustworthy baseline. The goal is not just a single accurate reading but repeatable readings under similar conditions. If you ever question a result, recheck with the same protocol and compare to prior records. Precision in weighing supports healthier decisions for infants and reduces ambiguity for parents and clinicians alike. The Calibrate Point approach emphasizes repeatable, documented steps that fit both clinical and home contexts, making this guide valuable for technicians, nurses, and caregivers working with newborns and infants. The 2026 guidance underscores that safe, accurate measurements support early detection of growth issues and informed medical planning.
Safety and prerequisites
Before you begin how to calibrate a baby scale, ensure you have a safe, clean workspace free of clutter, vibrations, or drafts. Remove any items from the scale surface and place the scale on a stable, level table or cabinet. Check that the scale is zeroed if required by your model. If your scale uses a battery, verify power levels; a dying battery can introduce drift during calibration. Always handle calibration weights with clean hands or gloves to prevent oil or residue from affecting readings. Finally, review the manufacturer’s manual to understand model-specific calibration procedures and any safety cautions. Remember, calibration should be performed when the baby is not present and not during caregiver routines to avoid accidental movement or noise that could compromise results.
Understanding scale types and calibration principles
Baby scales come in several types, including digital flat scales, mechanical spring scales, and infant basket scales. Each type has distinct calibration methods and reference points. The core principle is simple: establish a known reference mass, place it on the scale, record the reading, and adjust the scale so the reading matches the reference. For digital scales, this may involve entering a calibration mode and applying a known weight; for mechanical scales, you may adjust a screw or dial. Throughout the process, keep the environment consistent to minimize drift due to temperature, airflow, or surface rigidity. In 2026, best practices emphasize traceability: use calibrated weights with documented tolerances and record the date, operator, and readings for audits or pediatric care notes. Consistency across sessions helps you detect drift and decide when re-calibration is needed.
Tools and materials you’ll need
To perform how to calibrate a baby scale properly, assemble a dedicated toolkit with items that meet safety and precision standards. You’ll need certified calibration weights that match the scale’s minimum and maximum ranges, ensuring the weights are clean and free of oils or residues. A flat, level testing surface is essential to avoid tilting, which can skew readings. A bubble level or digital level helps verify surface flatness. Depending on your model, you may require a screwdriver for mechanical adjustments or access to a calibration menu for digital units. A clean cloth, alcohol swabs, and lint-free towels help maintain cleanliness. Finally, keep a logbook (digital or paper) to record each calibration event, readings, and adjustments for future reference. Following a prepared checklist reduces the chance of missing steps and helps you stay compliant with pediatric weighing standards.
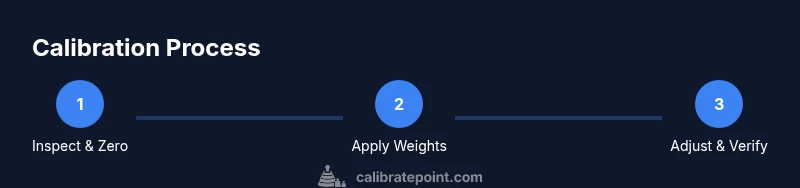
Step-by-step calibration workflow (overview)
The calibration workflow is a repeatable sequence: verify the baseline condition, apply known references, adjust the device, and confirm accuracy with additional checks. This approach works across digital and mechanical scales and aligns with general calibration standards used in labs and clinics. A careful, documented process minimizes measurement uncertainty and ensures confidence in infant weight data. In this guide, you’ll learn a practical, vendor‑agnostic method you can apply at home or in a clinic setting, with clear guardrails for safety and accuracy. Remember to log each action, including the environmental conditions, weight values, and any adjustments, so you have a complete history for audits or pediatric health records.
Step-by-step calibration workflow (detailed steps)
In practice, calibrating a baby scale involves several concrete actions. First, ensure the scale is clean, on a stable surface, and powered (if digital). Then, zero the scale to remove any tare weight. Next, apply a known calibration weight incrementally, recording the scale’s reading at each step. If readings deviate beyond acceptable tolerances, adjust the calibration parameter according to the manual and re-test. Finally, verify accuracy with a second set of known weights and document all results. This section provides a high-level overview; you’ll find a complete, itemized STEP-BY-STEP section later in this article for your exact model and environment.
Verifying accuracy after calibration
Verification is the critical bridge between calibration and everyday use. After calibration, re-check readings with multiple known weights that cover the scale’s typical infant weight range. If your unit allows, perform a repeatability check by placing the same weight multiple times and confirming readings are consistent within the specified tolerance. Compare results against previous calibration logs to detect drift. If measurements exceed tolerances, perform a re-calibration, re-testing, and update the log with date, time, operator, and ambient conditions.
Maintenance, troubleshooting, and best practices
Regular maintenance extends calibration stability. Keep the scale free from dust and moisture, check for surface wear, and replace batteries as needed to prevent drift. When troubleshooting, consider factors like weight placement, surface levelness, and whether calibration weights are within tolerance. If drift persists, consult the manufacturer’s guidance or contact an authorized service center. Adopting a routine calibration schedule—monthly in clinics or quarterly at home—helps sustain measurement reliability. Document every calibration iteration to maintain a robust historical record for pediatric care and growth tracking.
Tools & Materials
- Certified calibration weights matching scale range(Weights should be clean, radiused, and traceable with documented tolerances)
- Flat, level testing surface(Use a steady table or bench with minimal vibration)
- Bubble level or digital level(Verify surface flatness within 0.5 degrees)
- Screwdriver or calibration menu access (depends on model)(Only if your scale requires manual adjustments)
- Clean cloth and isopropyl alcohol(For removing dust and oils from weights and surface)
- Calibration logbook (digital or paper)(Record readings, date, operator, and conditions)
Steps
Estimated time: 15-30 minutes
- 1
Prepare the scale and workspace
Clear the area, wipe the scale surface, and ensure the unit is on a stable, level surface. If digital, confirm it is powered and not in sleep mode. This initial setup prevents drift caused by environmental factors.
Tip: Double-check the surface level with a bubble level before proceeding. - 2
Zero or tare the scale
If the scale has a tare function, press tare to remove any residual weight. For mechanical scales, bring the pointer to zero. A correct zero baseline is essential for accurate calibration.
Tip: Ensure no objects are touching the scale during taring. - 3
Apply first calibration weight and record
Place the smallest calibration weight on the center of the scale and record the reading. Use light, steady placement to avoid disturbance. Repeat with additional weights up to the scale’s typical range.
Tip: Record each weight and reading precisely, including unit and time. - 4
Adjust calibration parameters
If readings deviate beyond tolerance, adjust the calibration setting or screw as specified by the model manual. Re-weigh after every adjustment to confirm alignment with the known weight.
Tip: Make small adjustments and re-test to avoid overshooting the target value. - 5
Verify with a second set of weights
Test a fresh series of known weights to confirm repeatability and accuracy across the scale’s range. Look for readings that match within tolerance for all tested weights.
Tip: If any weight fails, repeat the entire process and document the issue.
Questions & Answers
What kind of calibration weights should I use for a baby scale?
Use certified calibration weights that match the scale’s range and have traceable tolerances. Dry, clean weights reduce measurement error and keep readings stable over time.
Use certified weights that match your scale's range and are clean to keep readings stable.
How often should I recalibrate a baby scale?
Recalibrate whenever you notice drifting readings, after moves or repairs, or on a scheduled basis (monthly in clinical settings, quarterly at home). Documentation helps track when recalibration is due.
Calibrate when you notice drift or on a regular schedule, and keep a log to track it.
Can digital and mechanical baby scales use the same calibration procedure?
The core principle—apply known weights and adjust to readings—remains the same, but the exact steps differ by model. Always follow the manufacturer’s instructions for your unit.
The principle is the same, but follow your model's manual for steps.
What error tolerance should I expect after calibration?
Tolerance depends on the scale and manufacturer specifications. Use the documented tolerances and verify readings across the range to ensure consistency.
Check the device's tolerance specs and verify across its range.
What could cause persistent drift after calibration?
Possible causes include surface instability, temperature changes, worn components, or worn calibration weights. Reassess setup and consider professional service if drift continues.
Drift can come from instability, temperature, or worn parts; reassess and consider service if it keeps happening.
Should I keep a calibration log?
Yes. A calibration log documents dates, readings, weights, adjustments, and conditions, enabling trend analysis and compliance with care standards.
Yes—keep a log to track history and trends.
Watch Video
Key Takeaways
- Calibrate on a stable surface with traceable weights
- Document every reading and adjustment
- Verify accuracy across multiple weights
- Schedule regular recalibration to prevent drift