How to Calibrate a Bosch Laser Level: A Step-by-Step Guide
Learn to calibrate a Bosch laser level with a practical, step-by-step method. Setup, safety, verification, and pitfalls are covered to ensure precise, repeatable leveling on the job site.

Goal: calibrate bosch laser level for precise horizontal and vertical alignment on the jobsite. Gather a Bosch laser level, a sturdy tripod, a calibration target, a spirit level, and a flat reference surface. This quick guide walks you through self-level verification, offset adjustments, and final validation to keep measurements accurate. Calibrate Point provides practical, repeatable steps for professionals.
Why calibration matters for Bosch laser level
Accurate leveling is the backbone of quality construction work. A Bosch laser level provides line projections that guide cuts, align cabinets, and level scaffolds; but even trusted tools drift over time due to temperature changes, minor shocks, or repeated use. Calibration helps reset the reference frame so that the laser lines truly reflect your intended plane. In practice, regular calibration reduces measurement errors, minimizes rework, and saves time on complex layouts. According to Calibrate Point, a disciplined calibration routine improves repeatability across different operators and sites. When you calibrate, you’re aligning not just the tool but your entire workflow: it ensures that the distance marks, cross-lines, and slope indicators stay synchronized with the physical world. This consistency matters whether you’re hanging a row of cabinets, aligning tile grids, or setting nominal elevations for a new deck. A well-calibrated Bosch laser level becomes a dependable partner, less prone to drift after bumps, temperature shifts, or long days on a dusty job site.
How Bosch laser levels self-level and why calibration is needed
Most Bosch laser levels use a pendulum-based self-leveling mechanism. When the unit is on a stable surface and within its specified tilt range, the internal pendulum aligns the laser beam to a true level. However, the reference plane can drift due to impact, temperature changes, or frequent on/off cycling. Calibration realigns the instrument’s internal zero with the physical world, ensuring horizontal and vertical lines remain consistent across distances and orientations. Regular calibration is especially important for long runs, multi-operator jobs, and installations where precision directly affects fit and finish. By establishing a known reference, you reduce cumulative error in wall layouts, cabinetry, and tile patterns, improving overall build quality.
Safety and prep before calibration
Laser devices emit bright beams that can harm eyes if viewed directly. Always wear appropriate eye protection and avoid staring into the beam. Clear the calibration area of trip hazards, cables, and dust. Ensure the surface you’ll reference is clean and flat, and verify that batteries are fresh to prevent unexpected shutdowns mid-calibration. If you’re calibrating outdoors, consider shielding from wind gusts and replacing the beam’s reflective targets if they become subdued by glare.
Understanding Bosch calibration features and tools
A thorough calibration uses several helper tools: a stable tripod, a high-contrast calibration target, a standard spirit level for cross-checks, and a flat wall or floor plane as a reference. The calibration window or setup stage on the Bosch unit helps you measure offsets in real time. Documenting the target distances and observed deviations creates a traceable record for project logs. This is where practice with the manual becomes valuable—knowing how to adjust horizontal and vertical offsets without overcorrecting speeds up the process and minimizes rework.
Common mistakes and how to avoid them
Rushing through calibration leads to missed offsets and inconsistent results. Common pitfalls include using a wobbly tripod, failing to clean the laser lens, neglecting to re-check after adjustments, and calibrating on an uneven floor. Always verify the reference plane is flat and stable, and perform a test at multiple distances. If the readings drift after a few minutes, re-check the setup for vibration, background interference, or loose mounting components.
How to validate calibration results
Calibration validation should confirm that the laser lines align with the intended references across angles and distances. Mark reference points on the wall at several distances and verify that the laser line intersects these marks consistently. Repeat the test after changing orientations (horizontal vs vertical) to ensure cross-axis accuracy. Maintain a calibration log including date, operator, results, and any adjustments made. This record helps with future audits and provides a baseline for comparison after tool maintenance.
Tools & Materials
- Bosch laser level (with self-leveling capability)(Model should support self-leveling within its specified range)
- Stable tripod(Lock legs firmly; ensure level surface)
- Calibration target(High-contrast marks or a dedicated target)
- Spirit level(For cross-checks on surfaces and mounting plates)
- Flat reference surface(Wall or floor with clean, flat plane)
- Measuring tape(At least 2 meters for distance checks)
- Marker or pencil(To mark reference points and lines)
- Batteries and charger(Fresh batteries to prevent mid-calibration power loss)
- Safety glasses(Eye protection when exposing to laser beams)
- Cleaning cloth(Optical surfaces; optional but recommended)
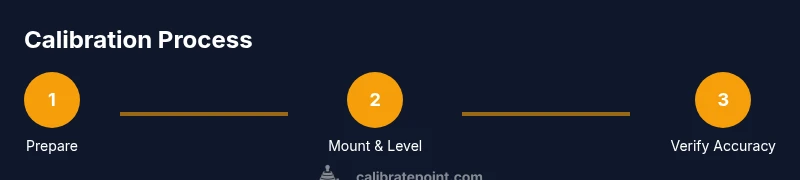
Steps
Estimated time: 30-60 minutes
- 1
Prepare workspace and equipment
Clear the calibration area, inspect the laser level and accessories, and confirm batteries are fresh. Clean the lens if needed to avoid beam distortions. This initial setup reduces embarrassment later and keeps readings consistent.
Tip: Use a clean, dust-free surface and perform calibration away from direct sunlight or sources of heat. - 2
Mount laser on tripod and ensure stability
Attach the laser level to the tripod plate and secure clamps. Extend the legs evenly and set the instrument to a comfortable height for marking references. Lock the tripod to prevent micro-movements during testing.
Tip: Place the tripod on a non-slip mat or stable floor to minimize drift. - 3
Power on and verify self-level
Turn on the device and observe the self-leveling indicator. If the unit is outside its self-level range, adjust the tilt or re-seat the mounting. Confirm the green or neutral state before proceeding.
Tip: If you hear unusual mechanical noises, stop and inspect the pendulum and mounting gear. - 4
Establish calibration plane and target position
Position the calibration target at the reference wall so the laser line can intersect it cleanly. Mark the target height and distance for later checks. Ensure the wall surface is flat and free of dust or wallpaper texture that could confuse readings.
Tip: Use a temporary aid (like a chalk line) to maintain consistent target height across measurements. - 5
Mark reference lines and verify horizontal alignment
With the laser active, mark the intersection points on the wall at predefined distances. Check that the line runs true to the marks within an acceptable tolerance. If misalignment occurs, pause to reassess mounting and plane references.
Tip: Always measure at multiple distances to catch subtle drift. - 6
Adjust horizontal offset as needed
If the horizontal line is off, use the offset adjustment screws or controls to realign with the reference marks. Recheck at 2–4 distances to confirm the correction holds. Document any persistent offset for future maintenance.
Tip: Make small iterative changes and verify after each adjustment. - 7
Adjust vertical offset and test vertical accuracy
Repeat the offset adjustment process for vertical alignment. Validate by projecting lines perpendicular to the horizontal mark and ensuring cross-axis intersections align with the target.
Tip: Vertical checks are often more sensitive—verify slowly and methodically. - 8
Finalize and document calibration results
Record the date, operator, target distances, and observed deviations. Perform a final cross-check by projecting lines in both axes and confirming consistency. If readings are within tolerance, you’re ready to use the tool with confidence.
Tip: Keep a calibration log for audits and future recalibration planning.
Questions & Answers
What is calibration for Bosch laser level?
Calibration aligns the tool's reference plane with the real world, ensuring laser lines reflect true level planes. It fixes drift from use, impact, or temperature.
Calibration aligns the laser's reference plane with the real world so its lines stay true. This helps prevent drift over time.
How often should you calibrate a Bosch laser level?
Calibrate based on usage and criticality of jobs. A typical practice is to recalibrate after a drop, major impact, or at regular project milestones such as weekly or monthly checks for continuous accuracy.
Calibrate after impacts or on a regular maintenance schedule, depending on how you use the tool.
What if the laser still reads off after calibration?
Re-check mounting stability, clean optics, verify battery power, and re-run the calibration steps. If issues persist, consult the manual or service.
If off after calibration, check setup, clean optics, and retry. Persisting issues may require service.
Can I calibrate a Bosch laser level myself or do I need a service?
Most users can perform routine calibration themselves following the manufacturer’s steps. Seek professional service if persistent anomalies or component failure are suspected.
You can usually calibrate yourself, but get service if problems persist.
Does calibration affect self-leveling sensors?
Calibration defines the reference plane and offsets; it does not replace or modify the self-leveling mechanism itself. It ensures the sensor reads against a correct baseline.
Calibration sets the reference but doesn’t alter the self-leveling hardware.
Is there a difference in calibration between rotating and line laser levels?
Yes. Rotating lasers add rotational alignment checks and may require different reference strategies. Always follow the manual for rotating models and perform aligned checks across axes.
Rotating lasers need specific alignment steps; check the manual for exact procedures.
Watch Video
Key Takeaways
- Verify self-leveling before adjusting offsets.
- Document all calibration steps and results.
- Validate at multiple distances and orientations.
- Keep calibration logs for future reference.