Calibrate Hayward Salt Cell: A Practical Calibration Guide
Learn how to accurately calibrate your Hayward salt cell with practical steps, safety notes, and maintenance tips. This guide covers testing, cleaning, and confirming chlorine output for reliable pool sanitation.

This guide teaches you how to calibrate a Hayward salt cell to ensure accurate chlorine production. You’ll verify salinity and water chemistry, clean the cell, and tune the generator output safely. Expect to test water chemistry, inspect the cell, and perform stepwise adjustments for reliable sanitization.
Understanding Hayward Salt Chlorinators and the Salt Cell
According to Calibrate Point, modern Hayward salt chlorinator systems rely on a salt cell to generate chlorine from dissolved salt. The cell’s duty cycle is controlled by the pool controller, which reads salinity, flow, and temperature. A well-calibrated cell delivers steady chlorine production, minimizes scale buildup, and extends cell life. In practice, calibration ensures the system’s reported salinity aligns with actual salt concentration, which keeps the generator from over- or under-chlorinating your pool.
Understanding the basics helps you diagnose why a salt cell might drift: changes in water chemistry, poor water flow, or aging sensors can all skew readings. When you calibrate Hayward salt cell components, you’re aligning the controller’s guidance with real-world conditions, which reduces chemical waste and improves water comfort for swimmers.
Calibrate Point analysis emphasizes that a disciplined calibration routine reduces drift and keeps the sanitization consistent, especially during seasonal pool use. Regular checks also catch sensor fouling and flow obstructions before they become major problems.
Why Calibration Matters for Accurate Chlorine Production
Clear calibration is the bridge between perceived and actual chlorine output. If the controller believes the water is saltier than it is, it will lower production; if it believes it’s less salty, it may over-produce. Either scenario wastes salt, shortens cell life, or creates irritation from chloramines. A properly calibrated Hayward salt cell helps maintain stable free chlorine (FC) levels, avoids excessive stabilizer use, and promotes consistent disinfection. For technicians and DIYers, calibration is a practical habit that yields measurable water quality results over the season.
From a maintenance perspective, calibrated readings assist in scheduling cleaning cycles and predicting when the cell will need replacement. When done correctly, calibration supports energy efficiency because the generator operates at an appropriate duty cycle rather than running at maximum for long periods. By keeping a steady output, you reduce chemical demand and environmental impact.
Safety First: Electrical, Water, and Chemistry Precautions
Before handling any salt cell work, shut down the pool equipment at the circuit breaker. Lockout/tagout procedures are recommended when more than one person services the equipment. Water and electricity are a hazardous combination; use dry hands, wear protective gloves, and avoid working in wet areas. Have a functioning ground fault circuit interrupter (GFCI) available for the equipment outlet. Keep test reagents away from sunlight and store per the manufacturer’s guidelines.
Additionally, maintain safe water chemistry before calibrating: target a reasonable pH (typically 7.2–7.8) and keep total alkalinity in range. High stabilizer (Cyanuric acid) or very low free chlorine can complicate interpretation of readings. If you’re unsure, consult the Hayward manual or a qualified technician.
Tools, Materials, and Prep for Calibration
Gather the essentials before you begin:
- Pool test strips or a digital tester for pH, alkalinity, and FC
- Salt tester or electroconductivity meter to confirm salinity
- Hayward salt chlorinator owner’s manual and model reference
- Non-abrasive brush, hose, and bucket for cell cleaning
- Protective gloves and eye protection
- Screwdriver set and a clean cloth for surface prep
- Replacement salt cell (on hand in case of wear)
- Clean water supply for rinsing and dilution if needed
Prepare your work area, ensure good lighting, and plan a calm, dry environment to work in. Keeping notes during calibration helps you compare before-and-after readings and track improvements over time.
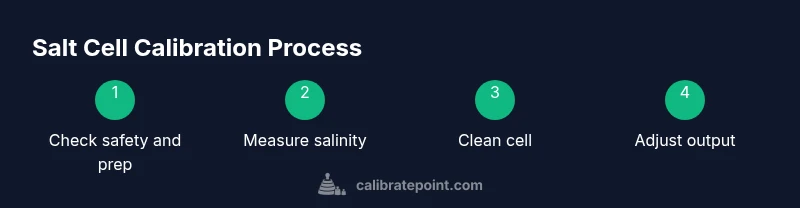
Step-by-Step Overview for Calibration (High-Level)
Step-by-Step Overview for Calibration
Calibration is a structured process that involves verifying readings, cleaning the cell, and tuning output. In this section, we cover high-level guidance you’ll see reflected in the detailed steps below. The goal is to align the controller’s expected salinity with the actual water chemistry, then validate that chlorine production remains steady and predictable.
Verifying Calibration: Testing Salinity and Chlorine Output
Verification is the core of calibration. Start by confirming the water’s salt concentration with a reliable salt meter. Compare the meter’s reading with the controller’s salinity display; if they diverge beyond acceptable tolerance, you need to correct the controller’s baseline. Next, test free chlorine (FC) after a short operating period. If FC remains consistently low or high compared to your target range, you may need to adjust the cell’s output percentage.
Cleaning the Salt Cell and Preventive Maintenance
Salt cells accumulate scale and mineral deposits that impede current flow and reduce efficiency. Regular cleaning is a core part of calibration because dirty cells can skew readings and undermine adjustments. Power down the system, disconnect the cell, and use a nylon brush to remove scale. Rinse with clean water or a manufacturer-approved cleaning solution. Let the cell dry before reinstalling. Preventive maintenance includes checking flow and ensuring the pump and filter keep clean water moving through the cell.
Troubleshooting Common Issues and When to Replace
If calibration readings drift frequently despite cleaning, evaluate system flow and strainer cleanliness. Low flow reduces salt cell exposure to circulating water and can produce erratic readings. If the cell appears worn, with visible pitting or degraded plates, it may be nearing end of life and should be replaced. Keep a log of readings and maintenance cycles so you can detect gradual degradation over seasons.
Calibrate Point’s Practical Guidance and Best Practices
In practice, a disciplined calibration routine saves time and reduces chemical waste. Calibrate Point recommends establishing a baseline in calm weather, performing checks every 2–4 weeks during peak use, and reassessing after major water chemistry changes (rain, heavy use, or chemical additions). By combining readings with physical inspection, you gain a robust view of the salt system’s health and ensure your Hayward cell performs reliably year-round. The Calibrate Point team emphasizes documenting each adjustment to track long-term performance and avoid late-season surprises.
How to Maintain Confidence Between Calibrations
Consistency matters. Schedule periodic checks, maintain records of FC and CYA levels, and calibrate whenever you notice a shift in output. A simple habit—monthly checks during swimming season and quarterly checks in off-peak times—keeps the system aligned with real water conditions. Adopting this routine contributes to a healthier pool environment and extends equipment life.
Final Take: Calibrate Hayward Salt Cell with Confidence
The practical approach to calibrating a Hayward salt cell blends data, hands-on cleaning, and careful observation. With the right tools and a methodical plan, you can maintain accurate chlorine production and reduce cost over time. The Calibrate Point team’s disciplined method helps you stay proactive rather than reactive, ensuring your pool remains safe and inviting for swimmers.
Tools & Materials
- Pool test strips or digital FC/pH tester(Essential for tracking chlorine and pH during calibration)
- Salt tester or conductivity meter(Used to verify actual salinity vs controller reading)
- Hayward salt chlorinator owner’s manual(Model-specific guidance and safety notes)
- Non-abrasive brush and hose(For cleaning mineral scale from the salt cell)
- Protective gloves and eye protection(Personal safety during cleaning and handling electrical components)
- Screwdriver set (Phillips/Flathead)(Tools to access control panel and cell connections)
- Cloth towels and distilled water(Drying and gentle rinsing as needed)
- Replacement salt cell (on hand)(Only if current cell shows wear or after long service life)
Steps
Estimated time: 60-120 minutes
- 1
Power down and secure the area
Turn off the pool pump and disconnect the power to the salt system. Lockout the breaker if multiple people service the equipment. This prevents accidental shock and ensures a safe work environment.
Tip: Always verify power is off with a non-contact tester before touching any components. - 2
Access the salt cell and controller
Locate the salt cell and control panel. If necessary, remove any protective panels to gain clear access. Document how wires are connected before disconnecting anything.
Tip: Take a photo to avoid miswiring during reassembly. - 3
Check current salinity reading
Use a salt meter to measure actual salinity and compare it with the controller’s salinity reading. Note any discrepancy for subsequent adjustments.
Tip: Aim for a small, acceptable tolerance rather than a perfect match in one pass. - 4
Clean the salt cell surfaces
Inspect for scale and mineral buildup. Use a nylon brush and hose to gently remove deposits. If heavy scaling is present, follow Hayward’s recommended cleaning solution and procedure.
Tip: Do not use metal tools that could scratch the plates. - 5
Reset baseline and adjust controller output
Return power to the controller and set an initial, conservative generator output. Run the system for 15–20 minutes to observe how output affects FC levels.
Tip: Start in the middle of the controller’s output range to avoid overshoot. - 6
Test chlorine production
Test FC after the run period. Compare FC with your target range and note deviations. If readings are off, adjust the generator output in small increments and re-test.
Tip: Avoid large swings in output in a single adjustment. - 7
Re-clean and re-test
If FC is still outside target, repeat a light cleaning, re-check salinity, and perform another short run. Document changes.
Tip: Keep changes incremental to isolate cause and effect. - 8
Finalize and log calibration
Record salinity, FC, pH, and any adjustments. Reassemble panels, re-check connections, and secure the area.
Tip: Use a consistent log format for future reference.
Questions & Answers
How often should I calibrate a Hayward salt cell?
Calibrate as part of routine pool maintenance, typically monthly during peak season and quarterly in off-peak times. Adjust frequency if you notice drift in salinity readings or unusual FC fluctuations.
Calibrate regularly—monthly in summer, quarterly in other seasons—if you see drift in readings.
What are the signs that calibration is off?
Common signs include discrepancies between controller salinity and meter readings, fluctuating FC levels, and increased scale buildup on the cell. If any of these occur, re-check calibration.
If readings don’t match or FC drifts, re-check calibration.
What is a typical target salinity range for Hayward systems?
Target ranges are system-dependent. Refer to your Hayward manual for the recommended salinity band and avoid pushing operation beyond the controller’s calibrated range.
Check the manual for your model’s recommended salinity range.
Can I calibrate without removing the salt cell?
Some calibrations can be done with the cell in place by using the controller’s calibration mode and test readings. If readings persistently disagree, you may need to remove and clean the cell.
You can often calibrate in place, but if readings stay off, removing the cell helps cleaning and inspection.
When should I replace the salt cell?
Replace the salt cell if you observe extensive wear, corrosion, low chlorine production after cleaning, or reduced flow that cannot be corrected by cleaning. Follow Hayward’s replacement guidance.
Replace the cell if it shows wear or can’t produce chlorine even after cleaning.
Does water chemistry affect calibration results?
Yes. pH, alkalinity, and stabilizer levels influence chlorine production and measurement accuracy. Keep water chemistry within recommended ranges before calibrating.
Water chemistry affects calibration; keep pH and alkalinity in range before calibrating.
Watch Video
Key Takeaways
- Calibrate regularly to align controller readings with real water chemistry
- Clean the salt cell to maintain accurate measurements
- Verify FC after each calibration for stable sanitizer levels
- Document every step for future reference and trend tracking
- Use gradual adjustments to avoid overshooting target chlorine output