How to Calibrate a Smart Tool Level
Learn a reliable, step-by-step method to calibrate a smart tool level for accurate layouts, with safety tips, required tools, and troubleshooting guidance from Calibrate Point.

To calibrate a smart tool level, power on the device, connect to its companion app, and run the baseline reference check on a known flat surface. Then test tilt on X and Y axes, apply the recommended offsets, and verify readings against the reference again. Document results and save the calibration profile for future checks.
Why calibrate a smart tool level
A smart tool level integrates traditional leveling with digital sensors and software, providing instant tilt readings and, in many models, automatic offsets. For professional work, accuracy is non-negotiable: even tiny tilts can compound into misaligned installations, gaps, or off-square components. A robust calibration routine helps ensure that every reading the tool provides reflects the true geometry of your workspace. The Calibrate Point approach treats calibration as a repeatable process, not a one-off test. By establishing a baseline, validating against a stable reference, and locking in offsets, you create a reliable workflow you can repeat with different tools and locations. In practice, this means setting up a clean, stable reference surface, following a documented sequence, and recording results so you or your team can audit performance later. When you build this habit, you reduce rework, increase productivity, and improve the quality of your final installations.
How smart levels differ from traditional levels
Traditional levels rely on bubble indicators and rely on human interpretation for tilt. Smart levels combine accelerometers, gyroscopes, magnetic sensors, and sometimes laser components to measure tilt in two or more axes. They often connect to an app that stores calibration data, logs readings, and guides you through offset corrections. This combination changes calibration from a single check into a managed process: you calibrate, verify, and document. Because the system can drift with temperature, vibration, or usage, periodic verification with a known reference is essential. The main benefit is consistency: the device can automatically compensate for small biases, but only if you load a current calibration profile that matches your current environment and tasks.
Safety and environment considerations
Calibrating a smart tool level is generally safe, but there are still best practices to follow. Work on a flat, stable surface to prevent the instrument from tipping or sliding. If the tool uses sensors sensitive to magnetic fields, keep magnets away during setup. Make sure the battery is charged and avoid calibration near sources of heat or airflow that could alter readings. If you must work outdoors, shield the reference surface from sun and wind, and wait for surface conditions to stabilize before testing. Finally, consult the manufacturer guidance for device-specific warnings and always wear eye protection if you're working around heavy fixtures or power tools.
Planning your calibration setup
Before you begin, sketch a simple plan and assemble your materials. Choose a reference plane that you trust, such as a granite plate or a certified flat steel plate, and ensure it is clean and free of debris. Position the smart tool level so that its reference edge rests on the surface, then decide which axes to test first. Decide how you will capture readings (in-app screenshots, exported data, or manual notes) and where you will store the calibration profile. Consistency is key: use the same orientation, same seating, and the same test sequence for every calibration session. This reduces variability and makes future comparisons meaningful.
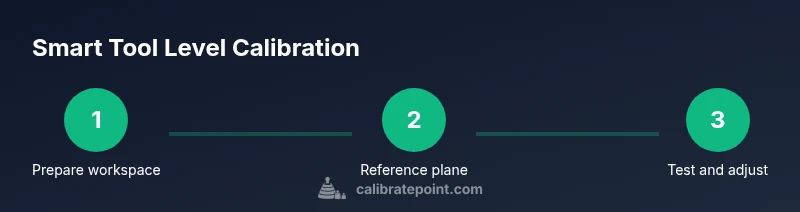
Step-by-step calibration workflow overview
Below is a high-level view of the workflow. Start with preparation and app pairing (if available), then perform a baseline read on a true reference plane. Next, test tilts on the X and Y axes to identify drift. Apply the recommended offsets in the app or via the device hardware, and re-check against the reference. Finally, document results and store the profile for future use. Use a log or digital record to capture ambient conditions and any notes about tool behavior. The next time you calibrate, you can repeat the same sequence to confirm consistency.
Troubleshooting and maintenance
Drift after calibration can indicate an unstable reference, sensor bias, or a firmware issue. Re-check the reference plane for flatness and re-tighten any adjustable components. Ensure the device remains on a stable surface during tests. If readings remain inconsistent, reset the calibration on the device and re-run the procedure from the beginning. Keep firmware up to date and review calibration logs regularly to catch wear or drift early. When in doubt, contact the manufacturer's support or consult calibration-procedures resources from credible sources.
Authority sources and standards
For calibration standards and best practices, consult reputable sources:
- https://www.nist.gov
- https://www.osha.gov
- https://ocw.mit.edu
These references provide foundational guidance on measurement accuracy, safety, and calibration procedures that support the methods described in this guide.
Tools & Materials
- Smart tool level with companion app(Ensure battery is charged and firmware is up to date before starting.)
- Flat, known reference surface (granite plate or certified flat steel plate)(Surface must be clean and free of debris.)
- Clean lint-free cloth(Used to wipe dust and fingerprints from reference surfaces.)
- Caliper or precision ruler(For confirming reference plane flatness and sample measurements.)
- Smartphone/tablet with Bluetooth or wired connection(Required to pair with the tool and save calibration profiles.)
- Small screwdriver or tool for any mechanical offsets(Only if your model has adjustable hardware offsets.)
- Ambient temperature indicator (optional)(Useful for logging environmental conditions that affect readings.)
Steps
Estimated time: 60-120 minutes
- 1
Prepare workspace and gather tools
Clear a flat, stable workbench. Wipe down the reference surface and ensure your calibration area is free from vibration or drafts. Have the smart tool level and the paired app ready. This step sets the foundation for accurate measurements.
Tip: Keep the reference surface identical across sessions to minimize variability. - 2
Power on and connect to the app
Turn on the device and launch the companion app. Pair the tool via Bluetooth or cable, then verify the device is recognized and that you can save a new calibration profile. If firmware updates are available, install them before starting.
Tip: Check for updates to access the latest calibration features. - 3
Establish a baseline on a true reference plane
Place the tool on the flat reference surface and record the baseline reading. Confirm the baseline is close to known zero or the reference value, depending on your model’s convention. This establishes what a 'correct' reading looks like.
Tip: If the baseline is off, re-check surface flatness and re-seat the tool. - 4
Test tilt along the X axis
Tilt the tool along the X axis to capture any drift in that direction. Record the reading and compare with the reference. Repeat once or twice to ensure consistency.
Tip: Rotate the tool to rule out a fixed sensor bias. - 5
Test tilt along the Y axis
Repeat the tilt test for the Y axis. Note any discrepancy from the reference and collect multiple samples for reliability. This helps identify axis-specific drift.
Tip: Document the average of multiple reads to reduce random error. - 6
Apply offsets in the app or hardware
Enter the recommended offsets in the app or adjust the hardware as needed. Save the new calibration profile and ensure it is linked to the tool for future sessions.
Tip: Apply offsets one axis at a time to avoid confusion. - 7
Re-check against the reference surface
With offsets applied, re-measure on the baseline plane. Verify readings align with the reference within the expected tolerance. If not, repeat the adjustment step.
Tip: If readings still drift, revisit the reference plane quality. - 8
Document results and store the calibration
Export or log the calibration data, including ambient conditions and the tool’s serial references. Store the profile in a safe, retrievable location for audits.
Tip: Create a recurring reminder to review calibration data periodically. - 9
Validate with additional orientations
Place the tool in a few additional orientations to confirm the offsets hold across different angles. This step ensures robustness of your calibration.
Tip: More orientation tests improve confidence in real-work scenarios.
Questions & Answers
What is a smart tool level?
A smart tool level combines sensors and software to measure tilt and apply offsets automatically, improving accuracy for precision tasks.
A smart level uses sensors and an app to measure tilt and adjust readings automatically for better accuracy.
How often should I calibrate a smart tool level?
Calibrate whenever accuracy matters for your work or when you notice drift, and follow the manufacturer’s recommended schedule.
Calibrate whenever you need high precision or you notice drift, following the device's guidance.
Can I calibrate without an app?
Some models offer manual calibration steps, but many rely on the companion app for offsets and logging. Check your model’s manual.
Some models let you calibrate manually, but many require the app for offsets and records.
What if readings still drift after calibration?
Re-check the reference surface for flatness, verify environmental stability, and re-run the calibration from the start. Consider firmware updates.
If drift remains, re-check the reference, ensure stability, and repeat the process from the beginning.
Does calibration differ for wooden vs metal references?
Yes. Wood can deform with humidity and heat, while metal references are generally more stable; choose appropriate reference for the task.
Wood references can warp; metal references are usually more stable—choose accordingly.
What should I document after calibration?
Record date, ambient conditions, reference surface, offsets used, and the final verified readings.
Note the date, environment, reference, offsets, and verified results for future comparison.
Watch Video
Key Takeaways
- Record calibration results for audits.
- Test multiple orientations to catch drift.
- Use a true reference plane for accuracy.
- Store calibration profiles with timestamps.
- Document ambient conditions during tests.