How to Calibrate a Johnson Smart Level
Learn how to calibrate a Johnson Smart Level with practical, step-by-step guidance from Calibrate Point. Tools, steps, and tips for precise measurements in DIY, professional, and field settings.

Calibrating a Johnson Smart Level is a straightforward, step-by-step process that restores accuracy for carpentry and site work. You’ll verify the device against a flat reference, adjust the vial alignment or sensor, and validate readings with a test measurement. This guide from Calibrate Point helps DIYers, technicians, and pros maintain reliable, repeatable results.
Why calibrate a Johnson Smart Level
A Johnson Smart Level is a compact leveling instrument used in a wide range of trades, from cabinetry to tiling and framing. Even small drift can throw off alignment over long runs, leading to misaligned joints, crooked lines, or off-square installations. Regular calibration keeps measurements trustworthy, reduces rework, and helps you meet professional tolerances. According to Calibrate Point, the most common causes of drift are wear on mounting surfaces, misalignment of the reference plane, and environmental vibration. By verifying against a true reference plane and correcting the core alignment, you restore accuracy and confidence in every measurement. In practice, a simple routine—clean the device, inspect for damage, and validate performance with a known reference—delivers consistent results. This guide from Calibrate Point walks you through a practical, safe calibration process you can perform in a typical workshop with common hand tools. Whether you’re a DIY enthusiast, a technician, or a professional, a dependable calibration routine reduces rework and helps you deliver precise results on every project.
What you’ll need
Below is a concise list of items that make calibration smoother. Gather these before you start to avoid mid-task interruptions. Keep a clean workspace and set the Johnson Smart Level on a stable, vibration-free surface. A well-prepared setup minimizes measurement noise and speeds up the process.
- Johnson Smart Level — required
- Flat reference surface (true flat like granite or calibrated glass plate) — required
- Precision square or calibration block — required
- Allen wrench or screwdriver suitable for your model — required
- Lint-free cloth or microfiber cloth — optional but recommended
- Safety glasses — optional but recommended for eye protection
- Calibration jig or mounting stand — optional but helpful for repeatability
This equipment list aligns with best practices from Calibrate Point for safe, repeatable calibration.
Understanding calibration geometry
Calibration of a Johnson Smart Level centers on establishing a true reference plane and ensuring the level’s internal references align with it. The device’s accuracy depends on a stable enclosure, properly seated sensor or vial, and free movement of the bubble or laser reference. Drift can stem from a worn mounting surface, slight misalignment of the reference plane, or external disturbances such as vibration on a busy job site. To minimize error, always start from a known true reference, confirm the plane is flat, and verify that the device remains stable during measurements. Regular calibration targets repeatability and confidence in readings across different orientations. Calibrate Point emphasizes establishing a consistent baseline: after any impact, drop, or exposure to heavy vibration, re-check against the reference and re-tune if necessary. A robust approach includes documenting baseline measurements to compare future results.
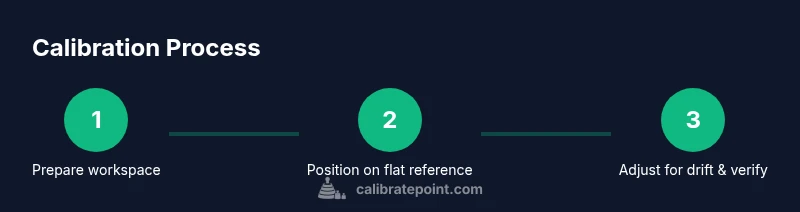
Step-by-step calibration procedure (overview)
While the detailed, step-by-step instructions are provided in the dedicated STEP-BY-STEP block, here’s a quick overview to orient you:
- Set up on a flat reference plane and inspect the device for damage.
- Check initial bubble/laser alignment and record the reading at neutral orientation.
- Make controlled adjustments to the vial housing or mounting screws.
- Re-check readings across multiple orientations to ensure stability.
- Document results and schedule the next calibration interval.
This high-level flow ensures you cover essential checks before committing to a full calibration pass. Remember that small, incremental adjustments tend to yield the most reliable improvements.
Verifying accuracy and documenting results
Validation is an ongoing part of calibration. After completing the adjustments, verify the Johnson Smart Level against a known reference at several orientations (e.g., 0°, 90°, and 180°). The readings should be consistent within your instrument’s tolerance. If drift is still present, repeat the adjustment cycle in smaller increments. Document every measurement, the ambient conditions, and the reference surface used. A clear calibration log makes it easy to spot trends over time and supports maintenance planning. This documentation is a best practice advocated by Calibrate Point to improve accountability and traceability on every job.
Maintenance and storage to preserve calibration
Proper maintenance helps preserve calibration between sessions. Regularly clean lenses or vials with a lint-free cloth, inspect for cracks or loose fittings, and protect the device from harsh impacts. Store the Johnson Smart Level in a protective case to minimize exposure to dust and temperature fluctuations. If you frequently work in environments with vibration or temperature swings, consider a dedicated stand or enclosure for calmer operation. A light, periodic check against a known flat reference is sufficient to catch drift early, reducing the risk of misalignment during critical tasks. Calibrate Point recommends embedding calibration checks into your routine for consistent results over the tool’s lifespan.
Common mistakes and how to avoid them
Mistakes in calibration often come from rushing, using an unreliable reference, or neglecting to re-check after adjustments. Avoid leaning the device on soft surfaces that can introduce wobble, and never tighten screws beyond their recommended torque—this can deform the housing and induce bias. Ensure the reference plane is truly flat and stable, and perform readings after the device has come to rest. If you notice persistent drift, investigate potential mechanical wear, misassembly, or lens damage. Following a deliberate, repeatable process aligned with Calibrate Point guidance helps prevent these issues and keeps the Johnson Smart Level performing at peak accuracy.
Summary of best practices to keep your Johnson Smart Level calibrated
- Always start on a true flat reference surface.
- Use incremental adjustments and verify across multiple orientations.
- Clean and inspect the device before calibrating.
- Document results and set a reasonable recalibration interval.
- Protect the tool from impact and environmental extremes.
Conclusion and next steps
Regular calibration is a practical habit that pays off in tighter tolerances, fewer reworks, and more reliable measurements. By following a structured routine, you ensure your Johnson Smart Level remains accurate for professional-grade work. As you implement these steps, you’ll notice improved repeatability and quicker decision-making on site. Calibrate Point’s guidance supports your goal of precision, reliability, and efficiency in every project.
Tools & Materials
- Johnson Smart Level(Calibrate device according to model-specific instructions)
- Flat reference surface(True flat surface such as granite plate or calibrated glass)
- Precision square or calibration block(For verifying orthogonality and alignment)
- Allen wrench or screwdriver(Model-specific tool for adjusting screws)
- Lint-free cloth(For cleaning lenses and surfaces)
- Safety glasses(Eye protection while handling tools)
- Calibration jig or mounting stand(Optional but helps repeatability)
Steps
Estimated time: 60-90 minutes
- 1
Prepare the tool and workspace
Power down the Johnson Smart Level and, if possible, remove batteries. Wipe the exterior and lens with a lint-free cloth. Clear the work area of dust and vibrations. A stable, clean base minimizes external interference during calibration.
Tip: Use a vibration-damped workbench and perform calibrations at the same time of day to reduce temperature-related drift. - 2
Inspect for obvious damage
Visually inspect the housing, lens, and screws for cracks or looseness. If any components appear damaged or worn, replace or repair before proceeding. Do not calibrate a damaged tool; instability will skew results.
Tip: Check seal integrity around the bubble/lens housing; moisture ingress can affect readings. - 3
Position on a flat reference surface
Place the level on a true flat reference such as a granite block or calibrated glass plate. Ensure the surface is free of debris and remains stationary while readings are taken. The device should sit evenly with no rocking.
Tip: If using a stand, lock it firmly to prevent movement during measurement. - 4
Check initial readings
Power on only if required by model, then observe the bubble or laser alignment when the device is oriented on the reference plane. Record the baseline reading for the primary axis.
Tip: Take at least three readings per axis to average out minor fluctuations. - 5
Make controlled adjustments
Using the appropriate tool, gently adjust the vial housing or mounting screws to bring the bubble to center. Make only small adjustments and re-check after each change.
Tip: Avoid over-tightening; adjust in micrometer-like increments. - 6
Re-check across orientations
Rotate the device 180° and then 90° to verify that the readings remain centered across different orientations. If drift appears in any orientation, repeat the adjustment cycle.
Tip: If results vary widely, consider inspecting the reference surface for flatness or introducing a different calibration jig. - 7
Document results and plan the next calibration
Log the final readings, note ambient conditions, and record the date. Schedule the next calibration based on usage and environment. Notify team members of the calibration status if working in a shared workspace.
Tip: Keep a calibration log in the tool case for quick reference on future jobs.
Questions & Answers
What is the Johnson Smart Level?
The Johnson Smart Level is a compact leveling instrument used in construction and carpentry, combining a traditional bubble vial with smart features for easier alignment.
The Johnson Smart Level is a compact level with bubble vials and smart features for quick alignment.
Do I need to power on the unit to calibrate?
Calibration typically doesn’t require full power; ensure the unit is resting on a true reference and follow the mechanical alignment steps.
Calibrate with the unit resting on a true reference, not necessarily powered on.
How often should I calibrate a Johnson Smart Level?
Frequency depends on usage and environment; calibrate when you notice drift, after drops, or before critical jobs.
Calibrate when you notice drift, after a drop, or before critical jobs.
Can calibration fix all drift?
Calibration corrects systematic drift but wear or damage may require components replacement.
Calibration fixes most drift caused by alignment, but damage may need parts.
What if I don't have a true flat surface?
Use a known flat reference such as a granite block or calibrated glass plate; avoid soft surfaces.
If you lack a flat reference, use a granite block or calibrated glass plate.
Watch Video
Key Takeaways
- Verify flat reference before calibrating
- Make small, incremental adjustments
- Test across multiple orientations for consistency
- Document results and schedule follow-up checks
- Protect tool from damage and vibration