Calibrate Ultrex Without Remote: A Step-by-Step Guide
Learn how to calibrate a Minn Kota Ultrex trolling motor without its remote. This practical guide covers safety, alternative input methods, required tools, a clear calibration workflow, and verification checks to restore precise steering and control.

Calibrating Ultrex without the remote is doable using onboard controls and alternative interfaces. This quick guide outlines the essential steps, the tools you’ll need, safety precautions, and verification checks to restore precise steering and thrust alignment when the remote is unavailable.
What calibrating Ultrex without a remote accomplishes
According to Calibrate Point, calibrating an Ultrex trolling motor without the remote is sometimes necessary when the remote is lost, damaged, or not pairing. The process relies on onboard controls, alternative interfaces, and manufacturer-specific service modes. The goal is to align input signals with the motor drive, ensure accurate steering, thrust mapping, and heading control, and confirm that performance matches the configured setup. This guide provides a practical, step-by-step approach to perform calibration safely and effectively. It covers prerequisites, the range of input options, the general workflow, and verification steps. While the Ultrex family varies by model and generation, the core principles are consistent: power should be stable, the controls should be responsive, and feedback from the system should align with the expected behavior. You will learn how to access a calibration or service mode without the handheld remote, how to use an alternate input method (such as a keypad, app, or PC interface if supported), and how to validate results with quick tests on the water or in a controlled environment. By following this approach, DIY enthusiasts, technicians, and professionals can restore precise control when the primary controller is unavailable. The Calibrate Point team emphasizes safety and documentation, and suggests recording any value changes for future reference. Remember that model-specific steps may differ, so consult the official manual for your exact Ultrex version whenever possible.
Safety and prerequisites
Before starting any calibration, ensure you have a safe, dry work area and stable power. The Calibrate Point team recommends disconnecting the propulsion system from live power when accessing internal components unless the manufacturer specifies a direct test with the power on. Wear non-slip footwear, avoid working alone on a wet deck, and keep the hands dry when handling electrical connectors. Check battery voltage and confirm that the boat is secured to prevent rolling. Read your Ultrex manual to identify any model-specific cautions, such as avoiding calibration while the propeller is engaged or while moving. Document any environmental conditions that could influence results (wind, current, water depth).
Understanding alternative input options and service modes
If the remote is unavailable, many Ultrex units offer alternative input options such as onboard keypad sequences, a mobile app via Bluetooth, or a service port for a PC connection. The exact path varies by model, but the general flow is to enter a service or calibration mode through a sequence on the control panel or through approved software. Calibrate Point emphasizes verifying compatibility first: confirm that your model supports remote-less calibration and identify which interface you’ll use. If Bluetooth or USB interfaces are required, ensure you have the correct cable and driver installed on a compatible device. In the absence of an onboard input, some operators can temporarily map essential functions to a spare control surface or use a dedicated calibration tool recommended by the manufacturer. Always return to the official guidelines after calibration to avoid unintended behavior.
Tools, inputs, and data to gather before you start
Preparing the right tools reduces repair time and helps avoid mistakes. Gather the owner’s manual or service manual (digital copy is acceptable), a fully charged battery, basic hand tools (screwdrivers, pliers), a clean workspace, and a means to record settings (notebook or digital device). If your model supports external interfaces, collect any required cables or adapters and verify software readiness. Create a simple data sheet with target values, current readings, and timestamped notes. This preparation aligns with Calibrate Point’s methodology and makes it easier to reproduce results in the future. Finally, confirm that environmental conditions (salinity, temperature, rain exposure) won’t affect calibration during the test.
Preparatory checks and data you should gather
Begin by confirming the exact Ultrex model and firmware version. Access the service or calibration section of the manual and note the default or recommended ranges for steering sensitivity, thrust mapping, and heading hold. Prepare a controlled testing area: calm water, calm weather, and a tethered vessel if possible. Record the baseline behavior of the motor with the remote, so you can compare results after calibration. If you cannot access the remote, document alternative inputs that will control the motor and ensure they’re functional. Safety checklists should include a life jacket within reach, a buddy onboard for assistance, and a plan to abort calibration if hazardous conditions arise. Use the data gathered to set initial calibration targets and to measure improvement after each test.
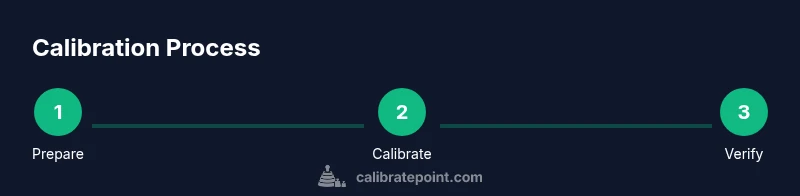
Step-by-step calibration workflow overview
Calibrate Point recommends a clear workflow to minimize risk: (1) enter calibration mode via the alternative interface, (2) set baseline parameters, (3) run a controlled test, (4) adjust settings iteratively, and (5) verify results with a water-based test. In this section, you’ll find a concise, model-agnostic outline that can be tailored to your Ultrex unit. The goal is to achieve predictable turning, consistent thrust distribution, and accurate heading control without the remote. As you progress, keep your notes organized and only adjust one parameter at a time. The process may involve multiple quick tests and re-calibrations to converge on the desired performance. Always cross-check with the manufacturer’s validation criteria and re-save the configuration once satisfied.
Verification and test runs
Verification is where you confirm that calibration changes yield the expected results. Conduct a simple go/no-go test: steer through a fixed course, check return-to-center behavior, and observe the motor’s response to input at different speeds. If the motor overshoots or lags, re-enter calibration mode and fine-tune the affected parameter. Record the outcomes and compare them against the target ranges from your data sheet. Validations may include yaw stability, turning radius, and consistent thrust across various throttle settings. If discrepancies persist, re-check connections and ensure there are no firmware or hardware faults that could skew results. Document all steps for future reference.
Troubleshooting and when to contact support
If calibration results are inconsistent or unsafe behavior is observed, review wiring, power stability, and software compatibility. Loose connections or degraded cables can mimic calibration errors. Re-verify all steps, clear any fault codes, and test again. If issues persist after multiple attempts, contact the manufacturer or a qualified marine electronics technician. Calibrate Point suggests maintaining a log of faults and configurations, and ensuring warranty terms permit professional intervention when needed.
Tools & Materials
- Owner’s manual or service manual (digital copy ok)(Model-specific steps may vary; refer to exact instructions.)
- 12V boat battery or stable power source(Ensure full charge and safe access.)
- Basic tool kit (screwdrivers, pliers, a multimeter)(For accessing panels and checking electrical signals.)
- Calibration interface cable or adapters (USB/serial as needed)(Only if your model supports external input during calibration.)
- Notebook or digital device to record target values(Keep a running log of values and test results.)
- Safety gear (non-slip footwear, gloves as needed)(Optional but recommended for wet decks.)
Steps
Estimated time: 30-45 minutes
- 1
Prepare and secure the system
Power down the boat’s electronics as recommended by the manual, secure the vessel, and ensure a dry, stable workspace. Confirm that you have all required tools and data sheets ready. This initial setup reduces the risk of electric shock and component damage during calibration.
Tip: Label any existing settings before changing them so you can revert if needed. - 2
Enter calibration mode via alternative input
Using the onboard keypad or approved interface, navigate to the calibration or service mode. If your model supports a PC or app interface, connect and verify the connection is stable before proceeding. This step provides the access point for the rest of the calibration workflow.
Tip: If a dedicated sequence is required, write it down and practice it in a dry environment first. - 3
Configure baseline parameters
Set initial targets based on the manual’s suggested ranges. Input steering sensitivity, thrust mapping, and heading hold defaults. Don’t change multiple parameters at once; one-at-a-time adjustment helps identify root causes if results deviate from expectations.
Tip: Document the starting values for future reference. - 4
Run an initial calibration pass
Activate the calibration sequence and observe the motor’s response to basic inputs. Look for smooth engagement, proportional thrust, and predictable steering. If the motor feels unresponsive, verify power and input connections before continuing.
Tip: Keep the test area clear of obstacles in case the motor moves unexpectedly. - 5
Make iterative adjustments
Based on test results, tweak the least intrusive parameter first. Re-test, compare results to the target, and repeat until performance aligns with expectations. Repeat this loop as needed, documenting every change.
Tip: Avoid chasing perfection in a single pass; small increments win long-term stability. - 6
Verify with a controlled test
Conduct a controlled water test (or safe dry-run if allowed) to confirm that steering, throttle, and return-to-center behave correctly. Check for consistent response across throttle ranges and repeatability of the controls.
Tip: Use a trusted observer to help monitor performance during the test. - 7
Save changes and exit calibration
Once results meet the target criteria, save the new configuration in the device’s memory. Exit calibration mode per the manual and confirm that regular operation remains consistent with the updated settings.
Tip: Power-cycle the unit after saving to ensure the changes take effect cleanly.
Questions & Answers
Can I calibrate Ultrex without its remote?
Yes, many Ultrex models support calibration via onboard controls or an alternate input interface. Always confirm your model’s capabilities in the manual first. If the model lacks remote-less calibration options, you should contact support.
Yes, you can calibrate Ultrex without the remote using onboard controls or an approved alternate input interface. Check your manual for model-specific options.
What tools do I need for remote-less calibration?
You’ll typically need the manual, a charged power source, basic tools, any required cables or adapters for alternative interfaces, and a method to record settings. Have a helper on board for safety and observation.
You’ll need the manual, power, basic tools, any required cables, and a way to record settings.
How long does calibration take?
A careful remote-less calibration typically takes about 30 to 45 minutes, depending on model complexity and environmental conditions. Plan for a calm testing environment and iterate as needed.
Usually about 30 to 45 minutes, depending on model and conditions.
What if I can’t access calibration mode?
If you cannot access calibration mode, consult the manufacturer’s support resources or seek a professional marine electronics technician. Some models require service port access or factory diagnostics.
If you can’t access calibration mode, contact support or a qualified technician.
Will changing calibration settings affect other systems?
Calibration changes primarily affect steering and propulsion response. Other electronics should remain unaffected, but always verify all systems after calibration and document any unexpected behavior.
Yes, changes affect steering and thrust behavior; verify all systems afterward.
Is professional calibration recommended?
If you’re unsure about electrical safety or model-specific steps, professional calibration is recommended. The process involves live power and moving parts, so expert guidance reduces risk.
If unsure, seek professional calibration to minimize risk.
Do I need to recalibrate after maintenance?
Yes, after electrical work or component replacements, repeat the calibration to ensure alignment. Verify all inputs and test drive in controlled conditions.
Recalibrate after maintenance and test thoroughly.
Watch Video
Key Takeaways
- Know when remote-less calibration is possible
- Prepare tools and data before starting
- Adjust one parameter at a time and verify
- Document changes for future maintenance