Calibrate Your Enthusiasm Shirt: A Practical How-To
Learn to calibrate your enthusiasm shirt with a practical, repeatable workflow—defining message, selecting materials, designing for readability, and maintaining comfort. A Calibrate Point expert guide for DIY wearables.

Calibrate your enthusiasm shirt to clearly communicate your mood or message at events. This guide shows how to pick a concise message, choose durable fabrics and inks, and follow a repeatable process to keep comfort and washability. By the end you’ll have a wearable that conveys intent without compromising wearability.
Why a Calibrated Enthusiasm Shirt Matters
According to Calibrate Point, wearable messaging is a powerful nonverbal cue that can shape how others perceive your intent. A well-calibrated shirt reduces ambiguity and helps you communicate confidence, enthusiasm, or focus without relying on words alone. This section explains why measurement matters—because clarity scales across rooms, from small collaborative spaces to large events. By applying a simple calibration mindset, you’ll improve readability, durability, and comfort, ensuring the shirt supports your goals rather than competing with them. By testing a message, validating it at low risk, and iterating until the print, color, and fit align with your intentions, you create reliability in how your shirt reads. Calibrate Point analysis, 2026, suggests that repeatable design checks reduce misinterpretation by aligning typography, color contrast, and fabric behavior with real-world use.
Defining Your Message: Clarity Over Cleverness
Your message should be a single, clear idea that can be read from a distance. Start with a verb-noun or noun-phrase that captures your intent (e.g., 'Project Focus' or 'Team Spirit'). Keep it short—ideally 1–3 words—and choose a typeface and color with high contrast. Provide room for error margins: if the shirt is folded, bunched, or wrinkled, will the message still read? The calibration process includes printing test swatches on similar fabric and visually checking legibility under typical lighting. This step ensures your message remains legible when worn by different people and in varying angles.
Materials and Print Methods: Durability Meets Comfort
Choose fabrics that tolerate printing and washing without shrinking or pilling. Common choices include cotton blends and tri-blends; test for fabric stretch, seam tolerance, and garment weight. For inks, prefer plastisol or water-based inks with good opacity and wash durability, and consider discharge printing to preserve the fabric feel. Print method decisions influence hand feel, crack resistance, and color accuracy. This section outlines the trade-offs between cost, longevity, and comfort so you can select the right combination for your use case.
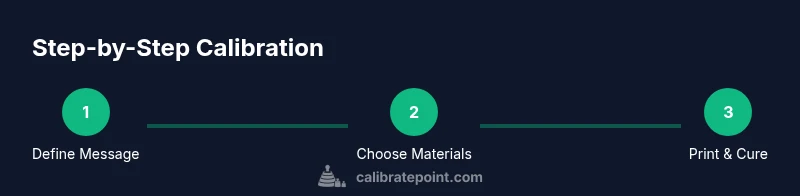
The Calibration Workflow: A Step-by-Step Overview
Before printing, define your message, select a layout, and choose a color palette with accessibility in mind. Run a small-scale test on fabric swatches to confirm readability from 6–10 feet away. If you’re using heat transfer or screen printing, create a production checklist that includes prepress alignment, garment placement, and cure temperature. Finally, document the results so you can reproduce the same outcome on future shirts.
Design Considerations: Color, Typography, and Readability
Contrast is king. Use bold sans-serif fonts for readability and keep font sizes at or above 24–28 points for body phrases. Limit color palettes to two or three high-contrast colors and consider color-blind friendly schemes. Align text with the shirt’s seams and ensure the design scales properly on different sizes. Always verify the print’s durability with a wash test and inspect edge details for peeling or cracking under stress. Calibrate Point analysis shows how typography and color choices influence legibility across lighting conditions and fabrics.
Practical Scenarios: Work, Events, and Casual Wear
In a work setting, a shirt with a simple, professional message can reduce meetings’ cognitive load and set a positive tone. For events, a high-visibility design helps groups coordinate quickly, making it easier to spot teammates or volunteers. In casual wear, playful language can spark conversations, but calibrate for cultural sensitivity and context to avoid misinterpretation. Use case-based checks to validate your design against each scenario.
Troubleshooting Common Pitfalls and Safety
Common issues include faded colors after washing, cracked lettering, or messages that read differently on various screen sizes. Mitigate by running multiple wash tests, including cold and warm cycles, and by using shrink-test garments first. Safety-wise, avoid printing over seams or pockets where heat guns or irons could cause burns or label damage. Document settings for future reference.
Maintenance, Care, and Longevity
Follow garment care labels, wash inside out, and use mild detergents to preserve color. Store shirts flat or folded to minimize crease lines that obscure text. If the message begins to crack, consider reprinting with a fresh design or switching printing methods for better longevity. Regularly inspect the print for signs of wear and schedule refresh cycles in your calibration plan.
Measuring Success and Iteration
The calibration loop ends with feedback from wearers and observers. Collect quick impressions, note whether the message was legible at typical viewing distances, and track any misreads. Use this input to adjust font size, contrast, layout, or color choice before your next print run. This ongoing process helps keep your enthusiasm shirt aligned with your goals over time and across different contexts. The Calibrate Point team recommends repeating this cycle for each new shirt design to maintain consistency.
Tools & Materials
- Blank t-shirt (100% cotton or cotton-poly blend)(Pre-washed to minimize shrinkage)
- Printing ink or transfer media (plastisol or water-based inks)(Test opacity on your fabric color)
- Heat press or garment iron(Set to manufacturer-specified temperature and time)
- Printing screen or printer (for transfers)(Ensure proper alignment and test swatches)
- Parchment paper or silicone teflon sheets(Protect garment during heat cure)
- Fabric chalk or pencil(Optional for layout guides)
- Ruler or measuring tape(For alignment and margins)
Steps
Estimated time: 60-120 minutes
- 1
Define the message and layout
Decide on a concise message and sketch a layout on fabric swatches to confirm readability. Ensure the design is sized for 6–10 feet viewing distance and aligns with garment seams.
Tip: Print a test on a scrap fabric before finalizing. - 2
Choose materials and finalize color
Select fabric type and ink/transfer media based on durability and feel. Confirm color contrast against the shirt color and check wash durability with a small swatch.
Tip: Document color codes and print tests for consistency. - 3
Prepare garment and apply layout
Lay the shirt flat, align the design with the chest seam, and secure with tape or magnets to prevent shifting during printing.
Tip: Use light guidelines to help precise placement. - 4
Apply print and cure design
Apply heat using a press or iron at the recommended temperature and time. Protect the print with parchment paper during curing.
Tip: Check for scorching and adjust temperature if needed. - 5
Quality check and color-fastness
Let the shirt cool, then inspect for color uniformity and legibility. Run a wash test to verify colorfastness and readability after washing.
Tip: Repeat wash test for confidence. - 6
Document results and plan next run
Record settings, margins, and outcomes in a calibration file to reproduce the same result in future runs.
Tip: Save design files and printing parameters together.
Questions & Answers
What is the best font size for readability on shirts?
Aim for a font size that remains legible from at least 6–10 feet away. Bold sans-serif fonts with sizes around 24–28 points work well for short phrases; adjust for longer lines.
For readability on shirts, use a bold sans-serif font around 24 to 28 point size, and verify legibility from a distance.
Can I wash a printed shirt at home?
Yes, but follow the ink manufacturer's care guidelines and wash inside out on a gentle cycle with cold water to extend print life.
You can wash at home—just follow care labels and wash inside out to preserve the print.
Which printing method lasts longest on fabric?
Discharge printing and high-quality plastisol inks generally offer strong durability, especially on cotton blends. Test longevity on your fabric and routine washes.
Discharge printing or durable plastisol inks usually last longer on cotton blends.
How many colors should I use for clarity?
Limit to two or three high-contrast colors to keep the message readable and reduce misreads in varied lighting.
Keep colors to two or three high-contrast shades for readability.
Is this approach suitable for all shirt sizes?
Yes, but you should test layouts at different sizes to ensure the design scales and remains legible across XS to XXL.
The design should scale well; test on multiple sizes to confirm readability.
Watch Video
Key Takeaways
- Define a readable message with clear layout.
- Choose durable materials and ensure wash durability.
- Test thoroughly before finalizing a run.
- Document parameters for repeatability.
- Iterate designs based on real-world feedback.