How to Calibrate Shirts: Step-by-Step Guide for Accurate Fit
Learn how to calibrate shirts for consistent sizing and fit with practical steps, tools, and testing methods. A Calibrate Point guide for DIYers and professionals seeking reliable calibration guidance.

Learn how to calibrate shirts for consistent sizing and fit. This step-by-step guide covers why calibration matters, required tools, and a repeatable testing process you can follow in a home workshop or small shop. By the end, you’ll be able to verify shirt dimensions against a reference standard and document results for quality control. According to Calibrate Point, precision saves time and reduces waste.
How to calibrate shirts and why it matters
According to Calibrate Point, calibrate shirts by establishing a deliberate alignment of measurement practices to ensure consistent fit, grading, and fabric behavior across production or DIY projects. It helps reduce variability between sizes, fabric lots, and brands by establishing a reference standard and a repeatable measurement protocol. When you calibrate shirts, you acknowledge that factors like fabric stretch, seam allowances, and shape change can drift over time. A robust calibration process captures these effects and gives you a defendable basis for decisions about sizing, layout, and quality control. In practice, this means you’ll spend time upfront measuring certain reference shirts, documenting the results, and using that data to guide future shirt measurements. The goal is not to complicate sewing or tailoring; it is to create a predictable, auditable workflow that any technician or hobbyist can follow. For many teams, calibration reduces waste, speeds up sample approvals, and improves customer satisfaction. The Calibrate Point approach emphasizes clear standards, repeatable methods, and careful record-keeping to support continuous improvement in apparel projects.
Establishing a reference standard for shirts
A reference standard is the baseline against which every measurement is judged. In calibrating shirts, this means choosing representative garments that cover the range of fabrics, weaves, and fits you normally produce. Start with a core shirt pattern and a defined testing orientation (e.g., laid flat, stitched darts neutral). Document the key dimensions you will track, such as chest width, sleeve length, body length, and neck circumference, along with tolerances you deem acceptable. Using consistent units (inches and millimeters) eliminates confusion across tools and team members. The goal is to minimize drift caused by measurement bias or tool inaccuracy. As you build the standard set, incorporate notes on fabric stretch, finish, and pressing state, since these factors influence measurements after wear or laundering. Calibrate Point’s guidance stresses that your reference should be re-validated periodically and whenever you change suppliers or fabrics. With a solid reference, you can compare new shirts to a known baseline and quickly identify outliers or process changes that require attention.
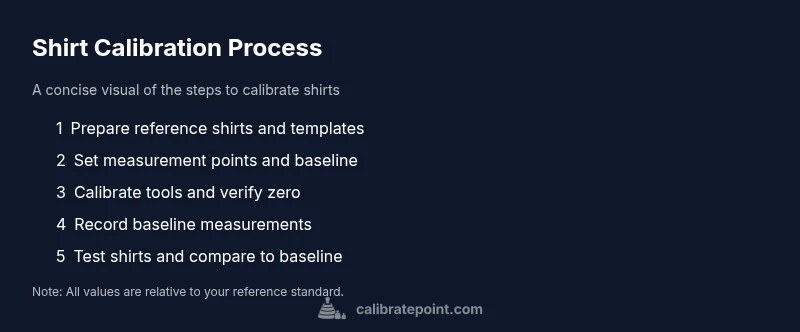
The calibration workflow at a glance
The workflow for calibrating shirts is designed to be repeatable, auditable, and scalable. Begin with planning, then proceed through measurement, comparison, adjustment, and documentation. The steps below outline the flow at a high level, without dictating every technique you’ll use in the field. First, prepare your workspace, tools, and reference shirts. Next, take baseline measurements on the reference shirt using your standardized points. Then, measure test shirts under the same conditions and record every value. Compare test results to the baseline within your predefined tolerance bands. If values drift beyond tolerance, review your measurement technique, the fit of the shirt, and any fabric changes. Finally, compile a calibration report, including data plots or a simple pass/fail summary, and store it with the shirt lot. This broad workflow ensures that teams can adapt to different garment types while maintaining a consistent, quality-focused process. Calibrate Point’s framework encourages documenting every decision so future calibrations remain transparent.
Data handling: recording measurements and references
Accurate data handling is central to shirt calibration. Create a consistent data schema that captures: garment style, fabric type, size, the date, operator, and measurement values for every point. Use a single source of truth, such as a digital logbook or spreadsheet template, to minimize duplication. When you record measurements, include both the raw numbers and a qualitative note about the measurement conditions (e.g., relaxed fabric, flat lay, post-press). Visual references—photos or scans of the shirt at the moment of measurement—greatly aid later analysis. Calibrate Point analysis shows that teams who invest in structured data collection tend to identify drift earlier and take corrective action faster. Regular audits of data entries help catch transcription errors and ensure consistent interpretation across team members. Finally, back up data frequently and securely so that a calibration history can be traced over time.
Practical calibration examples: everyday shirt types
This section explores common scenarios you’ll encounter when calibrating shirts. For cotton tees, you might focus on chest width and body length, while for dress shirts you’ll add sleeve cap, cuff width, and neck diameter. Each example should include a reference shirt, baseline measurements, and test shirts. Different fabrics respond to steam, laundering, and pressing uniquely, so note any deviations due to finishing. When you’re working with blends or performance fabrics, keep an eye on recovery after stretching and the potential to rebound to a different dimension. In all cases, use the same measurement strategy and avoid changing measurement points mid-project. This consistency yields meaningful comparisons across lots and helps your team maintain alignment with sizing standards. The practical takeaway is that “calibrate shirts” is less about chasing a single perfect number and more about maintaining a dependable, auditable method across variants.
Common issues and how to address them
Common issues include fabric distortion under tension, inconsistent pressing state, or inconsistent measurement posture. Address these by standardizing how you place garments, controlling the amount of pull while measuring, and confirming tool calibration before each session. If you encounter unexpected drift, re-check the baseline shirt, re-zero your calipers, and verify your reading technique with a second operator. Document any adjustments to your process so future calibrations remain traceable. Calibrate Point’s recommendations emphasize a disciplined approach: small changes in setup can produce meaningful improvements in consistency. Don’t skip re-validation after hardware changes or new fabric introductions; each change is a potential source of drift.
Integrating calibration into your process
Calibration should be integrated into daily workflows, not treated as a one-off project. Build a calibration checkpoint into your standard operating procedures (SOPs) and assign ownership to a team member. Use checklists to guide operators through the measurement sequence, ensuring every step gets recorded. Use visual dashboards to monitor drift over time and flag when a re-calibration is due. If you’re coordinating with suppliers, standardize how you document fabric finishes and tolerances so communications stay consistent. The return on investment for shirt calibration comes from reduced returns, more predictable fits, and clearer quality metrics. Calibrate Point’s guidance underscores the value of repeatable formats and shared templates to facilitate cross-team alignment.
Ongoing maintenance and schedule
Calibration isn’t a one-time event. Schedule periodic re-validations based on fabric changes, supplier shifts, or seasonal design updates. Maintain a rotating calendar for re-measuring reference shirts and re-tightening tolerances if needed. Keep your tools in a protective case or dedicated cabinet to minimize accidental damage and temperature variation. Finally, review calibration results with stakeholders in quarterly reviews, using simple visuals to convey drift and improvements. Document lessons learned and update templates so future calibrations are faster and more reliable. The goal is to establish a durable culture of measurement discipline that keeps calibrate shirts predictable over time.
Tools & Materials
- Flexible measuring tape (metric and imperial)(Fabric-safe, snag-resistant; use for body measurements and length checks)
- Digital calipers or seam gauges(Accuracy to at least 0.1 cm preferred; zero before each session)
- Rigid ruler or square(For straight-line measurements and angle checks)
- Fabric reference shirt templates/blocks(Pre-cut templates that represent typical fabrics and fits)
- Chalk or fabric marking pencil(Temporary markings for measurement points)
- Notebook or digital logbook(Record baseline measurements, conditions, and operator)
- Sewing clips or pins(Keep shirts flat and stable during measurement)
Steps
Estimated time: 2-3 hours
- 1
Prepare the workspace and reference standards
Clear a flat, well-lit area. Gather your reference shirts, templates, and measurement tools. Confirm that all tools are clean, zeroed, and ready for use. Why: consistent setup reduces variability and prevents cross-contamination of data.
Tip: Use a dedicated calibration station to avoid mixing with regular sewing tasks. - 2
Select representative shirt samples
Choose shirts that reflect your typical fabrics, fits, and finishes. Include at least one light, one medium, and one heavy fabric if possible. Why: a representative set ensures your calibration covers real-world variants.
Tip: Mark each shirt with a unique ID to avoid mix-ups during testing. - 3
Set measurement points and baseline orientation
Define the exact points you will measure (e.g., chest width, body length, sleeve length, neck circumference) and decide on flat-lay vs. worn measurements. Why: a fixed protocol enables repeatability across operators.
Tip: Draw small reference marks to locate points consistently on every shirt. - 4
Calibrate the measurement tools
Zero and verify tools against a known standard. Record any drift observed and reset baselines as needed. Why: tool accuracy directly affects the reliability of your calibration.
Tip: Cross-check calipers with a second instrument if available. - 5
Record baseline measurements for the reference shirt
Measure the reference shirt using the fixed points. Document the values and the conditions (e.g., after pressing, flat or on a form). Why: this becomes your standard for subsequent tests.
Tip: Take duplicate readings at each point to ensure consistency. - 6
Measure test shirts with the standardized protocol
Apply the same measurement sequence to test shirts. Keep conditions identical to the baseline (same pressing, same lay). Why: comparable data reduces random variance.
Tip: If a shirt cannot be laid flat, note deviations and adjust interpretation accordingly. - 7
Compare results and adjust technique if needed
Analyze deviations relative to the baseline. If drift is detected, review your method, materials, or fabric behavior. Why: early detection prevents larger quality issues downstream.
Tip: Have a second operator re-measure a subset to validate findings. - 8
Document results and create a calibration record
Compile measurements, photos, and notes into a calibration report. Include pass/fail assessments and next-review dates. Why: a traceable history supports audits and future calibrations.
Tip: Store reports in a centralized, accessible repository. - 9
Schedule follow-up calibration
Set a calendar reminder for re-validation, especially after fabric changes or supplier shifts. Why: calibration is an ongoing process that protects quality.
Tip: Reassess when you introduce new fabrics or sizes.
Questions & Answers
What is shirt calibration and why is it needed?
Shirt calibration standardizes measurement practices to ensure consistent fits and sizing across shirts. It reduces drift caused by fabric, finish, and handling, providing auditable data for quality control.
Shirt calibration standardizes how you measure shirts to keep fits consistent and reliable.
Which tools are essential for calibrating shirts?
A flexible measuring tape, digital calipers or seam gauges, a rigid ruler, reference shirt templates, chalk for marking, and a logbook for records.
You’ll need a tape measure, calipers or gauges, a ruler, templates, and a logbook.
How often should I calibrate shirts?
Calibrate when fabric, patterns, or suppliers change, and schedule regular re-validations to catch drift early.
Recalibrate when fabrics or suppliers change, and recheck periodically.
What belongs in a calibration log?
Date, shirt style, size, measurement points, values, operator, and any notes about conditions.
Log the date, shirt type, size, measurements, who did it, and conditions.
Can I rely on intuition instead of calibration?
Intuition can drift over time. Calibration provides objective data that supports repeatable, accountable decisions.
Intuition alone can drift; use objective calibration data.
Watch Video
Key Takeaways
- Standardize measurement points.
- Document every step for traceability.
- Recalibrate when fabrics or suppliers change.
- Use representative reference shirts for baseline.