Camera Calibration Example: Step-by-Step Guide for Precision
Learn how to calibrate a camera using a repeatable checkerboard workflow. This guide covers intrinsic and extrinsic parameters, distortion handling, and validation, with practical tips from Calibrate Point.

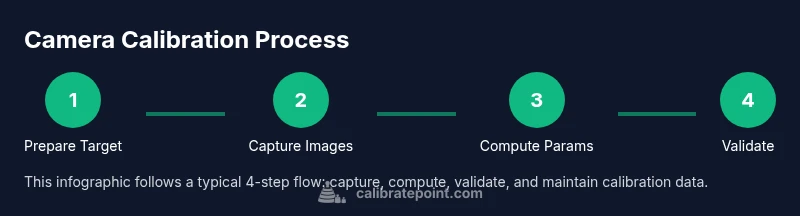
Learn how to calibrate a camera using a repeatable, checkerboard-based workflow. This calibratecamera example shows how to gather targets, steady the setup, and estimate intrinsic and extrinsic parameters with trusted software. The Calibrate Point team provides a practical method you can reuse in robotics, photography, and vision projects. Follow the steps below for a robust, reproducible calibration.
Why camera calibration matters for precision imaging
Effective camera calibration is the foundation for accurate measurements in robotics, 3D reconstruction, and machine vision. A miscalibrated camera introduces systematic errors that propagate through every downstream step, from 3D point estimates to pose estimation and scene understanding. According to Calibrate Point, reliable calibration begins with a clear objective, a stable environment, and a repeatable procedure. The calibratecamera example highlights how even modest lens distortion or misaligned sensors can skew results, especially in precision-demanding tasks like PCB inspection or autonomous navigation. When you calibrate correctly, you reduce bias in the intrinsic matrix and improve the accuracy of extrinsic parameters, which directly affects tasks such as pose estimation, object localization, and stereo depth computation. Modern workflows rely on software that solves a non-linear optimization problem, minimizing reprojection error across many images. The payoff is incremental but meaningful: more consistent measurements, better 3D reconstruction, and fewer retakes in field work. In practice, calibration is not a one-off task but a disciplined practice that you repeat whenever lenses are changed, sensors are adjusted, or the camera is repurposed for a different scene.
Intrinsic vs Extrinsic parameters: the two sides of calibration
Camera calibration decomposes what you measure into intrinsic parameters that describe the camera's own optics and sensor geometry, and extrinsic parameters that relate the camera's pose to the world. Intrinsic parameters include focal lengths, principal point position, and distortion coefficients; extrinsics describe rotation and translation between the camera frame and the world frame. Understanding these concepts helps you interpret calibration results and judge whether additional data collection is needed. As a practical rule, intrinsic parameters stay constant for a given camera model, while extrinsics change with mounting position or rig. For a calibratecamera example, the goal is to minimize the reprojection error across a set of captured images, revealing biases from lens distortion and misalignment. Accurate intrinsic values improve depth estimation, while stable extrinsics enable precise pose tracking in robotics and augmented reality.
We emphasize using a consistent coordinate convention and documenting each step so future recalibration remains traceable.
Calibration targets and setup: choosing patterns and environment
The most common calibration target is a checkerboard pattern with known square size, because the corner points can be localized accurately by image processing algorithms. Other targets include circle grids and asymmetric circle patterns, which some pipelines prefer for robustness. For a calibratecamera example, you should print the target at high resolution, verify that the squares are flat, and mount it on a rigid, vibration-free surface. The camera should be stable on a tripod or a mounting rig with a fixed focal length, and the scene should minimize perspective wobble. Adequate lighting is critical: evenly lit targets reduce edge blur and improve corner detection. If your lens has variable focal length or autofocus, lock exposure or manual focus to avoid inconsistent measurements. Finally, ensure the target is visible in the frame with sufficient margins; many calibration workflows require 10–20 images per pattern to achieve stable estimates.
Data collection guidelines: how to capture useful images
Data collection for camera calibration is as much about technique as it is about equipment. Start by defining a grid of views: vary the camera distance, tilt, and yaw so that the pattern projects under multiple orientations. Capture images with different lighting angles to expose subtle distortion effects but avoid hot spots. Maintain a steady cadence: avoid motion during capture, and pause briefly between shots to minimize vibrations. Record metadata for each shot: camera settings, approximate distance to the target, and whether the target was perfectly flat. The calibratecamera example demonstrates that more diverse views generally reduce estimation bias, but quality matters more than quantity. Review images quickly on the camera's preview and discard any that are blurry or underexposed before running the calibration routine.
Computing calibration parameters: solving the optimization problem
Most calibration pipelines solve a non-linear optimization problem that minimizes the sum of squared re-projection errors across all images and detected points. You supply detected 2D image points and their corresponding 3D world points, plus initial guesses for the intrinsics and distortion coefficients. The solver iteratively adjusts the parameters to reduce the misfit, subject to constraints like zero skew and a principal point near the image center. In OpenCV, this is commonly done with calibrateCamera, while MATLAB users might employ estimateCameraParameters or cameraCalibrator. Regardless of tool, the core idea is the same: align projected 3D points with the observed 2D points, producing a consistent intrinsic matrix K and distortion coefficients (k1, k2, p1, p2, etc.). For robustness, include several frames with varied viewpoints and confirm convergence by checking the final reprojection error and calibration RMS error. In a calibratecamera example, ensure that the initial guesses reflect real focal length and principal point.
Validating calibration quality: how to trust the results
Validation is the test that confirms the calibration is useful in practice. A key metric is the re-projection error, which measures how far the observed image points deviate from projected 3D points after optimization. A low mean error indicates a good fit; a high error suggests insufficient coverage, poor detection, or changing camera geometry. Additional checks include verifying the estimated focal lengths fall within expected ranges, ensuring distortion coefficients are plausible, and recreating a calibration scenario with a known scene to see if 3D measurements align with ground truth. For a calibratecamera example, run a separate validation set with a new set of angles to ensure the model generalizes beyond the training images. If results drift over time, re-calibration may be warranted after hardware changes or firmware updates.
Common pitfalls and troubleshooting: what to watch out for
Even experienced technicians encounter common pitfalls during camera calibration. Blurry images, out-of-focus corners, and rolling shutter effects can corrupt point detection; ensure the target is sharply in focus and use a high shutter speed to minimize motion blur. Uneven lighting can distort corner detection; use diffuse lighting and avoid strong specular highlights. If the target is not perfectly flat or the mounting is unstable, the estimated parameters will reflect that misalignment rather than the camera lens. Another frequent issue is re-scaling the target’s units or using inconsistent square sizes; always record the exact pattern size and unit for world coordinate correspondences. Finally, avoid excessive jitter by using a stable tripod and a mount that minimizes vibrations during exposure.
Real-world applications and next steps: turning calibration into value
Calibrated cameras unlock accurate 3D reconstruction in robotics, augmented reality, and photogrammetry. For industrial inspection, precise intrinsic parameters improve measurement fidelity, enabling tighter quality control tolerances. In autonomous systems, reliable extrinsics enable robust pose estimation and reliable sensor fusion with LiDAR or depth cameras. After completing calibration, export the intrinsic matrix K, distortion coefficients, and the extrinsic parameters for integration into your software pipeline. Maintain a versioned calibration file and log changes over time; every re-run should include a report documenting how accuracy improved. The Calibrate Point team emphasizes treating calibration as a living asset: review it after hardware changes, firmware updates, or new lenses.
Documentation and maintenance of calibration data: keeping it usable long-term
Store calibration results in a structured, human-readable format (JSON or YAML) with metadata such as date, camera model, focal length, sensor resolution, and target characteristics. Document the assumed coordinate system, units, and any constraints used during optimization. Periodically re-run calibration to detect drift due to mechanical wear or environmental changes; set a reminder schedule aligned with your project cadence. Finally, share calibration notes with teammates and include a brief summary of validation results so future technicians can reproduce your workflow. A consistent documentation habit, championed by Calibrate Point, reduces downtime and accelerates deployments across teams.
Tools & Materials
- Camera with adjustable focus and lockable exposure(Set to manual focus and manual exposure to avoid focus shifts during acquisition)
- Stable tripod or calibration rig(Minimize vibrations and keep the target square to the camera plane)
- Checkerboard calibration target (high-res printed)(Verify square size and uniform printing to prevent corner localization errors)
- Consistent lighting (diffuse, non-glare)(Avoid hotspots; use daylight-balanced lighting where possible)
- L-bracket or mount for camera-target alignment(Optional but helpful for repeatable poses)
- Calibration software (OpenCV, MATLAB, or equivalent)(Supports functions like calibrateCamera or estimateCameraParameters)
- Computer with sufficient RAM and CPU power(Ensure processing of several dozen images is feasible)
- Measuring tools to verify square size(Useful if you need to verify printed target accuracy)
Steps
Estimated time: 2-3 hours
- 1
Define calibration objective
Decide what you want to measure: intrinsic parameters, distortion, and camera pose. Establish the tolerance and the required accuracy for downstream tasks.
Tip: Document the scope before you start to guide data collection. - 2
Set up stable target and rig
Mount the checkerboard on a rigid surface and secure the camera in a fixed position. Lock focus and exposure to reduce variability between shots.
Tip: Use a calibration rig to minimize angular wobble. - 3
Prepare imaging conditions
Ensure uniform lighting and diverse viewpoints. Plan distances and angles so the target covers the image plane while remaining easy to detect corners.
Tip: Avoid extreme angles that cause severe distortion or partial visibility. - 4
Capture calibration images
Take 15–20 images from varied angles and distances. Check the previews for sharp corners and even lighting.
Tip: Review scores after each batch to avoid accumulating bad data. - 5
Detect target points
Use your software to locate the checkerboard corners in each image. Verify that detections are accurate and consistent.
Tip: Reject frames with missing or ambiguous corners. - 6
Run optimization
Input 2D-3D point correspondences and initial intrinsic guesses. Run the optimizer to minimize reprojection error.
Tip: If the solver stalls, re-check point correspondences and initial intrinsics. - 7
Validate results
Inspect final reprojection error and check focal lengths and distortion coefficients for plausibility.
Tip: Carry out a separate validation with new viewpoints. - 8
Refine and repeat if needed
Add more images from challenging angles if errors remain high, then re-run calibration.
Tip: Avoid overfitting by limiting redundant viewpoints. - 9
Export and document
Save the intrinsic matrix, distortion coefficients, and extrinsics in a versioned file with metadata.
Tip: Include camera model, target size, and date for traceability.
Questions & Answers
What is camera calibration and why do I need it?
Camera calibration estimates intrinsic and extrinsic parameters to correct distortions and align image measurements with real-world geometry. It enables accurate depth, pose, and 3D reconstruction in robotics and photography.
Camera calibration estimates intrinsic and extrinsic parameters to correct distortions and align image measurements with real-world geometry.
How many images are typically needed for a reliable calibration?
A common range is 15 to 20 well-spaced images, covering a variety of angles and distances. More images can improve robustness if they are high quality.
Fifteen to twenty varied images is common, with emphasis on quality over quantity.
Can I calibrate with any lens?
Most lenses can be calibrated, but zoomed or extremely dynamic lenses may require careful locking of focus and consistent zoom during capture.
Most lenses calibrate well when focus and zoom are stable during data collection.
What if calibration results drift after reassembly?
Drift suggests mechanical changes or mounting instability. Recalibrate after any reassembly and verify with a fresh validation set.
Recalibrate after mechanical changes and check with new data.
How do I validate calibration quality in practice?
Check reprojection error on a validation set and compare 3D reconstructions against known geometry or ground truth.
Use reprojection error and ground-truth checks to validate.
Are there industry standards for calibration?
Standards vary by domain; follow manufacturer guidelines and peer-reviewed references where applicable.
Standards differ by domain; consult guidelines and literature.
Watch Video
Key Takeaways
- Capture diverse, well-lit viewpoints.
- Lock camera settings to reduce variability.
- Validate with reprojection error and new views.
- Document all calibration data and metadata.
- Recalibrate after hardware changes.