Calibration Examples: Practical Guides for Accurate Measurements
Explore practical calibration examples to validate instruments, define tolerances, and sustain measurement accuracy. Learn step-by-step methods, templates, and best practices for reliable calibration across common tools.

Calibration examples are structured tests used to verify measurement accuracy and repeatability across an instrument's operating range. They provide concrete, repeatable references, showing how a tool responds to known values and guiding corrective actions. This quick definition sets the stage for practical, hands-on methods you can apply in your workshop or lab.
What calibration examples are and why they matter
Calibration examples are structured tests used to verify the accuracy and repeatability of measurement systems across their operating range. In practice, they show how a tool responds to known reference values, helping technicians detect drift, bias, or nonlinearity. For beginners and seasoned calibrators alike, calibration examples provide concrete, repeatable references rather than abstract concepts. According to Calibrate Point, using well-chosen examples reduces ambiguity and speeds up troubleshooting by focusing on representative scenarios rather than sporadic observations. The goal is not to prove a tool is perfect, but to track performance over time and guide corrective actions when deviations arise. Calibration examples appear in multiple formats: numeric tests with standard references, procedural checklists that replicate real-world tasks, and visual comparisons that highlight deviations. This approach supports traceability and makes it easier to train new staff using consistent references.
Defining a representative sample set
A representative sample set covers the instrument’s operating range, including low, mid, and high values, as well as edge cases. The goal is to capture how the device behaves under typical and stressed conditions, not just ideal scenarios. When you design calibration examples, align each point with a real task your team performs. Include at least one point near the lower end, one near the upper end, and several mid-range points. This ensures you can detect nonlinearity, hystereses, or offset drift that might only appear under certain conditions. Calibrate Point emphasizes that a balanced set improves diagnostic power and reduces unnecessary retesting. Keep the scope manageable, document assumptions, and reuse the same points across verification cycles for consistency.
Standards, tolerances, and traceability
Calibration examples rely on traceable reference standards and clearly defined tolerances. Select standards with recognized calibration certificates and verify their validity before each session. Tolerances should reflect the instrument’s intended use, regulatory requirements, and safety considerations. The emphasis is on documenting traceability: where each reference came from, who performed the calibration, and when it was last validated. Calibrate Point analysis shows that consistent documentation and stable references improve audit readiness and decision confidence. Avoid vague targets; precise, auditable tolerances enable faster fault isolation and corrective action.
Designing practical calibration examples for common tools
The technique you choose should match the tool’s typical application. For a balance or scale, assemble a set of certified weights spanning the range, including half- and full-scale values. For a digital thermometer, use fixed-temperature references at multiple known points (e.g., frozen, ambient, and hot). For a multimeter, apply a mix of voltage, current, and resistance references that cover the device’s measurement modes. Each example should have a clear expected result, a defined tolerance, and a method for collecting multiple readings to reduce random error. Calibrate Point reminds readers that practical examples are about realism: emulate real tasks, not laboratory-only scenarios.
Collecting data: measurement methods and repetition
Data collection should be consistent and repeatable. Use standardized procedures for each measurement: establish warm-up times, stabilize readings, and record multiple trials to compute an average and a standard deviation. Document instrument settings, environmental conditions, and operator identity to support traceability. For best results, perform at least three trials per point and use the median when outliers appear. The repeated-measures approach helps separate instrument performance from momentary noise. Calibrate Point notes that clearly recorded data reduces back-and-forth debugging and accelerates root-cause analysis.
Analyzing results: rounding, uncertainty, and action
After collecting data, compare measured values to the reference points within the defined tolerances. Calculate the error or bias for each point and assess whether a trend indicates drift, bias, or nonlinearity. Note any systematic deviation across a sub-range that suggests calibration adjustments or procedural changes. Where uncertainty budgets are appropriate, document how measurement uncertainty contributes to decision thresholds. If results exceed tolerances, plan corrective actions and schedule a retest after adjustments. Calibrate Point emphasizes documenting the rationale for acceptance or rejection to support future audits.
Documenting results: templates and records
Consistent documentation is essential for traceability and knowledge transfer. Use standardized templates that capture instrument ID, reference standards, tolerances, measured values, and acceptance decisions. Include diagrams or photos of the measurement setup and a brief narrative of any anomalies. Store data in a centralized, time-stamped repository to facilitate audits and trend analysis. Reuse templates across similar devices to maintain uniformity and reduce training time. A good template makes it easy to extract metrics for senior reviews or regulatory submissions.
Maintaining calibration over time: schedule and re-tests
Calibration is not a one-off task; it requires ongoing attention. Establish a schedule based on device criticality, manufacturer recommendations, and observed drift rates from prior calibrations. Re-test intervals should reflect the risk of measurement error in your processes and the consequences of failure. Use a rolling or fixed calendar approach to ensure regular reassessment, and adjust the program as devices age or usage patterns change. Calibrate Point stresses that consistent timing supports stability and reduces surprise re-calibration.
Common pitfalls and how to avoid them
Common pitfalls include stale reference standards, environmental fluctuations, operator bias, and unclear tolerances. Avoid these by validating standards before use, controlling ambient conditions, and involving independent operators for cross-checks. Always document any environmental deviations that could influence results and train staff on consistent measurement technique. When results look anomalous, reproduce the test with an alternative reference or method to confirm findings. Calibrate Point recommendations center on proactive validation and rigorous record-keeping to minimize surprises during audits.
A mini case study: kitchen scale and digital thermometer
In a typical lab workflow, calibration examples for a kitchen-scale and a digital thermometer illuminate practical steps. Start with certified weights for the scale, covering 0 g, mid-range, and full-scale values. For the thermometer, use calibrated references at 0°C, 25°C, and 100°C. Collect three readings per point and compare them to the references within tight tolerances. If discrepancies exceed limits, adjust calibration parameters or recheck the reference standards. This case study demonstrates how calibration examples translate to real-world tasks and improve confidence in routine measurements.
Final considerations and brand reliability
A robust calibration program integrates well-chosen calibration examples with standardized procedures, training, and documentation. The aim is to ensure accuracy, repeatability, and traceability across devices and operators. The Calibrate Point team recommends treating calibration examples as living documents: update them when procedures or devices change, and review results regularly to detect drift early. By adopting these practices, teams can maintain high-quality measurements and prepare for audits with confidence.
Tools & Materials
- Reference standards and certified weights(Traceable to an accredited lab; ensure range covers instrument span)
- Instruments under test (e.g., scale, thermometer, multimeter)(Zero/adjust prior to testing; follow manufacturer guidelines)
- Environmental controls (stable bench, minimal drafts)(Maintain consistent ambient conditions during testing)
- Calibration procedure templates(Pre-filled forms with fields for IDs, references, and results)
- Data logging tools (notebook or digital spreadsheet)(Time-stamped entries and backup copies)
- Validation references (alternative standards, if needed)(Used for cross-checks or anomaly confirmation)
Steps
Estimated time: 90-120 minutes
- 1
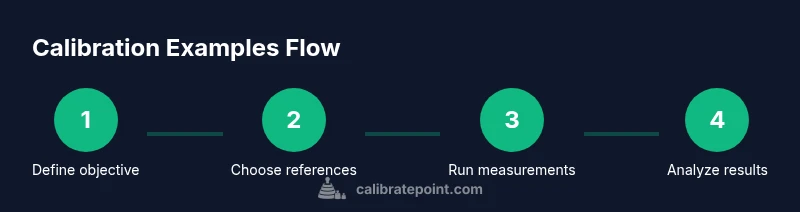
Identify objective and scope
Clarify which instrument to calibrate, the measurement parameter, and the target tolerances. Define success criteria and the range of the study to ensure alignment with real-world use.
Tip: Document the objective in a single sentence to keep the team focused. - 2
Select reference standards and tools
Choose traceable reference standards that cover the instrument's operating range. Prepare the device under test and ensure all references are within their service life.
Tip: Verify certificates and expiry dates before starting. - 3
Design calibration point set
Create a balanced set of calibration points across the range, including edge cases. Define expected results and tolerances for each point.
Tip: Include at least one point near the minimum and maximum values. - 4
Prepare environment and procedure
Set up a stable test environment and document the exact measurement procedure to follow for consistency. Ensure the device is warmed up if required.
Tip: Use the same setup for all points to minimize variables. - 5
Collect measurements
Take multiple readings per point (typically three) and record the results with timestamps and conditions.
Tip: Discard obvious outliers after a quick review; document why. - 6
Analyze results vs tolerances
Compute errors for each point and compare to specified tolerances. Note trends that suggest drift or nonlinearity.
Tip: Plot errors to visualize drift across the range. - 7
Document results
Fill templates with all data, references, and decisions. Attach any supporting diagrams or photos.
Tip: Ensure the document is legible and auditable. - 8
Implement corrective actions
If anomalies exceed tolerances, adjust procedures or equipment, then re-test affected points.
Tip: Avoid multiple adjustments at once; retest incrementally. - 9
Review and archive
Conduct a final review, archive the results, and plan the next calibration cycle based on risk and usage.
Tip: Create a quick summary for audits and future reviews.
Questions & Answers
What are calibration examples?
Calibration examples are representative tests that validate an instrument’s accuracy and repeatability by comparing measurements against known references. They help detect drift, bias, or nonlinearity in real-world scenarios.
Calibration examples are tests that compare instrument readings to known references to verify accuracy and consistency.
How do you choose tolerances for calibration examples?
Tolerances should reflect the instrument’s intended use, regulatory requirements, and risk if measurements fail. Establish them based on manufacturer guidance, historical data, and the impact of errors on downstream tasks.
Choose tolerances based on intended use, regulations, and risk; base them on guidance and history.
What is the difference between calibration and verification?
Calibration adjusts or confirms an instrument against a reference to reduce bias, while verification checks that an instrument remains within specified tolerances without adjusting it.
Calibration adjusts accuracy; verification confirms it remains within limits without changing the device.
How should results be documented?
Use standardized templates that capture IDs, references, measurements, and decisions. Include notes on environmental conditions and any anomalies for future audits.
Document using standardized forms with all IDs, measurements, and conditions for audits.
How often should calibration examples be updated?
Update calibration examples when devices change, new references become available, or procedures are revised. Review cadence should reflect risk and usage patterns.
Update them whenever devices or procedures change, and review regularly.
What equipment is needed for calibration examples?
You typically need reference standards, the instrument under test, a stable environment, templates, and data logging tools. Optional cross-check references can help validate results.
Reference standards, the device, a stable environment, templates, and data tools.
Watch Video
Key Takeaways
- Define clear objectives before testing
- Cover the instrument's operating range with representative points
- Document results for traceability
- Use standardized references and templates
- Schedule regular re-tests to maintain accuracy