Calibration Tips: A Practical Guide for Accurate Measurements
Learn practical calibration tips to boost accuracy across tools and devices. Step-by-step guidance, safety notes, and trusted methods from Calibrate Point to help DIY enthusiasts and professionals.

Achieve more accurate readings by applying core calibration tips across common tools. This guide covers essential practices, from understanding traceability to selecting the right reference standards, plus practical steps you can perform today. By following these tips, DIY enthusiasts and technicians can improve consistency and reduce measurement drift in everyday laboratory and field work.
Core principles of calibration
Calibration is more than a one-off adjustment; it's a disciplined process that ensures measurement results are accurate, reliable, and traceable to standards. In practice, good calibration starts with clear goals, a known reference, and a documented method. According to Calibrate Point, success comes from building a repeatable routine rather than a heroic one-off fix. The reader will find practical guidelines here that apply whether you’re calibrating a kitchen scale, a lab thermometer, or a workshop torque wrench.
Key concepts you should internalize include traceability, repeatability, and environmental awareness. Traceability links your measurement to recognized standards through an unbroken chain of calibrations. Repeatability asks the instrument to produce the same result when the same measurement is repeated under the same conditions. Environmental awareness reminds us that temperature, humidity, and vibration can tilt results, sometimes more than obvious operator error. In DIY projects, treating calibration as a loop rather than a single event helps you catch drift early and reduce surprises during audits or job tasks.
wordCount_placeholder
Tools & Materials
- Reference standard (e.g., calibration weight, thermometer reference)(Use certified, traceable standards where possible)
- Calibrated measuring instrument under test (e.g., digital multimeter, scale)(Ensure device is within its operating range)
- Calibration records/logbook(Document serials, date, environment)
- Tools to adjust (screwdriver, Hex/Allen keys)(Only if adjustment is part of calibration)
- Environmental monitor (temperature/humidity)(Record ambient conditions)
Steps
Estimated time: 60-90 minutes
- 1
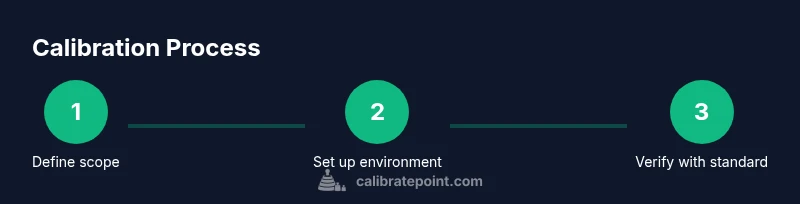
Define calibration scope
Identify which instrument, which range, and which tolerance will define success. Clarify whether the goal is acceptance testing, drift tracking, or routine maintenance. Write the scope down so all participants share the same objective.
Tip: Document the instrument’s model, serial number, and the exact reading you expect. - 2
Set up controlled environment
Establish a stable testing environment. Record ambient temperature and humidity. Minimize vibration and thermal cycling that could skew results. Confirm that the reference standard is stable before starting.
Tip: Keep the environment within the instrument’s stated operating range during testing. - 3
Collect baseline readings
Take multiple readings with the instrument as-is to establish a baseline. Use the same procedure and the same reference standard for each trial. Note any outliers and assess whether they result from operator technique or equipment drift.
Tip: Use a consistent measurement sequence to reduce variability. - 4
Apply adjustments
If drift exists, apply the smallest practical adjustment first. Re-check immediately after each small change to verify effect. If the adjustment worsens accuracy, revert and reconsider the approach.
Tip: Avoid overcorrecting; incremental changes are safer and easier to audit. - 5
Verify with reference standard
Re-measure using the reference standard to confirm the adjustment achieved the target. Compare results against the tolerance window. Repeat measurements to confirm stability before finalizing.
Tip: Use at least 3 consecutive readings to confirm stability. - 6
Record results and plan next checks
Document all readings, adjustments, certificates, and the environment. Schedule the next calibration according to risk, usage, and standards guidance. Store records in a retrievable, auditable format.
Tip: Create a repeatable template for future calibrations.
Questions & Answers
How often should I calibrate equipment?
Calibration frequency depends on how often the instrument is used, the criticality of measurements, and the environment. Follow manufacturer guidelines and your internal QA plan; for high-risk or high-variance tools, consider more frequent checks.
Calibration frequency depends on usage, risk, and environment; follow manufacturer guidelines and your QA plan for high-risk tools.
What does traceability mean in calibration?
Traceability means readings can be linked to national or international standards through an unbroken calibration chain. It provides confidence that measurements are comparable over time and across locations.
Traceability links measurements to recognized standards through a documented calibration chain.
What should I do if a device fails calibration?
If a device fails calibration, isolate it from critical work, investigate potential causes, and either adjust per the protocol or replace the instrument. Recalibrate after any adjustment and verify with the reference standard.
If calibration fails, remove from use, diagnose cause, adjust or replace, then recheck with a standard.
Do I need to send equipment to an accredited lab?
Accredited labs are recommended for critical instruments or when formal certification is required. For many DIY and shop applications, in-house calibration with traceable standards is sufficient if properly documented.
Accredited labs are best for critical tools or formal certification; in-house calibration can work with proper records.
Can I calibrate equipment at home?
Yes, for many common tools you can perform routine calibration at home with reference standards and documented procedures. Ensure you follow safety guidelines and store certificates for future audits.
You can calibrate many tools at home using proper standards and procedures, with safety in mind.
Watch Video
Key Takeaways
- Define calibration scope before starting.
- Use traceable references and log results.
- Maintain consistent environmental conditions.
- Document adjustments and verification results.
- Schedule regular calibrations to prevent drift.