DIY Calibrated Microphone: A Practical Guide
Learn to build and calibrate a DIY calibrated microphone with a repeatable workflow, practical tips, and validation steps for reliable recordings in home studios and workshops.

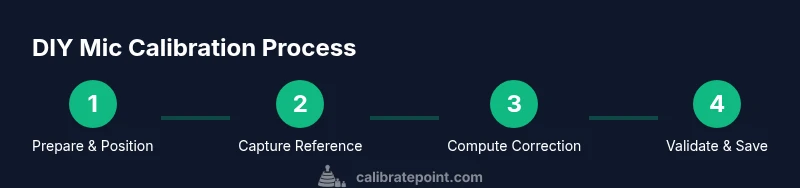
You will learn how to build and calibrate a DIY microphone using a stable reference source, a calibrated measurement chain, and accessible software. The process covers establishing a repeatable test setup, capturing frequency response, and applying corrective adjustments so your mic produces consistent, usable results for basic field work or home studios.
Why calibrate a microphone yourself
According to Calibrate Point, calibrating a microphone yourself helps you understand and control the chain from sound source to recorded signal. The goal is to improve repeatability, reduce variation between microphone units, and document results for future comparisons. This isn't about achieving studio‑grade accuracy for every scenario, but about building a dependable baseline you can trust for projects, podcasts, or field recordings. A DIY calibration workflow also provides a hands‑on educational path for technicians and hobbyists who want tangible feedback from each measurement.
In practice, a DIY calibrated microphone combines a known reference, a stable test signal, and transparent data processing. You’ll learn to quantify how your microphone responds across frequency, then apply a correction so subsequent recordings align with that reference. The approach is iterative: measure, compare, correct, and re‑measure. As you gain experience, you’ll refine your setup for faster turnarounds and more repeatable results.
You should understand that calibration data is only as good as your process: all choices—sound source, mic positioning, room treatment, gains, and software settings—affect outcomes.
Tools & Materials
- Calibrated reference microphone (with certificate)(A known, traceable reference helps establish an accurate baseline for your test mic.)
- Microphone under test(The mic you want to calibrate and document.)
- Calibrated sound source (loudspeaker or sound level calibrator)(Prefer a source with flat response or a known spline for repeatable tests.)
- Audio interface or preamp with clean gain staging(Low noise, adequate headroom, and phantom power if needed.)
- XLR cables, adapters, and mic stands with clips(Secure mounting to minimize movement during measurements.)
- Measurement software (e.g., REW, ARTA, or similar)(Open‑source or commercial tools that support frequency response analysis.)
- Acoustic environment or isolation panel(Optional but improves measurement repeatability by reducing reflections.)
- Recording computer with adequate RAM(For running software and storing measurement data.)
Steps
Estimated time: 2-4 hours
- 1
Prepare the workspace and gather tools
Clear noise sources, power down nonessential equipment, and lay out every item from your tools list within reach. This reduces setup time and helps you maintain consistent conditions across measurements.
Tip: Label cables and mic positions so you can reproduce the same setup on subsequent tests. - 2
Mount reference mic and test mic securely
Place both microphones at the same distance from the source, aligned along the same axis, and mounted on stable stands to minimize vibration.
Tip: Use identical mic clips and positioning to minimize mechanical differences. - 3
Connect microphones and set gain
Connect each mic to the interface, set initial gains so peaks stay well below clipping, and disable any internal DSP that could alter the signal.
Tip: Record a short test tone to verify cleaner levels before full measurements. - 4
Generate a stable reference signal
Use a calibrated test signal (sine sweep or pink noise) and ensure the source is consistent across measurements. Confirm the signal plays at the intended level without distortion.
Tip: If your source permits, use a fixed SPL reference or calibrate the source with the reference mic first. - 5
Capture baseline measurements for both mics
Record multiple iterations of the signal, at the same distance and environment, for statistical stability. Save raw data and label each run clearly.
Tip: Take at least 3 sweeps per mic to mitigate random noise. - 6
Compute the correction curve
In software, compare the test mic response to the reference across frequency. Compute the inverse of the deviation and design a correction filter (EQ or FIR) to flatten the response.
Tip: Document the chosen analysis window and smoothing settings for reproducibility. - 7
Apply correction and re‑test
Apply the correction to future recordings and re-measure with the same setup to verify improvement in the response curve.
Tip: If results drift, re‑align microphone positioning and re‑calibrate the source level. - 8
Validate with independent signals and document results
Test with a second, independent signal (e.g., a different sweep) to verify consistency. Save calibration data and create a baseline for future reference.
Tip: Keep a calibration log file with dates, conditions, and outcomes.
Questions & Answers
What is calibration and why would I calibrate a DIY microphone?
Calibration aligns your microphone’s response to a known reference, reducing variability and improving consistency across recordings. It helps you quantify and correct for deviations in frequency response and sensitivity.
Calibration aligns your mic to a known standard, improving consistency. It helps you understand how your mic behaves and how to correct it.
What equipment do I need to calibrate a mic at home?
A calibrated reference microphone, the mic under test, a stable sound source, an audio interface, measurement software, cables, and a stand are the core items. An acoustically treated space improves results but is not strictly required.
You’ll need a reference mic, your mic under test, a stable sound source, an audio interface, and software to analyze the data.
How accurate can a DIY calibrated microphone be compared to a pro lab?
DIY calibration can achieve meaningful improvements and repeatable baselines for many hobbyist and educational uses, but pro labs use traceable standards and tighter tolerances. Expect good but not lab-grade accuracy.
A DIY setup gives you solid accuracy for learning and non-critical work, but professional labs offer tighter, traceable tolerances.
How often should I recalibrate my mic?
Recalibration frequency depends on usage and recording criticality. Recheck if you notice drift, after hardware changes, or if you’re moving between environments.
Calibrate whenever you notice drift or change environments or gear.
Can I calibrate different mic types the same way (dynamic vs condenser)?
The general workflow is similar, but you must account for differences in SPL handling, phantom power needs, and frequency response peculiarities of each mic type.
The process is similar, but adapt steps for dynamic versus condenser mics.
What if I don’t have a reference mic?
Without a reference mic, you can still perform relative calibration against a known test signal, but you won’t have an absolute baseline. Consider acquiring a basic calibrated mic or using a trusted external reference.
Without a reference mic you’ll calibrate by relative measures, which isn’t as reliable as a true reference.
Watch Video
Key Takeaways
- Define a repeatable reference baseline first
- Maintain identical mic positioning for all tests
- Document every step and setting for reproducibility
- Validate with independent signals after applying corrections
- DIY calibration is practical for education and non-critical tasks