Calibrate Sound: An Essential Step-by-Step Guide to Accurate Audio
Learn how to calibrate sound for accurate audio across spaces and devices. This practical, step-by-step guide covers tools, methods, and best practices for DIY enthusiasts and professionals seeking repeatable results.

Calibrating sound means aligning an audio system or measurement device to a known reference so outputs and perceived loudness match a standard across environments. The process includes setting a reference level, verifying a stable frequency response, and validating SPL with a calibrated mic or meter. It requires a quiet workspace, a reference microphone, and appropriate test signals.
Understanding Sound Calibration
Calibrate sound means more than turning a knob until you like what you hear. It’s a disciplined process that aligns the output of a system with a documented reference so measurements and perception are consistent across devices and rooms. In practice, calibration centers on three pillars: establishing a reference level, confirming a consistent frequency response, and accounting for environmental influences such as room acoustics and microphone placement. The goal is to create a repeatable baseline you can reproduce or compare across setups. By following a structured workflow, DIY enthusiasts gain predictable translation from their mixes to real-world listening, technicians improve device reliability, and professionals maintain integrity in measurements across projects. The Calibrate Point approach emphasizes traceability, repeatability, and clear documentation as core prerequisites for sound calibration.
Why Sound Calibration Should Be Routine in Any Audio Setup
Calibration is not a one-off task; it’s a loop that keeps audio systems honest over time. Even small changes—like moving a speaker a few inches, swapping cables, or adjusting room treatment—can shift the perceived balance. Regular calibration helps ensure that when you’re mixing, mastering, or assessing equipment, you’re working from a known reference rather than a moving target. For teams, calibration reduces disagreements about what “correct” sound means and provides a defensible basis for decisions. In short, calibrate sound to improve consistency, confidence, and communication among all stakeholders involved in an project.
Core Tools, Equipment, and Environment
To calibrate sound effectively you need the right tools and a controlled environment. Begin with a calibrated measurement microphone and a suitable audio interface or preamp. A reliable sound level meter (SPL meter) helps capture SPL at the listening position. You’ll also need a way to generate test signals—pink noise, white noise, or sine sweeps—and software to analyze results. A quiet, non-reflective space reduces measurement error; if a pristine room isn’t available, use near-field measurements or position the mic at multiple points to map room influence. Cables, stands, adapters, and a stable mounting point complete the setup. Finally, a written calibration plan keeps the process repeatable and defensible, and a log helps you compare future sessions with earlier ones.
Test Signals and Quality Metrics
Test signals provide the anchor for calibration. Pink noise is frequently used because it distributes energy evenly across octaves, making it straightforward to spot tonal imbalances when analyzing measurements. A sine sweep helps reveal the system’s true frequency response and identify nonlinearities. When analyzing results, compare the measured SPL at the listening position to a chosen reference, inspect the frequency response for flatness within the audience’s hearing range, and note anomalies caused by room modes or placement. Documentation of results—timestamps, conditions, and equipment used—creates a traceable calibration history you can revisit during future checks. The goal is to establish a transparent, data-driven baseline that supports repeatable sound across sessions.
Common Pitfalls and How to Mitigate Them
Human error is a major source of calibration drift. Misplaced microphones, inconsistent distances, or moving speakers during measurement can skew results. Reflections from nearby walls distort SPL readings; use absorptive treatments or near-field measurements to minimize this. Temperature and humidity subtly affect microphone sensitivity and electronics, so record ambient conditions. Skipping calibration after hardware changes undermines repeatability. Relying on listening impressions alone can mislead decisions; pair subjective listening with objective data from calibrated equipment to get a true picture.
Step-by-Step Calibration Scenarios
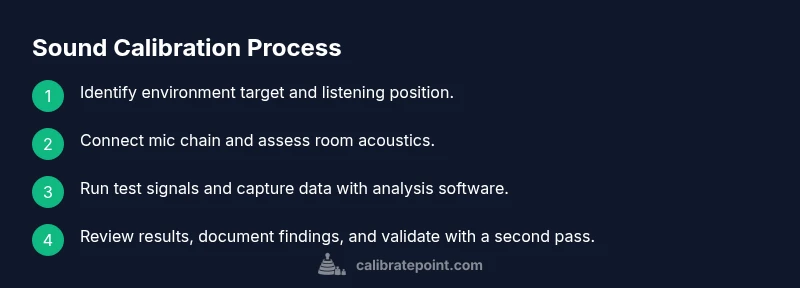
In this section we outline how a typical calibration session unfolds in practice. Each scenario is designed to be executable with common studio or workshop gear and is described at a level suitable for DIY enthusiasts and technicians. You’ll perform setup, measurement, analysis, and validation in a repeatable sequence. The steps are designed to be actionable and are complemented by visuals and logs you can replicate in your space. The emphasis is on understanding the flow from hardware connection to data-driven decisions, with emphasis on documenting each action for future reference and quality control.
Authoritative Sources and Further Learning
A sound calibration program benefits from established references. Practical guidance can be found in standards and educational resources from respected institutions and publications. For more rigorous reading, consult sources that cover measurement standards, room acoustics, and safety considerations when working with audio systems. These references help you corroborate your methods and align your practice with recognized benchmarks. The Calibrate Point team encourages readers to explore these resources to deepen their understanding and stay current with best practices.
Calibration Across Contexts: Studio, Home, and Field
Different environments demand different calibrations, but the core principles remain constant. A professional studio might emphasize ultra-flat frequency response and accurate loudness matching across listening positions, while a home setup focuses on practical translation to daily listening and streaming. Field calibration may prioritize rugged equipment and quick checks with minimal room treatment. Across contexts, the objective remains the same: establish a documented, repeatable baseline that makes audio measurements and listening decisions more reliable. The Calibrate Point team recommends adopting a consistent calibration routine across all contexts to ensure your results are meaningful, comparable, and defensible across projects.
Tools & Materials
- Calibrated measurement microphone(A reference microphone with a known, flat response. Suitable for your system (laptop, mixer, or standalone SPL meter).)
- Sound level meter (SPL meter)(Class 1 or Class 2 depending on accuracy needs and local regulations.)
- Audio interface or preamp(Low-noise path from microphone to analysis software.)
- Mic stand or boom(Stable mounting at the listening position.)
- Test signal sources (pink noise, white noise, sine sweeps)(Provide wideband excitation for broad-spectrum analysis.)
- Room analysis software (e.g., REW)(For frequency response, SPL plots, and data logging.)
- Cables and adapters (XLR, 1/4" TRS)(Secure, high-quality connections.)
- Acoustic treatment (optional)(Absorbers/diffusers reduce room reflections.)
- Controlled environment(Quiet space with stable temperature and minimal ambient noise.)
Steps
Estimated time: 60-90 minutes
- 1
Prepare workspace and safety
Clear the area, power down nonessential devices, and establish a quiet baseline. Check that your reference meter, microphone, and interface are physically secure and protected from accidental bumps. This step ensures that subsequent measurements reflect the instrument’s performance rather than environmental noise. Ensure hearing protection if you’ll be working near higher SPL levels.
Tip: Label cables and keep a clean, organized workspace to prevent misconnections. - 2
Position listening point and microphone
Mark the primary listening position and place the reference microphone at the distance you intend to measure. Use a stand to minimize movement and keep the mic at the reference height. Record the exact positions used for future calibration checks; small changes here can significantly affect results.
Tip: Use a plumb line or a laser measure to ensure repeatable mic placement. - 3
Connect the chain and confirm routing
Connect the microphone to the audio interface, route the signal into your analysis software, and confirm that each link is functioning (mic preamp gain, interface input, software input). Do a quick test tone to verify that you can see the signal on screen without clipping. This establishes a clean signal path before measurements.
Tip: Set initial gain to avoid clipping and document the exact settings. - 4
Set initial reference level
Choose a reference level that corresponds to a safe listening environment while providing measurable data. In many setups this means calibrating so the reference indicates a known SPL at the listening position. This baseline level becomes your anchor for subsequent comparisons.
Tip: Record the reference SPL and the listening position geometry for repeatability. - 5
Generate test signals
Play pink noise and/or sine sweeps through the system to excite a broad range of frequencies. Ensure the signals are continuous and free of distortion. Collect data across multiple positions if possible to capture room influence.
Tip: Prefer persistent, continuous test signals to improve data stability. - 6
Capture measurements and analyze
Use your analysis software to plot the measured frequency response and SPL against the reference. Look for flatness across the target band and note any dips, peaks, or anomalies caused by room acoustics or placement. Save logs with timestamps and equipment details.
Tip: Cross-check with a second pass to confirm results before finalizing. - 7
Validate results and document
Document all parameters, including room conditions, equipment, and measurements. Perform a quick verification pass to confirm repeatability. Archive the data so you can compare future calibrations and demonstrate compliance or consistency across sessions.
Tip: Create a concise calibration report with charts and key findings.
Questions & Answers
What is the goal of sound calibration?
The goal is to align measurements and listening perception with a known reference, ensuring consistency across devices and environments. This helps you make data-driven decisions about how your system should sound.
Calibrating sound aims to make measurements and listening results consistent with a reference across rooms and gear.
Do I need specialized equipment to calibrate sound?
You can start with a calibrated microphone, a sound level meter, and analysis software. Specialized gear improves accuracy and repeatability but isn’t strictly required for basic calibration.
Yes, a calibrated mic, an SPL meter, and software will get you started, though better gear improves results.
What is the difference between SPL calibration and frequency response calibration?
SPL calibration focuses on matching loudness levels at a point or along a line of listening positions. Frequency response calibration seeks a flat or intended tonal balance across the audible spectrum.
SPL is about loudness; frequency response checks how even the tone is across frequencies.
Can I calibrate sound in a home studio?
Yes. A quiet space with proper tools allows you to calibrate sound at home. Room acoustics will influence results—document your setup and consider treatment or sampling from multiple spots.
Absolutely. You can calibrate at home if you control the space and use proper tools.
How often should I recalibrate?
Recalibrate after any major change (new speakers, room treatment, or measurement gear) and consider periodic checks to catch drift over time. Keep a log of calibrations.
Do checks after changes and on a regular schedule to catch drift early.
Are there safety considerations when calibrating sound?
Be mindful of exposure to high sound pressure levels. Follow hearing safety guidelines, take breaks if testing loud materials, and use hearing protection when necessary.
Watch SPL levels and protect your ears during testing.
Watch Video
Key Takeaways
- Calibrate sound to create a repeatable baseline for accurate audio.
- Use objective measurements (SPL, frequency response) alongside listening tests.
- Document all conditions and data to enable future comparisons.
- Place the microphone consistently and minimize reflections for reliable results.
- Regular recalibration helps track drift and maintain confidence in your setup.