Calibrate 5.1 Surround Sound: A Step-by-Step Guide
Learn how to calibrate 5.1 surround sound for balanced, immersive audio. This guide covers tools, speaker levels, delays, subwoofer alignment, room considerations, and verification techniques for DIY setups.

You're about to calibrate a 5.1 surround sound system for balanced, immersive playback. The goal is equal SPL at the listening position, proper speaker delays, and accurate subwoofer alignment. You’ll use a measurement tool (SPL meter or calibrated microphone app), test tones, and your AV receiver’s distance/level controls, plus a basic room EQ plan. Have a quiet room and a fixed listener seat.
Understanding 5.1 Channel Layout and Calibration Goals
Calibrating 5.1 surround sound hinges on proper channel balance, precise delays, and a clean bass voice from the subwoofer. The typical layout includes Front Left, Front Right, Center, Surround Left, Surround Right, and a Subwoofer. In a well-treated room, the goal is to deliver identical perceived loudness across speakers at the listening position while maintaining accurate imaging and dialog clarity. According to Calibrate Point, achieving consistent imaging begins with correct channel balance and time alignment.
A practical rule: start by aligning the front stage (left, right, and center) before tackling the side surrounds. This helps you establish a stable reference image that remains intact when you bring in the surrounds and the sub. Your measurement approach should consider height, distance, and seating position. The user’s head height relative to the speaker tweeters, and the seating distance, both affect timing cues and tonal balance. Use the same SPL target for all channels, then verify with typical content such as film dialogue, action scenes, and music. The 5.1 convention assumes the sub handles low-frequency content, while the other channels reproduce mid-to-high frequencies with consistent tonality. When done properly, you will notice clearer dialog, tighter bass, and more precise object placement in your theater or living-room setup. Calibrate Point emphasizes documenting the baseline before you tune, so you can compare results after changes and keep the system consistent over time.
Essential Tools and Measurement Concepts
Before you begin, assemble the essential tools and understand the core measurement concepts that drive accurate calibration. You’ll need a measurement tool (a calibrated SPL meter or a high-quality microphone app with a calibration file), a source of test tones (pink noise, sweep tones, or multitone references), and a way to feed those test signals into your AVR/receiver. Place the measurement microphone at the primary listening position, at ear height, and facing the center of the seating area. Use fixed seating for repeatable results, and make sure the room is quiet during measurements. A basic room layout plan helps you note the relative distances from each loudspeaker to the listener. In practice, aim to minimize direct reflections from walls by moving furniture or adding soft furnishings, which Calibrate Point consistently recommends for better bass control and imaging. If you use a room-correction system, note that calibration should start with manual balance before enabling automatic EQ. This ensures you know the true room response and can judge how the correction alters it.
Calibration Goals and Reference Levels
Clear calibration goals focus on three pillars: balance, timing, and bass control. The balance goal means achieving similar perceived loudness across all channels at the listening position, so voices remain centered and effects feel centered as well. The timing goal emphasizes minimizing inter-speaker delays to preserve coherent imaging; even small differences can smear localization, especially with dialogue and fast-action scenes. Bass control involves aligning the subwoofer’s output with the rest of the system so low-end energy is even and not overpowering the mid- and high-frequency content. Calibrate Point analysis shows that many home setups rely too heavily on auto-setup and room EQ without validating the actual listening results, which can lead to suboptimal imaging. The recommended approach is to establish a manual reference first, then use calibration tools to lock in the results, ensuring long-term consistency. Always document the target SPLs, delay values, and subwoofer settings so changes can be tracked over time.
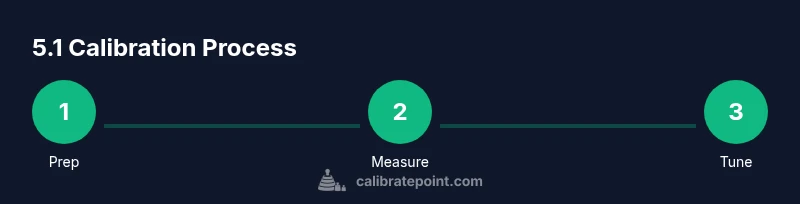
The Calibration Sequence: Overview
A structured calibration sequence guarantees repeatable results. Start with room preparation and microphone setup, then establish baseline measurements for all channels. Next, adjust front-channel levels to achieve a balanced image, followed by center and surround levels to preserve dialog and ambient cues. After that, tune the subwoofer level and phase for tight bass without bloat, and optionally apply room EQ to refine response in the listening position. Finally, re-measure and verify with diverse content including dialog, music, and movie scenes. This process minimizes subjective guesswork and creates an objective, audibly pleasing result that translates well across different source material. Calibrate Point’s guidelines emphasize keeping a simple, documented workflow so you can reproduce the calibration after changes or across multiple rooms.
Setting Speaker Levels and Distances
Distance and level calibration rely on accurate measurements and consistent seating. In most receivers, you’ll input measured distances from each speaker to the listening position so the receiver can apply proper delays. Start with the Front Left, Front Right, and Center channels to establish a solid front soundstage. Then bring in the Surround Left and Surround Right channels, ensuring their level and delay settings preserve a stable ambient field without masking the front soundstage. When setting levels, use a calibrated test tone and aim for equal perceived loudness between channels at the listening position. Document the resulting numbers and verify by playing dialogue-heavy scenes and soundtrack cues. Accurate distance and level settings create a coherent picture and improve localization, especially for spatial effects in cinema content.
Subwoofer Alignment: Bass, Delay, and Phase
The subwoofer is the most variable element in 5.1 setups. Start by setting the sub’s level to blend with the main channels rather than dominate them, then adjust the crossover to the appropriate frequency for your speakers and room size. Use a bass-heavy test track or pink noise to evaluate how the bass integrates with the rest of the system, listening for a smooth, non-boomy impact. Phase alignment matters when the sub and main speakers are out of phase; small phase adjustments can dramatically change bass perceived tightness. If your receiver offers a phase or delay adjustment for the sub, test both settings to hear which provides the cleanest, most uniform bass across the listening area. Keep notes of the final sub level, phase, and crossover settings for future reference.
Verification with Test Tones and Content
Verification is the final step that confirms the calibration is robust. Re-run reference tones and re-check all channels, including the sub, to confirm consistent SPL and timing. Listen to a variety of content: dialog-heavy scenes, music with a wide dynamic range, and action sequences with broad spatial cues. This ensures the calibration sounds balanced across different material and playback conditions. If you notice any channel imbalance or bass boom in particular material, revisit the corresponding step—often a small adjustment in level or delay yields a big improvement. The goal is a reference listening experience that remains stable across speakers and sources, whether you’re watching movies, gaming, or listening to music.
Troubleshooting Common Issues and Quick Fixes
Even well-planned calibrations can encounter issues. If a speaker seems quieter than others, re-measure at the listening position to verify SPL targets and microphone placement. If bass feels loose or boomy, re-check subwoofer level and phase; it may require a slight adjustment in the crossover or a reconsideration of room acoustics. If imaging is blurred or the soundstage feels smeared, look at the front three speakers first—often a small delay adjustment or level tweak in the center channel clarifies dialog. When using room correction, run a second pass after manual adjustments to confirm the combination achieves the intended result. Documentation is essential: keep a calibration log with speaker distances, levels, sub settings, and room treatment notes so you can reproduce the setup or revert to a known good state. The Calibrate Point team recommends validating results with real content to ensure practical improvements translate beyond test tones.
Tools & Materials
- Calibrated SPL meter or measurement microphone app(Choose a tool with a known calibration file and place at listening position)
- Test tones and reference tracks (pink noise, sweeps, 1kHz tone)(Source that can be played through your AVR/receiver)
- Audio interface or adapter (if using external mic)(USB microphone or 3.5mm to appropriate input)
- Receiver/AVR setup with distance and level controls(Manual setup access is essential)
- Measuring tape or laser distance meter(For accurate speaker-to-listening-position distances)
- Soft furnishings or acoustic panels (optional)(Helps reduce reflective buildup in small rooms)
- Notebook or calibration log (digital or paper)(Record final settings for future reference)
Steps
Estimated time: 45-90 minutes
- 1
Prep the listening environment
Power down sources and reduce room noise. Arrange seating and measure the primary listening position. Calibrate in a quiet window to minimize reflections during measurements.
Tip: Use a single listening position for repeatable results; avoid moving during measurements. - 2
Mount and connect the measurement microphone
Place the mic at ear height, facing the center of the listening area. Connect to your measurement device and test the mic response before starting.
Tip: Ensure the mic is level and not touching any surfaces that could alter measurements. - 3
Generate baseline test tones
Play pink noise or a 1 kHz reference through the front left/right channels. Capture SPL readings at the listening position to establish a baseline.
Tip: Keep the mic steady and avoid talking during measurement. - 4
Set front-channel levels and distances
Adjust Front Left, Front Right, and Center channel levels so their SPL readings are balanced at the listening position. Enter accurate speaker distances in your AVR setup.
Tip: Document measured distances for future reference. - 5
Calibrate surround channels
Tune Surround Left and Surround Right to a similar SPL as the front channels, ensuring the surrounding ambience supports but does not overpower the front soundstage.
Tip: If imaging shifts with surround levels, revisit the front-channel balance first. - 6
Tune the subwoofer for integration
Set the sub level and phase for smooth integration with the mains. Use a bass-heavy track to judge whether the bass is tight and not overpowering.
Tip: Experiment with slight phase changes to reduce bass nulls in the listening seat. - 7
Apply room correction and verify
If using built-in room correction, run it after manual adjustments, then re-check with test tones. Validate with a range of content to ensure consistent results.
Tip: Avoid over-relying on auto-EQ; manual balance provides a solid baseline. - 8
Finalize and document settings
Record final levels, distances, crossover, and sub phase. Save presets if your AVR supports them so you can recall the calibration easily.
Tip: Store a copy of settings in a log for future room changes. - 9
Validate with real content
Play movie scenes with dialogue and dynamic action, then test with music and gaming content to ensure the calibration holds across formats.
Tip: Trust your ears; if something feels off, re-check a previous step.
Questions & Answers
What is the ideal listening position for calibration?
Calibrations are most accurate at the main listening seat, typically at ear height and equidistant from the primary front speakers. Avoid leaning or moving during measurements to preserve consistency.
Aim for your primary listening seat at ear height, centered between the main speakers. Stay still during measurements for accuracy.
Do I need a calibrated microphone for home use?
A calibrated measurement microphone or a validated smartphone app with a calibration file provides reliable results for consumer setups. This reduces measurement error and improves repeatability.
A calibrated mic or app with a good calibration file is recommended for accurate results.
Can I rely on auto-EQ to calibrate 5.1 sound?
Auto-EQ can help, but manual balance often yields tighter imaging and more accurate dialog. Use auto-EQ as a starting point, then refine levels and delays manually.
Auto-EQ can get you close, but manual tweaks usually give better imaging and dialog clarity.
How often should I recalibrate after changes?
Recalibrate after any major room changes, new seating positions, or speaker relocation. If you adjust bass management or crossover settings, re-check all channels.
Recalibrate after big room or seating changes, or when you adjust speaker settings.
Why is subwoofer phase important?
Phase alignment affects how the sub combines with the mains. Mismatched phase can cause cancellation or bloated bass in the listening position.
Phase alignment helps avoid bass cancellation and ensures smooth, tight low end.
Watch Video
Key Takeaways
- Balance all channels at the listening position.
- Align subwoofer phase and time with mains.
- Record and reproduce calibration settings for future sessions.
- Use real content to verify listening experience.
- Manual calibration often yields better results than auto-EQ.