How to Calibrate a JBL 5.1 Soundbar
Learn how to calibrate a JBL 5.1 soundbar for balanced sound, clear dialogue, and immersive surround. This guide covers placement, levels, bass management, room tuning, and safe setup for DIY enthusiasts, technicians, and pros. Includes tips, tools, and a printable checklist.

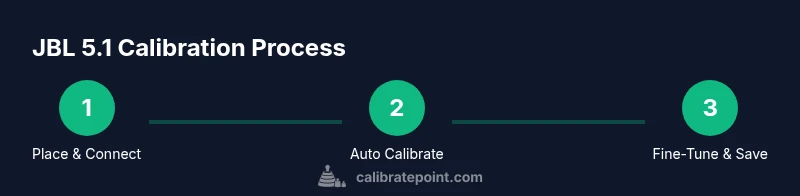
To calibrate jbl 5.1 soundbar, start with proper placement and clean connections, then run auto-calibration if your model offers it. Balance the main unit, subwoofer, and rear channels using test tones or spoken cues, adjust tone settings, and save the profile. Re-check with a reference track to confirm consistency.
Why Proper JBL 5.1 Calibration Elevates Your Home Theater
Calibrating your JBL 5.1 soundbar isn't just about louder bass or crisper dialogue—it’s about achieving a balanced, immersive listening experience that matches your room and content. According to Calibrate Point, proper calibration starts with a solid setup: correct placement, clean connections, and an initial level that avoids clipping. The Calibrate Point team found that most homes see the biggest gains when the front left/right and center channels are set at similar reference levels, and the subwoofer is tuned to blend with the main speakers rather than overpower them. In practice, calibration reduces listening fatigue, clarifies voice detail, and helps surround effects land where the director intended. Keep expectations realistic: you won’t get studio-grade accuracy from a consumer soundbar, but you can achieve a “near-field theater” sound that feels natural and spacious across most seating positions.
This article targets DIY enthusiasts, technicians, and professionals seeking reliable calibration guidance, with Calibrate Point as your expert reference.
When you calibrate jbl 5.1 soundbar, you’re aligning the system to your room and content, not chasing a fixed spec. The result should be a cohesive blend where speech remains intelligible, effects land with precision, and bass supports the overall mix without masking details.
note”:null],
blockData
Tools & Materials
- Smartphone with SPL app(iOS/Android; free or paid app for real-time SPL readings)
- Calibrated SPL meter (optional)(More precise than a smartphone; useful in large rooms)
- HDMI 2.0/ARC or Optical cable(Ensure the soundbar is connected to the TV via ARC/Optical for auto-calibration signals if available)
- Tape measure or ruler(Verify listening distance and rear speaker placement if needed)
- Reference content (movies/music)(Use scenes with dialogue and dynamic effects for testing)
- Paper and pencil for notes(Record target levels and adjustments for repeatability)
- Optional mounting hardware(For wall-mounting rear speakers or the bar if needed)
Steps
Estimated time: 60-90 minutes
- 1
Check compatibility and connections
Power on the soundbar and TV, verify that HDMI ARC or Optical is available and active, and confirm the soundbar firmware is up to date. This step ensures the auto-calibration signals can be received if your model supports them.
Tip: If ARC isn’t available, use the optical connection and adjust delays manually later. - 2
Position the soundbar and subwoofer
Place the soundbar centered under the TV, with the subwoofer on the same side of the room at a reasonable distance from walls. If you have rear speakers, position them slightly behind and above seating level for a more natural surround field.
Tip: Maintain symmetry: the listening position should be equidistant from left and right channels. - 3
Run auto-calibration (if available)
Use the JBL app or the soundbar’s on-device menu to start auto-calibration. The process sends test tones and adjusts initial levels for you.
Tip: Allow the process to complete without interruption and avoid changing other volume settings during calibration. - 4
Set target channel levels manually
If auto-calibration isn’t available or you want finer control, set front, center, rear, and sub levels to create a balanced baseline. Use test tones that separate dialogue, effects, and bass to judge adjustments.
Tip: Increase dialogue clarity by keeping the center channel steady while adjusting bass and surround levels separately. - 5
Tune bass management and sub crossover
Adjust the subwoofer level to blend with the main speakers. If the system offers a crossover setting, set it to a practical value that keeps bass from overpowering mids.
Tip: Avoid a bass-first setup; aim for a cohesive low end that supports, not muddies, the midrange. - 6
Fine-tune with reference content
Play scenes with voice-overs and action to confirm timing, punch, and intelligibility. Make small incremental changes (1–2 dB) until the balance feels natural.
Tip: Use a familiar track to gauge consistency across different content types. - 7
Save presets and re-test
Store your calibration as a named preset. Re-test with multiple sources (movies, music, gaming) to ensure stability across content.
Tip: Document the final settings for future reference or room changes. - 8
Maintenance and re-calibration schedule
Set a reminder to re-check calibration after furniture changes, new acoustics, or a firmware update. Small room changes can shift optimal settings.
Tip: Periodic checks prevent drift and keep your system performing consistently.
Questions & Answers
Do I need a measurement microphone to calibrate a JBL 5.1 soundbar?
Not typically. Many JBL soundbars provide auto-calibration via the app or on-device menus. A measurement microphone helps for more precise AVR-style setups, but it’s optional for most consumer configurations.
Usually you don’t need a mic. Use auto-calibration and manual tweaks, then test with familiar content to confirm balance.
Can auto-calibration replace manual tweaks?
Auto-calibration provides a solid starting point, but listening-based tweaks are often required for best results in your room.
Auto-balance is a good baseline; rely on your ears for fine-tuning.
Where should the subwoofer be placed for best results?
Place the sub away from corners and walls if possible to avoid boomy bass. Test different spots in the room while listening for a tight, controlled low end.
Try a few positions and pick the one that gives you even bass without overwhelming mids.
How long does calibration typically take?
A thorough calibration usually takes 45–90 minutes depending on room size and features available.
Expect about an hour for a careful setup.
Is calibration different for movies vs. music?
Yes. Movies often benefit from stronger dialogue clarity and balanced surrounds, while music may emphasize accurate tonal balance and bass response.
Movies and music may require a few profile tweaks to suit content type.
Watch Video
Key Takeaways
- Balance channels before bass to preserve dialogue clarity
- Use auto-calibration as baseline, then fine-tune manually
- Test with varied content to ensure consistent performance
- Document final settings and revisit after room changes