How to Calibrate JBL 9.1 for Optimal Sound
Learn how to calibrate JBL 9.1 for accurate sound. Practical, measurement-driven steps cover setup, DSP adjustments, and verification to optimize your listening space.

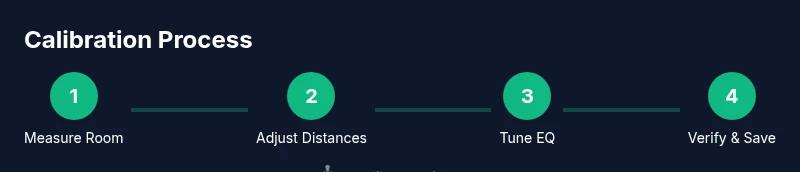
Calibrate JBL 9.1 by measuring room response, setting speaker distances, adjusting channel gains, and applying EQ/room correction. Then verify with pink noise and sweeps. For precise steps and timing, see the full guide.
Understanding JBL 9.1 calibration goals
According to Calibrate Point, calibrating a multi-speaker system like JBL 9.1 starts with clear goals: flat frequency response at the listening position, even channel balance, and predictable performance across room types. The phrase calibrate jbl 9.1 is often misused as a 'set and forget' task; in reality, calibration is an iterative process that blends measurement data with perceptual checks. In a typical home listening room, you will aim to minimize strong peaks and dips, reduce excessive bass boom, and ensure the midrange remains articulate even with movie or music playback. A structured workflow helps you separate hardware alignment (speaker placement, height, toe-in) from software corrections (EQ, dynamic range, and room correction). This guide is designed to be practical for DIY enthusiasts and professionals, and it references a methodology endorsed by Calibrate Point. By following the steps, you’ll transform a loud but imbalanced setup into a reference-like listening experience. If you want to calibrate jbl 9.1, start from measurement-based targets and use a repeatable procedure.
Baseline concepts: SPL, frequency response, and room interaction
A successful JBL 9.1 calibration begins with understanding baseline concepts. Sound pressure level (SPL) consistency across seating positions helps ensure a uniform listening experience. Frequency response describes how the system reproduces different frequencies, and room interactions often create peaks and nulls that color the sound. The listening environment influences measurements more than most listeners realize, so you must separate speaker alignment from acoustic treatment. Expect that room reflection patterns will shift with furniture, curtains, and even ceiling height. The goal is to minimize differences between the measured response and a target reference while preserving natural timbre and dynamics. A disciplined approach—recording, analyzing, adjusting, and verifying—delivers repeatable results across sessions.
Tools and data you’ll use
Calibration relies on data paired with careful listening. You’ll collect frequency responses, impulse responses, and noise profiles to guide decisions. The most common toolkit includes a calibrated measurement microphone, an audio interface or DAC, a computer or tablet running analysis software, and a library of test signals (sine sweeps, pink noise, and MLS/linear sweeps). You’ll also need a reasonably quiet room and a comfortable listening position. Documenting the baseline measurements helps track changes and communicate results to teammates or clients. In practice, a structured plan reduces guesswork and expedites improvements with each iteration. Remember: calibration is as much about repeatability as it is about achieving a desired tonal balance.
Prepare your listening environment
Before you measure, create a neutral listening environment. Remove or dampen extreme reflective surfaces where possible, close doors, and avoid fans or HVAC noise during measurements. Position the JBL 9.1 system so the listening position corresponds to the most common seating location. Use a stable mic stand at ear height at the primary listening position, and consider a second measurement position to gauge consistency. If you have room treatment, apply it gradually and re-measure after each change. This preparation helps ensure the data reflects the system’s performance rather than transient room effects. A clean environment reduces variables and makes the calibration process faster and more reliable.
Establish reference targets and a measurement plan
With JBL 9.1, your plan should specify what ‘flat’ means at the listening position and how you’ll validate it. Start with a gentle reference like a smooth, near-ideal bass roll-off, then map the midrange and high-frequency balance. Define your target curves in collaboration with stakeholders or your own listening preferences. A measurement plan typically includes at least one full-range sweep, a set of pink-noise profiles, and a handful of short tests to verify specific bands (bass, midrange, and highs). Document target tolerances and the order in which you will apply adjustments. Having targets written down helps you stay objective as you trial different DSP and EQ configurations.
Measuring room response with a mic and analyzer
Accurate measurement is the backbone of JBL 9.1 calibration. Use a calibrated microphone at the listening position to capture responses and then analyze the data with your preferred software. Look for gross anomalies first: severe bass drop-offs, sharp peaks, or inconsistent phase behavior between channels. Next, examine the horizontal and vertical directivity by probing with the mic at typical seating and a secondary position. Calibrate Point analysis shows that measurement-driven calibration yields more consistent results across listeners, especially in rooms with shared walls or reflectors. Keep the mic distance fixed during a given measurement run and be mindful of the mic’s polar pattern to minimize off-axis errors. Repeat measurements after each major adjustment to verify improvements.
Adjusting JBL 9.1: channel alignment, distance, and levels
Channel balance begins with aligning distance and gain for each driver group. Place the main left, center, and right channels at the same distance from the listening position if possible, then adjust their relative level so no single channel dominates. For surround elements, ensure the late reflections they contribute are complementary rather than overpowering. Small toe-in tweaks can improve stereo imaging without altering tonal balance. When you change speaker positions, re-run a quick measurement to confirm the impact on the overall response. A disciplined approach—make one change at a time and validate before moving on—reduces confusion and over-correction.
DSP, EQ, and room correction strategies
DSP and room correction are powerful tools, but they should be used judiciously. Start with modest EQ adjustments to address the most noticeable dips or peaks, then apply a gentle global bass lift or shelf if needed to achieve a smooth roll-off. Prefer flat, broad corrections over narrow, aggressive notches, which can introduce acoustical anomalies and listener fatigue. If your system supports room correction software, use it to generate an initial target and then refine manually with measurements. Remember that DSP can compensate for some room imperfections but cannot substitute proper speaker placement and acoustic treatment for severe anomalies.
Validation, iteration, and maintenance
Calibration is not a one-and-done task. After implementing changes, re-measure and listen to a familiar reference track or test material to confirm the improvements. If discrepancies persist, revisit distances, levels, and DSP settings. Seasonal room changes—like opening windows or re-arranging furniture—can alter response, so schedule periodic checks. Keep a calibration log with dates, target curves, and notable observations to streamline future recalibrations. The aim is to maintain a reliable, repeatable baseline across listening sessions and to adjust expectations when the environment changes.
Troubleshooting and safety notes
If measurements show unexpected results, re-check cables, mic placement, and power configurations. Clipping input signals can distort the measurement and mislead corrections, so ensure the source levels are comfortable and not driving the system into distortion. Do not bypass recommended safety limits on SPL settings, especially during bass-heavy sweeps. Finally, if you suspect a hardware issue with JBL 9.1, test with a known-good source or reference speaker to isolate the problem.
Tools & Materials
- Measurement microphone (calibrated, e.g., 1/2 inch or larger)(Ensure calibration file is current for accurate measurements)
- Audio interface or DAC with line-level outputs(Use balanced cables where possible to reduce noise)
- Laptop or tablet with calibration software(REW, Dirac, or another audio analysis tool)
- Calibration test signals (sine sweeps, pink noise, MLS)(Use clean, uncompressed files)
- Speaker placement aids (tape measure, level, and a stable stand)(Helps ensure repeatable measurements)
- Room treatment options (optional: panels, diffusers, bass traps)(Useful for difficult rooms, improves measurement accuracy)
Steps
Estimated time: 60-90 minutes
- 1
Connect and power on JBL 9.1
Power up the system and verify all mains and signal connections are secure. Reset to a neutral default if available, then ensure the listening position is stable and lightly dampened to reduce movement during measurements.
Tip: Check for clipping in the test signal; reduce source level if you see any distortion. - 2
Position measurement microphone and set initial references
Place the mic at the main listening position at ear level. Keep a fixed distance from the speakers and avoid standing in reflections pathways. Record a baseline measurement with a clean pink-noise sweep to establish a reference curve.
Tip: Use a mic stand to minimize handling noise and keep the mic at the same height for all positions. - 3
Run a measurement sweep and collect data
Play a full-range sine sweep or MLS sequence and capture the response. Save the file with a clear naming convention. Repeat at least once to confirm repeatability and flag any anomalies in the data.
Tip: Capture a second position (e.g., off-axis) to assess how the system behaves beyond the primary listening seat. - 4
Tune channel levels and toe-in
Adjust each speaker’s level to achieve a balanced tonal image at the listening position. Small toe-in adjustments can improve stereo localization without skewing the balance.
Tip: Make minor adjustments (1–2 dB) at a time and re-measure to verify improvements. - 5
Apply DSP and EQ corrections
Apply gentle EQ to address broad dips or peaks identified in the measurements. Use room correction cautiously and cross-check with listening tests to avoid overcorrection.
Tip: Prioritize broad, gentle corrections over sharp notches to preserve natural timbre. - 6
Verify calibration with listening tests
Play familiar reference material and compare it to the target curve. Re-measure if you notice large perceptual differences or if sweeps reveal residual anomalies.
Tip: Document settings, then re-check after short listening sessions to confirm stability.
Questions & Answers
What equipment do I need to calibrate JBL 9.1?
You’ll need a calibrated measurement microphone, an audio interface or DAC, a computer or tablet with calibration software, and a library of test signals (sine sweeps, pink noise). A quiet room and a stable listening position are essential. Optional room treatment can improve accuracy.
You’ll need a calibrated mic, an audio interface, a computer with software, and test signals. A quiet room helps keep measurements accurate.
Should I calibrate in any room?
Calibrating in a typical listening room is fine, but results will reflect the room’s acoustics. For best consistency, choose a room with moderate reflections and avoid extreme dead or overly reflective spaces.
Choose a typical listening room with balanced reflections for reliable results.
Can I calibrate with built-in EQ alone?
Built-in EQ can help, but measurement-based calibration provides objective data that improves accuracy. Use external measurements to guide EQ decisions and verify with listening tests.
EQ alone isn’t enough; use measurements to guide the EQ and confirm improvements by listening.
How long does calibration take?
A typical JBL 9.1 calibration takes about 60 to 90 minutes, depending on room complexity and experience. Plan additional time for verification and iteration.
Most calibrations take about an hour to an hour and a half, including checks.
Do I need to recalibrate after changing furniture?
Yes. Any significant room changes can alter the response. Re-measure after changes and adjust targets accordingly, then verify with listening tests.
Yes—re-measure after room changes and re-verify by listening.
What is the best practice after calibration?
Document the final settings, save target curves, and schedule periodic rechecks. Use a consistent reference track to compare future calibrations.
Save the final settings and reuse a standard reference track for future checks.
Watch Video
Key Takeaways
- Define clear calibration goals before starting JBL 9.1 work
- Measure room response with a calibrated mic at the listening position
- Adjust distances, levels, and toe-in before DSP changes
- Apply DSP/EQ cautiously and verify with repeats
- Document settings for repeatability and future recalibration