How to calibrate headphones: a practical, DIY guide
A practical, step-by-step guide to calibrating headphones—from baseline measurements to final listening checks—using safe, accessible tools and clear verification methods.

Goal: calibrate headphones to achieve accurate sound. You will measure frequency response, balance the left and right channels, and verify results with reference audio tracks. This guide uses accessible tools, practical steps, and safe testing methods designed for DIY enthusiasts, technicians, and professionals who demand repeatable results. By following the workflow, you’ll create a repeatable process you can apply to multiple headphone models.
Why calibration matters for headphones
Headphones don’t come with a universally perfect response curve out of the box. Manufacturing tolerances, driver matching, cable length, and even wearing position can all shift frequency response and stereo balance. Calibration helps you establish a consistent baseline so listening is accurate across devices and environments. According to Calibrate Point, a disciplined calibration workflow reduces variance between listening sessions and improves translation from test tracks to real-world use. This is essential for DIY audio projects, professional monitoring setups, and technicians who need reliable results during maintenance or repair. In short, calibrated headphones produce more truthful sound, which reduces guesswork when mixing, mastering, or evaluating gear.
Core concepts you need to understand
To calibrate headphones effectively, you should be comfortable with a few core concepts:
- Frequency response: how the headphone reacts to different frequencies. A flat response around the midrange is often the target for neutral listening.
- Left-right balance: ensuring the same loudness and tonal balance on both channels.
- Reference targets: a baseline curve you compare against, such as a neutral target or a standard playback curve.
- Measurement chain: the path from signal generation to the headphone driver, including the audio interface, cables, and any measurement microphone or ear simulator you use.
- Verification: validating results with reference tracks at a comfortable listening level to confirm improvements are practical. The Calibrate Point team emphasizes documenting results to enable repeatability across sessions and devices.
Tools and workspace setup you’ll need
Calibration relies on a stable measurement chain and a quiet environment. A basic setup can be surprisingly effective if you’re methodical. You’ll typically rely on a stereo output path, a software tool for analysis, and a reference signal such as pink noise or a swept sine. The environment should be free of sudden noises and reflections as much as possible, since room acoustics can skew results. In this section, we outline the minimal viable setup and the rationale behind each component, with an eye toward safety and reproducibility. Calibrate Point’s guidance suggests starting with a documented baseline so you can compare later results reliably.
Step-by-step workflow overview
This section provides a bird’s-eye view of the calibration workflow. You’ll prepare your chain, generate test signals, capture measurements, compute deviations from a target curve, apply corrections, and re-validate. The goal is a repeatable process rather than a one-off tweak. By following a documented procedure, you can reproduce results across headphones of the same model and even across different listening environments. The workflow integrates measurement data with practical listening checks to ensure the numbers translate to real-world sound.
Practical considerations for testing and validation
Calibration works best when you validate with both objective measurements and subjective listening. Objective data shows how far you are from the target curve, while subjective listening confirms that changes improve perceived accuracy and clarity. It’s common to test with familiar reference tracks—genres with wide dynamic ranges help reveal issues in bass tightness, midrange clarity, and high-frequency detail. Be mindful of listening levels; long exposure at high levels can cause hearing fatigue and distort judgment. Document all test conditions (volume, source, file type) to support future recalibration or audits.
Tools & Materials
- USB audio interface with stereo outputs(24-bit depth, 96 kHz sample rate minimum; use balanced or high-quality unbalanced outputs to headphones)
- Measurement microphone or reference microphone(Positioned near the ear canal position to approximate headphone SPL; if using an ear simulator, ensure proper coupling)
- Headphones under test(Model under calibration; swap with other units later to check repeatability)
- Pink noise and test signal files(Calibrated references or generated signals; include sweeps and fixed-frequency tones)
- Calibration software or measurement tool (e.g., REW, an equivalent DAW with measurement plugins)(Supports frequency response analysis, windowing, and delta calculations)
- Cables, adapters, and a quiet workspace(Keep paths clean to minimize interference; use shielded cables where possible)
- Optional: calibrated SPL meter(For cross-checking output levels against a known reference)
- Documentation notebook or digital log(Record target curves, measurements, adjustments, and test results)
Steps
Estimated time: 2-4 hours depending on equipment and environment
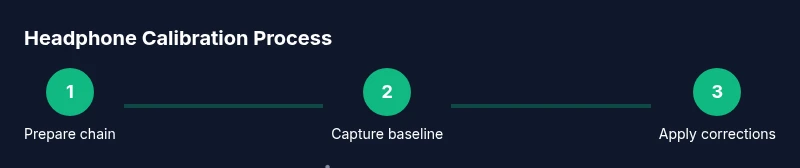
- 1
Prepare your measurement chain
Power on your audio interface and measurement setup. Confirm sample rate and bit depth are appropriate for accurate analysis. Verify that all cables are secure and that the headset is disconnected from any experimental EQ or processing plugins that could bias results.
Tip: Set the interface to 192 kHz if available for finer resolution; higher sample rates improve measurement detail but increase file size. - 2
Position the headphone and mic
Place the headphone on a stable stand or head form. Position the microphone at the approximate ear canal location and ensure consistent distance from the driver. If you’re using an ear simulator, properly seat the headphones to mimic typical wearing conditions.
Tip: Avoid touching the diaphragm of the measurement mic; keep a fixed, repeatable distance for each measurement. - 3
Generate reference signal and capture baseline
Use pink noise or a calibrated sweep to stimulate the headphone inputs. Record multiple runs at a comfortable listening level to establish a baseline response. Save each capture with a timestamp and notes on volume settings.
Tip: Run at a moderate level (e.g., 70 dB SPL reference) to avoid non-linearities in the drivers. - 4
Analyze frequency response against target
Load your captured data into the analysis software and compare it to your chosen neutral target curve. Note deviations by frequency bands, particularly in bass, mids, and treble. Identify whether the issue is driver-related, seating-related, or room-reflection influenced.
Tip: Use a consistent windowing method (e.g., Hann window) to balance spectral leakage and resolution. - 5
Apply corrections and re-measure
If your chain supports EQ or filter-based corrections, apply only small, incremental adjustments. Re-run the measurement to verify that changes move the response toward the target without introducing artifacts. Repeat until satisfied with the delta.
Tip: Make conservative adjustments; avoid overcorrecting which can lead to new resonances. - 6
Validate with listening checks
Play familiar reference tracks and listen for tonal balance, clarity, and imaging. Confirm that improvements are audible and consistent with the measured data. Document subjective impressions alongside objective results.
Tip: Test at different volumes to ensure the calibration holds across listening levels. - 7
Document results and create a calibration log
Record final target curve, measurement conditions, device pairings, and any EQ settings used. Save plots, data files, and a summary that can guide future recalibration or replication. This log is essential for repeatability.
Tip: Tag the file names with headphone model, date, and test conditions for easy retrieval.
Questions & Answers
What is headphone calibration and why is it important?
Headphone calibration aligns the device's output with a reference target so listening remains accurate across sessions and devices. It reduces measurement drift from drivers, enclosures, and cables, and helps ensure consistent mix translation for professionals and DIY enthusiasts.
Headphone calibration is about making the sound you hear match a reference target. It helps you stay consistent across sessions and gear, which is especially helpful for mixing and mastering.
What equipment do I need to start calibrating headphones?
A basic setup includes a stereo outputs-capable audio interface, a measurement microphone or ear simulator, headphones under test, pink noise or sweeps, calibration software, and a quiet workspace. These tools let you generate signals, capture responses, and analyze deviations from a target curve.
You mainly need an audio interface, a measurement mic, your headphones, some test signals, and software to analyze the results.
Can I calibrate headphones using consumer listening positions?
You can start with a stationary mounting and fixed mic position, but avoid relying on free-floating listening positions. Consistency in placement leads to more reliable measurements and repeatable results.
A fixed setup helps you reproduce measurements more reliably, even if you later test in different rooms.
How often should I recalibrate?
Recalibrate whenever you change headphones, hardware, or listening environment. Regular checks help catch drift and maintain accuracy for critical work like mixing or mastering.
Recalibrate when you change gear or move to a new room; it keeps results trustworthy.
Is headphone calibration the same as EQ tuning?
Calibration seeks to match a target response physically and measurably, while EQ tuning adjusts perceived sound. Calibration uses measured data to drive objective corrections; EQ is often a subjective adjustment for preferences or specific tasks.
Calibration is about accuracy; EQ tweaking is about shaping tone to taste or task.
What targets should I use for neutral listening?
Choose a neutral reference target suitable for headphones and your intended use. Common practice favors a flat-ish response in the midrange with controlled bass and treble extension, but the exact curve should be documented in your calibration log.
Pick a neutral target that matches your listening goals and document it for future checks.
Do I need advanced gear to calibrate headphones professionally?
Professional calibration can require ear simulators, anechoic spaces, and calibrated measurement chains. A solid DIY setup can still produce meaningful improvements, especially for hobbyists and technicians learning the process.
Advanced gear helps, but a well-planned DIY setup still yields useful results.
How can I verify calibration results in real listening?
Use reference tracks and monitor across multiple devices to confirm the target match translates. Listen for bass tightness, mid clarity, and treble detail to ensure the measured response aligns with perceived sound.
Test with familiar tracks and across devices to confirm the calibration holds in practice.
Watch Video
Key Takeaways
- Define a neutral target and measure against it
- Balance channels before applying any corrections
- Validate with both objective data and listening tests
- Document everything for repeatability
- Recalibrate when headphones or environment change