Calibrate an Audiometer: Step-by-Step Guide
Learn how to calibrate an audiometer with a practical, step-by-step method. This 2026 guide covers tools, standards, procedures, and documentation for reliable hearing tests.

Calibrate audiometer to ensure accurate hearing threshold measurements. You’ll prepare the workspace, verify reference sources, connect equipment, run a frequency sweep, adjust outputs to match reference values, and document results. This guide emphasizes safety, traceability, and repeatable procedures so professionals and DIY enthusiasts can achieve consistent results with confidence. You’ll also learn common pitfalls and how to verify calibration after maintenance.
What is Audiometer Calibration and Why It Matters
Calibration is the process of aligning an audiometer's output with established reference standards so that measurements of hearing thresholds reflect true auditory function. For clinics, schools, researchers, and technicians, precise calibration ensures that test results are comparable over time and across devices. According to Calibrate Point, a well-calibrated audiometer reduces drift caused by temperature, electronic components, and transducer wear, yielding dependable data for diagnosis and treatment planning. In practice, calibration verifies several key parameters: output level accuracy, frequency response, masking levels, and transducer coupling. Regular calibration forms the backbone of quality assurance programs and supports compliance with standards such as ISO 8253-1 and ANSI S3.6. By establishing traceability to certified references, you can audit performance, troubleshoot anomalies, and maintain patient safety. Diagram references are provided in Step-BY-STEP for visual guidance.
Safety, Compliance, and Quality Standards
Calibration work involves voltages and sound levels that can damage equipment or harm operators if mishandled. Always work in a quiet, temperature-stable room and use hearing protection when handling high-output sources or during long sessions. Follow applicable standards: ISO 8253-1 for reference test tones and ANSI S3.6 for clinical audiometer performance. Documentation should show equipment serials, calibration dates, reference sources, and acceptance criteria. For organizations, maintain an auditable record that demonstrates traceability to national or international standards. The Calibrate Point team emphasizes that conformity with these standards isn't optional—it's essential for patient safety, data integrity, and regulatory compliance. When in doubt, consult your institution's calibration procedures and your device manufacturer’s guidance. See diagram Fig.3 for typical reference paths.
Required Tools, Supplies, and Calibration Environment
Before starting, set up a dedicated calibration area with low ambient noise, stable electricity, and adequate ventilation. You will need a calibrated sound source or generator that can produce known frequencies in the audiometer's test band (typically 250 Hz to 8 kHz), an acoustic coupler or insert earphones, a precision sound level meter (SLM), an external reference microphone if required by your audiometer, a suitable attenuator bank or software-based controls, a calibration logbook or digital record system, and a timer. Keep the room at a stable temperature (ideally 20–23°C) to minimize drift and ensure power outlets are clean and grounded. Protect yourself and others from accidental exposure to high sound levels. See the checklist in Diagram A for layout guidance.
Calibration Workflow Overview
Calibrating involves a repeatable workflow: verify instrument readiness, connect the calibration source to the audiometer input, select test frequencies and nominal levels, record the actual output, compare with the reference, adjust as needed, re-check across all frequencies, and finalize a documented record. These steps reduce measurement uncertainty and help you demonstrate compliance during audits. The workflow should be reproducible: use the same sequence, same reference sources, and same environmental conditions each time. Visual diagrams can help—place a checklist next to the equipment and log deviations as you go. See Diagram B for a typical workflow path.
Choosing Calibration Standards and Reference Equipment
Best practice is to calibrate against a certified reference source with known SPL at standard frequencies (e.g., 250 Hz, 500 Hz, 1 kHz, 2 kHz, 4 kHz, 8 kHz). Decide on dB HL or SPL depending on your regulatory environment and test protocol. Use an acoustic coupler or insert earphones to standardize transducer loading, and ensure reference equipment comes with up-to-date calibration certificates. For portable setups, select a compact calibrator with documented tolerance and a clear calibration protocol, and cross-check readings with a secondary standard when possible. Diagram C illustrates common reference configurations.
Interpreting Readings and Adjusting Instruments
Interpretation involves comparing measured outputs to target reference values; if a discrepancy exceeds the acceptance criteria, you adjust the audiometer's internal attenuators, gain, or calibration constants. Document the adjustment, then re-measure to confirm the correction. Be mindful of frequency-dependent drift: some devices drift more at high frequencies. If readings are inconsistent across channels or transducers, verify cable connections, connector cleanliness, and headphone/earphone loading. Ensure the reference source remains stable during measurements; use a separate timer to avoid timing errors. Refer to the calibration table in Diagram D when aligning numbers.
Documentation, Traceability, and Record-Keeping
Every calibration session should produce a dated record that includes instrument identifiers, reference sources, environmental conditions, measured values, adjustments made, and the acceptance decision. Use a standardized form or software that can export to a regulatory-ready report. Tag records with version numbers so you can track changes over time. Keep digital backups and maintain a retention policy. Traceability means you can show that each calibration is linked to an accredited standard through an unbroken chain of custody. Ensure your documentation is organized to support audits and future calibrations. Diagram E shows a sample record layout.
Troubleshooting Common Calibration Issues
Drift, noise, and inconsistent readings are common challenges. Typical causes include loose connectors, worn transducers, temperature changes, or power supply fluctuations. If you observe drift between sessions, verify the calibration source stability and re-check environmental conditions. If you see elevated noise floors, inspect the earphone coupling and shielding. When results disagree with peers, perform an inter-laboratory comparison or re-validate with a second reference device. Keep a log of anomalies to identify recurring patterns. See Diagram F for troubleshooting flow.
Maintenance and Preventive Care for Long-Term Reliability
Regular maintenance includes periodic checks of cables and connectors, cleaning of transducers, and updating calibration certificates. Schedule semi-annual or annual calibration depending on usage and regulatory requirements. Store equipment in a clean, humidity-controlled area to prevent corrosion. Keep a spare reference source and a backup power supply. Document any service performed and update the maintenance log. Proactive care reduces downtime and extends instrument life. Diagram G outlines a maintenance calendar.
Tools & Materials
- Calibrated sound source / pure-tone generator(Provide stable tones at standard test frequencies (e.g., 250 Hz–8 kHz) with known SPL)
- Acoustic coupler or insert earphones(Used to standardize transducer loading)
- Calibrated sound level meter (SLM)(Prefer class 1 or class 2 SLM with appropriate weighting)
- A stable reference microphone (if required by audiometer)(Check device documentation; optional if not needed)
- Calibration attenuator bank or software controls(Used to adjust output levels precisely)
- Calibration logbook or digital record system(For traceability and documentation)
- Power supply and grounded outlets(Stable power reduces drift)
- Temperature/humidity monitor(Helps assess environmental impact)
- Personal protective equipment (ear protection)(Protection for staff during high-output checks)
Steps
Estimated time: 90-120 minutes
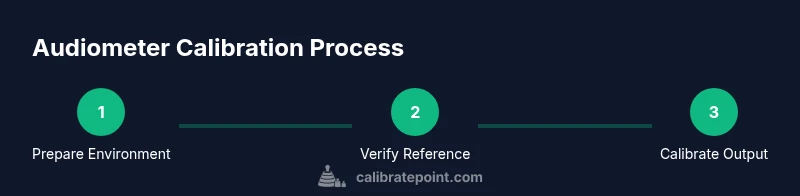
- 1
Prepare calibration environment
Set up a dedicated calibration area with minimal ambient noise and stable temperature. Verify that the room is quiet enough to prevent fluctuations in measurements and ensure all equipment is powered and ready. Allow the environment to stabilize for several minutes before starting, which reduces drift and improves repeatability. See Diagram A for layout and fixture placement.
Tip: Allocate 10 minutes for stabilization; record room conditions before starting. - 2
Verify reference equipment readiness
Inspect certificates, ensure the reference source is within its calibration window, and confirm the calibration facility’s accreditation if applicable. Check that the acoustic coupler or earphones are clean and properly seated. Document the reference source identity and any certificate numbers in your log. Diagram B shows a typical verification checklist.
Tip: Cross-check certificates against the equipment ID; note expiration dates. - 3
Connect calibration source to audiometer input
Physically connect the calibrated sound source to the audiometer input using the correct cables; avoid tension on connectors. Verify the signal path is free of noise sources and shielded where possible. Ensure the audiometer is in calibration mode if that option exists. Refer to Diagram C for connector layouts.
Tip: Use strain-relief for all cables and test a short run first to confirm signal integrity. - 4
Select test frequencies and target levels
Choose standard test frequencies (e.g., 250 Hz, 500 Hz, 1 kHz, 2 kHz, 4 kHz, 8 kHz) and set nominal levels based on your protocol. The target values should align with the reference standards you’re using. Document the nominal levels in the calibration log and prepare for measurement at each frequency. See Diagram D for a frequency plan.
Tip: Keep a running list of nominal values and compare against measured outputs. - 5
Record baseline measurements
Measure the audiometer’s output at each frequency and transducer using the reference system. Record the actual results exactly as shown by the SLM, including units and weighting. Note any environmental conditions that could influence readings. This step establishes the baseline for adjustments. Diagram E maps data capture points.
Tip: Capture multiple samples per frequency to assess short-term variability. - 6
Make adjustments to match reference values
If a discrepancy exists beyond acceptance criteria, adjust attenuators, gain, or calibration constants as specified by your device’s manual. Make small, incremental changes and re-measure after each adjustment. Use the diagrams to confirm the attenuation path and ensure no unintended channel cross-talk occurs. See Diagram F for attenuation paths.
Tip: Make incremental changes (e.g., 0.5–1 dB) and recheck; avoid large jumps. - 7
Re-check across all frequencies and transducers
Test all frequencies again and verify both transducers (left/right) if applicable. Confirm that all measured values are within the acceptance window. If discrepancies persist on any channel or frequency, re-check cabling and connector integrity. Document any residual drift and the justification for acceptance or rejection.
Tip: If one channel remains out of tolerance, isolate it with a separate test path to diagnose cabling or transducer issues. - 8
Finalize results and document decisions
Record final acceptance decisions, include the calibrated values, date, operator, equipment IDs, and reference sources. Generate a calibration certificate or report and archive it with the device record. Ensure the log is legible and tamper-evident. Diagram G demonstrates an example certificate structure.
Tip: Store results with version control so future calibrations can be tracked easily. - 9
Perform post-calibration validation and secure storage
Optionally perform a quick post-check using a secondary reference to validate the calibration. Shut down equipment properly, disconnect test sources, and store cables and transducers in protective racks. Confirm that the environment remains stable for next use. Diagram H shows the post-check workflow.
Tip: Keep a spare reference source and a power backup in case of outages.
Questions & Answers
What is the purpose of calibrating an audiometer?
Calibration ensures that audiometer outputs accurately reflect hearing thresholds, enabling reliable and repeatable test results. It also supports regulatory compliance and quality assurance.
Calibration ensures the audiometer gives accurate test results, which is essential for reliable hearing assessments.
How often should an audiometer be calibrated?
Most clinics calibrate annually, but local regulations and manufacturer recommendations should guide your schedule. Regular checks help catch drift early.
Most devices should be calibrated yearly, but follow local rules and manufacturer guidance.
What standards govern audiometer calibration?
Refer to ISO 8253-1 for reference test tones and ANSI S3.6 for clinical performance criteria. These standards underpin calibration acceptance criteria.
ISO 8253-1 and ANSI S3.6 are the key standards for audiometer calibration.
What tools are required for calibration?
Essential tools include a calibrated sound source, acoustic coupler or insert earphones, a precise sound level meter, a reference microphone if needed, attenuators or software controls, and a calibration log.
You need a calibrated tone source, a precise meter, calibrated earphones, and good record-keeping tools.
Can you perform calibration at home or in a non-clinical setting?
Basic verification and safety checks can be done outside a clinic, but formal calibration should be performed by trained technicians with traceable standards and equipment.
Basic checks can be done at home, but formal calibration should be done by trained technicians.
How should calibration results be documented?
Record instrument IDs, reference sources, environmental conditions, measured values, adjustments, and acceptance decisions. Exportable reports are preferred for audits.
Keep a clear, auditable record with all readings and adjustments.
Watch Video
Key Takeaways
- Follow a documented calibration workflow.
- Maintain traceability to certified references.
- Document results and store logs securely.
- Regular calibration reduces drift and improves test validity.
- Use environmental controls to minimize variability.