How to calibrate studio monitors: a step-by-step guide
A practical, step-by-step guide to calibrating studio monitors for accurate translation. Learn setup, measurements, room considerations, and verification to improve mix consistency across projects.

By the end of this guide you will be able to calibrate studio monitors to achieve neutral translation across your mixes. You’ll establish a repeatable workflow that covers room setup, baseline measurements, positioning, level matching, and verification with reference material. The goal is to minimize room influence, reduce hidden tonal biases, and improve consistency from project to project. Follow the steps and document results for future retests.
Why calibrating studio monitors matters
Calibrating studio monitors is about achieving a reliable listening environment where what you hear translates consistently to other rooms and systems. When monitors aren’t calibrated, your mixes may sound different in other studios, home setups, or on consumer speakers. A well-calibrated rig helps you make better decisions about balance, EQ, and dynamics, reducing the risk of overshooting or under-representing bass and high-end content. According to Calibrate Point, a repeatable calibration workflow can standardize listening conditions, so engineers spend less time second-guessing and more time making precise adjustments. A calibrated setup also provides a foundation for documented comparisons across sessions, projects, and teams, which is essential for professional workflows and client confidence. In practice, calibration means aligning level, timing, and tonal balance while accounting for room acoustics and listener position, then validating with neutral reference material and multiple genres to ensure broad accuracy.
Key takeaway: calibration isn’t a single adjustment—it's a repeatable process that stabilizes how your mix translates across playback systems.
Before you start: tools, references, and room considerations
Before you touch the knobs, assemble a clear plan and gather the essential tools. You’ll want a measurement microphone mounted on a stand at the listening position, a reliable audio interface, and a method for capturing room response (silence during measurements is crucial). Use reference material you trust across genres to test tonal balance, and make sure your listening space is as quiet as possible during measurements. Room treatment—like absorptive panels and bass traps—can dramatically improve measurement accuracy by taming first reflections and excess low-frequency buildup. If your room remains untreated, note that calibration results may reflect room behavior as much as the monitors themselves. The Calibrate Point team recommends documenting room dimensions and speaker placement so you can reproduce the setup later.
Quick tip: keep a clean, shaded workspace during measurements to prevent incidental reflections from objects in the room.
Step 1: establish a calibration baseline
Begin with a stable baseline: set your monitors to the same distance from the walls, equal height at ear level, and symmetrical toe-in toward the listening position. Establish a comfortable listening level using a reference track or pink noise and ensure there is no clipping in the signal path. Record the initial tonal balance and note any obvious anomalies, such as excessive brightness or bass boom. This baseline will serve as the reference point for all subsequent adjustments and measurements, making it easier to track changes over time. The goal is a neutral starting point from which you can improve accuracy without sacrificing listening comfort.
Pro tip: keep the listening position fixed for all measurements; consistency is essential for meaningful comparisons.
Step 2: measure room response and apply treatment
Use your measurement microphone to capture the impulse response and static frequency response at the listening position. Record a few sweeps or pink-noise bursts to map how the room shapes the monitored signal. Analyze the data to identify problematic peaks, nulls, or overly resonant bands. If possible, apply room treatment to reduce reflections and excessive bass energy in the listening area. After treatment, retake measurements to quantify the improvements. Remember: measurements are most valuable when taken in a quiet, controlled environment with consistent seating and equipment setup.
Tip: keep mic position consistent between measurements and label each file with date, room setup, and any treatment changes.
Step 3: adjust monitor level and tonal balance
Based on the measurements, adjust the monitors’ relative level to the reference level you established in Step 1. Fine-tune toe-in and speaker positioning to optimize stereo image and midrange clarity. If the room response shows a mild bass lift or a dip in the presence region, apply gentle EQ or boundary compensation if you have a calibrated monitoring system. Document every adjustment so you can reproduce the configuration on future sessions. The aim is to minimize room-induced coloration while preserving the monitors’ natural response in the critical midrange.
Pro tip: small, incremental changes are more reliable than large, sweeping ones. Save each configuration as a named profile for easy recall.
Step 4: verify with reference material and cross-checks
Play a curated set of reference tracks across genres to test tonal balance, spatial imaging, and transient response. Listen for consistency across material with different mastering styles and ensure the translation holds on other playback systems. If you detect discrepancies, revert to the baseline and re-evaluate your measurements and positioning. Repeat the cycle until the monitoring chain remains stable across sources and room conditions. This verification step is crucial for confidence in your calibration.
Note: use multiple sources (mix references, industry-standard test tracks, and familiar material) to avoid overfitting to a single reference.
Step 5: document results and plan for retests
Create a calibration log that records the measurements, adjustments, room conditions, and listening position. Include references to measurement files, EQ settings (if used), and the exact speaker placements. Schedule periodic retests—especially after changes to furniture, seating, or room treatment—to ensure ongoing accuracy. A simple version-control approach (date-stamped files and profiles) helps teams stay aligned and reduces drift over time. Documentation also supports auditability for client projects and quality control.
Pro tip: store measurement data alongside project files so you can compare changes over time.
Step 6: maintenance and best-practice routine
Calibration is not a one-time task; it’s an ongoing practice. Establish a routine to reevaluate monitoring accuracy after any environmental changes, new speaker models, or adjustments to the listening position. Keep a log of changes and revisit the baseline periodically to confirm continued accuracy. Encourage others in the room to use the same reference settings for consistent translation across collaborative projects. A disciplined approach helps sustain reliable results across sessions and clients.
Common pitfalls and best practices
Common pitfalls include neglecting room treatment, skipping baseline measurements, and relying on memory instead of data. Best practices emphasize controlled measurement conditions, all-dominant references, and repeatability. Always document your steps, save measurement data, and label profiles clearly. Finally, avoid over-tuning to a single reference track; use a diverse set of material to ensure broad compatibility.
Tools & Materials
- Measurement microphone(Condenser mic with stand at the listening position)
- Audio interface(Reliable line-level input/output with proper cables)
- Calibrated reference monitor or reference speaker(Use a known reference as a secondary check when available)
- Room treatment (panels, bass traps)(Recommended for improved measurement accuracy)
- Cables and adapters (XLR/TRS)(Keep paths clean and repeatable)
- SPL meter or software-based level readout(Helpful for objective level matching)
- Room layout diagram(Useful for documenting placement and reflections)
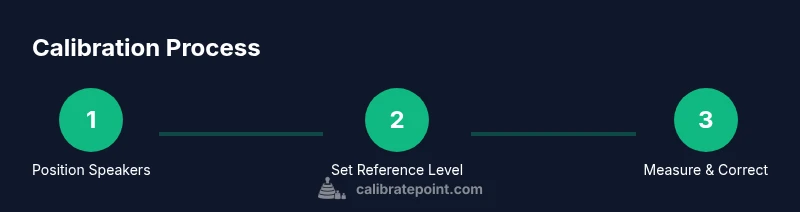
Steps
Estimated time: 60-90 minutes
- 1
Position monitors and listening chair
Place the left and right monitors at the same distance from the listening chair and at ear height. Angle the monitors so they point toward the listening position, forming a symmetric triangle. Ensure there are no large reflective surfaces directly behind or to the sides of the listening area.
Tip: Use a ruler or tape measure to confirm equal distances; small asymmetries can influence impedance and imaging. - 2
Set initial levels and toe-in
Establish a roughly centered listening position and set the monitors to a comfortable, non-clipping level. Adjust toe-in to place the stereo image centered on the listening point. Keep software latency minimal to avoid timing discrepancies during measurements.
Tip: Lock the seating position and avoid moving during the measurement phase. - 3
Capture baseline measurements
With the measuring setup active, capture the room’s impulse and frequency response at the listening position. Use pink noise or sine sweeps to gather data that reveals peaks, nulls, and overall tonal balance. Save the baseline files with a clear date and room setup tag.
Tip: Record several sweeps to average out transient inconsistencies. - 4
Apply corrections based on measurements
If your system supports calibrated EQ or boundary compensation, apply corrections to address identified room-induced deviations. Re-measure after changes to confirm improvements and ensure you haven’t overcorrected a resonance.
Tip: Make conservative adjustments; small changes often yield better long-term results. - 5
Verify with reference material
Play a curated set of reference tracks and test tones to verify balanced tonal response and imaging. Check consistency across genres and different playback formats. If anomalies appear, revisit steps 3 and 4.
Tip: Cross-check with multiple reference sources to avoid drift toward a single sound. - 6
Document results and schedule retests
Create a calibration log detailing measurements, adjustments, room conditions, and profiles. Set a reminder to retest after changes to the room or gear. Store files in a project folder for easy retrieval.
Tip: Label files clearly and keep backups in a dedicated calibration archive.
Questions & Answers
Do I need a measurement microphone to calibrate studio monitors?
A measurement microphone improves accuracy by capturing the room’s frequency response. It enables a data-driven calibration rather than relying solely on listening. If you don’t have one yet, you can start with careful listening and reference material, but plan to add measurement tools later.
A measurement mic makes calibration more precise; you can start by listening and using reference tracks, but plan to add a mic later.
Is calibration the same for all genres?
Calibration aims for a neutral baseline. You can tailor the monitoring environment for different genres, but changes should be documented and applied consistently across projects.
Neutral baseline helps you compare projects; you can adjust for genre but keep a reference.
How often should I recalibrate?
Recalibrate when your room, layout, or monitors change, or when you notice shifts in translation. Regular checks help maintain reliability.
Do checks after changes and on a schedule.
Can I calibrate without room treatment?
Calibrating without room treatment is possible but results will be noisier and less repeatable. Adding treatment improves measurement accuracy.
It's possible but less reliable.
What is the difference between calibration and measurement?
Measurement is collecting data about how the system responds. Calibration uses that data to adjust levels, EQ, and positioning to reach a defined reference.
Measurement is data; calibration uses it to adjust.
What if I can't access professional tools?
You can perform an introductory calibration with consumer gear and reference material, but expect less precision. Plan to upgrade tools over time for better accuracy.
Start with your ears and reference tracks, then upgrade tools.
Watch Video
Key Takeaways
- Calibrate monitors with a repeatable workflow
- Measure room response before adjustments
- Document settings and retest regularly
- Verify with diverse reference material