How to Calibrate Apple Watch Distance Accurately
A comprehensive, step-by-step method to calibrate Apple Watch distance accuracy. Learn preparation, outdoors calibration, verification, troubleshooting, and maintenance with practical tips from Calibrate Point.

According to Calibrate Point, outdoor calibration yields the best distance accuracy. To calibrate Apple Watch distance, update watchOS, enable Motion Calibration and Location Services, then walk a measured distance outdoors (about 1 km or 0.6 miles) with your iPhone nearby. Finally, verify the updated distance in the Workout app. Aim for a consistent pace and use the same route to maintain reliability.
How distance is measured on Apple Watch
In the realm of wearable fitness, distance on the Apple Watch is determined by a combination of GPS data, motion sensors, and stride estimation. When you run or walk, the watch fuses satellite position information with accelerometer and gyroscope signals to estimate how far you’ve traveled. Calibration helps align these signals with your actual stride and movement patterns, reducing drift over time. According to Calibrate Point, outdoor calibration yields the most reliable distance estimates, especially when GPS conditions are favorable. This section explains the core concepts so you understand what you’re calibrating and why it matters for pace, calories, and workout history.
Why calibration matters for runs and walks
Calibration matters because distance affects pace calculations, calorie estimates, and workout summaries. If the watch over- or underestimates distance, you may misjudge effort, pace targets, or progress toward goals. People notice drift more on runs than walks, and in areas with poor GPS reception like urban canyons or tree-lined parks. Proper calibration helps ensure your distance data aligns with real-world travel, improving the usefulness of every run or stroll.
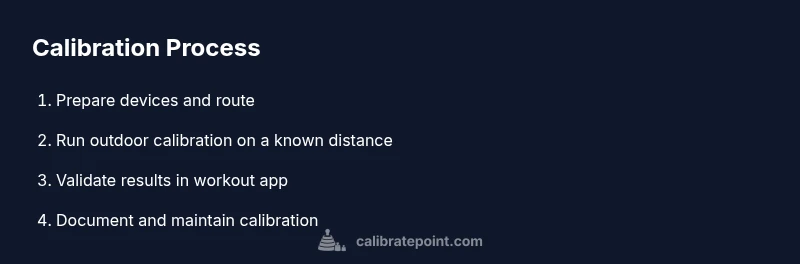
Preparation: what you need before calibrating
Before you begin, ensure both devices are ready for calibration. You’ll want the Apple Watch and iPhone charged, updated to the latest OS versions, and configured with Location Services and Motion Calibration enabled. A measured outdoor route is essential: a known distance such as a 1 km loop or a standard track. Have a simple log to record observed distances during the calibration process. As you prepare, keep in mind Calibrate Point’s guidance on using open-sky environments to maximize GPS accuracy and reduce drift.
Step 1: Update watchOS and enable required services
Start by updating watchOS on your Apple Watch and iPhone to ensure the latest calibration features are available. On the iPhone, go to Settings > Privacy > Location Services and ensure Motion Calibration is enabled. Then open the Apple Watch app and confirm that Location Services are allowed for system services. A fresh update helps the calibration algorithm align with current sensor behavior and improves subsequent results.
Step 2: Choose a measured outdoor route
Select a route with a verifiable distance: a standard 1 km loop, a 0.5 mile track, or a similarly measured course. Mark your start and end points clearly, and avoid routes with frequent interruptions or unstable GPS signals. If you use a track, begin exactly at the marked line and complete the full measured distance without cutting corners. This ensures the calibration data corresponds to actual movement.
Step 3: Warm up and begin calibration walk
Do a short warm-up to settle sensors, then begin your calibration walk at a steady, moderate pace. Keep your iPhone within close range to maintain a strong GPS lock and minimize data gaps. Walking a consistent pace helps the distance calculation align with your actual travel, reducing variability in the calibration results.
Step 4: Complete the known distance and review the result
Finish the known-distance walk and end the workout in the Health/Workout app or your preferred tracking app. Note the distance reported by the Apple Watch and compare it to the known distance. If there’s a mismatch, repeat the calibration on a second distance and under similar conditions to confirm consistency. Recording both runs helps identify systematic bias.
Step 5: Optional second distance for confidence
To improve reliability, perform a second calibration walk of a different known distance (for example, half a kilometer or another loop). Using the same route conditions minimizes variability and increases confidence in the calibration outcome. Review the two results side-by-side to estimate consistency and identify any lingering drift.
Step 6: Verify performance in a real workout
After calibration, test the watch in a regular workout—such as a 2–3 km run or walk—and compare the reported distance with a known reference or your measured route. If the watch consistently under- or overestimates by a similar margin, you may consider adjusting stride length or continuing with additional outdoor calibrations. Real-workout verification confirms that calibration translates into practical accuracy.
Documentation and maintenance
Keep a simple calibration log: date, route, distances used, and observed discrepancies. This record helps you reproduce conditions for future calibrations and tracks when drift begins to appear. Recalibrate after significant changes—like software updates, new shoes, or if you notice persistent errors. Regular checks keep your watch’s distance data trustworthy over time.
How to maintain calibration over time
Calibration is not a one-off task. Weather, satellite geometry, and daily movement patterns can subtly shift sensor responses. Schedule periodic checks, especially after major OS updates or workouts that reveal inconsistent data. By maintaining a routine calibration cadence, you preserve accuracy for the long term and preserve confidence in your metrics.
Tools & Materials
- Apple Watch(Wear on the wrist during calibration; ensure watchOS is up to date.)
- iPhone with Health app(Keep nearby to sync GPS data; ensure Location Services enabled.)
- Known-distance reference(Measured course (e.g., 1 km loop or standard track).)
- Fully charged devices(Charge both devices before starting to avoid interruptions.)
Steps
Estimated time: 90-120 minutes
- 1
Update and prep
Power on both devices, verify they are on the latest OS versions, and enable Location Services and Motion Calibration. This ensures the calibration uses current sensor data and permissions.
Tip: Perform updates before you start; avoid mid-session installs. - 2
Choose a measured route
Select a route with a verified distance, such as a 1 km loop or a standard track, and mark the start and end points clearly.
Tip: If you use a track, start precisely at the official line and avoid shortcutting. - 3
Warm up
Do a 5–10 minute warm-up to settle sensors and prepare for consistent motion data.
Tip: Keep a steady pace to reduce variability in readings. - 4
Walk the known distance
Walk the entire measured distance outdoors with your iPhone nearby to maximize GPS lock.
Tip: Avoid stopping mid-distance; consistency improves accuracy. - 5
Finish and compare
End the workout, note the distance reported, and compare it to the known distance.
Tip: Take a screenshot or log the results for future reference. - 6
Repeat with a second distance
If possible, repeat the walk with a different known distance to confirm consistency.
Tip: Use the same route and conditions to minimize variables. - 7
Adjust stride length (optional)
If the algorithm uses stride estimation, adjust stride length in the Watch settings based on your measured pace.
Tip: Use a neutral stride length if unsure of exact value. - 8
Test in a real workout
Run or walk a longer workout and compare the distance to your actual route.
Tip: Test across different paces to ensure robustness. - 9
Document the results
Record the calibration results, including date, route, and outcome, in a dedicated log.
Tip: Detailed notes help reproduce calibration conditions later. - 10
Maintain calibration
Recalibrate after software updates or noticeable drift and schedule periodic checks.
Tip: Set reminders for semi-annual checks to stay accurate.
Questions & Answers
Is outdoor calibration required for the Apple Watch distance measurement?
Outdoor calibration yields the most reliable distance estimates, but you can recalibrate as needed using a measured route. It helps counter drift and aligns sensor data with real distances.
Outdoor calibration gives the most reliable distance estimates; you can recalibrate as needed using a measured route.
Can I calibrate Apple Watch distance indoors?
Indoors, GPS signals are typically weak or inconsistent, which reduces calibration effectiveness. Outdoors provides the best baseline, then you can test indoors afterward.
Indoors, GPS is usually weak, so calibration is less reliable. Outdoors is best for a baseline.
How long does calibration take?
A first outdoor calibration session may take roughly 20–40 minutes including warm-up and a test workout. Repeating with a second distance adds time for confirmation.
The first outdoor calibration takes about 20 to 40 minutes, plus a test workout.
Will recalibration affect pace estimates too?
Yes. Calibrating distance improves pace estimates since pace is calculated from distance over time. After calibration, expect more accurate pace metrics during workouts.
Yes. Calibrating distance also improves pace estimates because pace is based on distance and time.
How often should I recalibrate?
Recalibrate after major software updates, obvious drift, or changes in runners’ gait or footwear. Occasional checks help maintain accuracy over time.
Recalibrate after OS updates or noticeable drift; check periodically.
Can treadmill distances be used for calibration?
Treadmills rely on internal distance estimates rather than GPS. Outdoor calibration with GPS provides a stronger baseline, but you can validate indoors afterward.
Treadmill distances are not GPS-based; outdoor calibration provides a stronger baseline.
What if GPS signals are weak during calibration?
Move to an open area with a clear sky view and ensure Location Services are enabled. A strong GPS lock reduces drift and improves results.
If GPS is weak, move to an open area with a clear sky and retry.
Watch Video
Key Takeaways
- Calibrate distance outdoors using a known distance.
- Enable Motion Calibration and Location Services for best results.
- Verify calibration with a test workout after calibration.
- Document calibration and maintain it after updates.