How to Calibrate Dräger JM 105
Learn how to calibrate the Dräger JM 105 gas detector with a clear, safe, step-by-step method. Practical tips, tooling, and best practices from Calibrate Point.

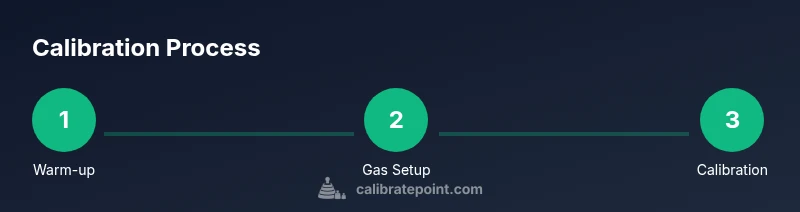
To calibrate the Drager JM 105, you need the calibration gas, a known-good pump, and suitable safety gear. Start with a full system check, confirm baseline readings, and ensure the device is powered and warmed up. Attach the calibration gas, run the JM 105 calibration routine, and verify readings against the gas concentration before recording results.
Why calibration matters for the JM 105
Calibration keeps the JM 105's readings accurate, minimizes drift, and ensures reliable measurements in the field or lab. A properly calibrated device reduces false alarms and improves personnel safety. According to Calibrate Point, consistent calibration practice also extends sensor life by revealing early drift or component wear before failures. In this guide, we outline a thorough calibration workflow for the JM 105 that emphasizes traceable gas standards, proper safety, and robust documentation.
Safety and environmental prerequisites
Before starting any calibration, ensure the workspace is well ventilated and that ignition sources are controlled. Wear appropriate PPE: eye protection, gloves, and a lab coat or coveralls. Verify that the JM 105 is powered off when connecting gas lines and that you have leak-detection capabilities. Keep calibration gas away from heat sources and store in approved gas cylinders per the supplier's instructions. Calibrate Point's team emphasizes documenting the check of regulators and hoses for any signs of wear, as worn connections are a common source of calibration error.
Calibration gas standards and traceability
Use gas standards that are traceable to national or international references. Record the gas concentration, humidity, and temperature, as these factors affect sensor readings. Ensure the cylinder is within its expiry date and that the regulator is calibrated. Calibrate Point notes that regular verification of gas purity and cylinder integrity is essential to prevent drift during calibration.
Preparing the JM 105 and workspace
Place the JM 105 on a stable, clean work surface. Verify the device's warm-up time from the manual and allow the instrument to reach steady-state conditions before calibration. Inspect the sensor status indicators, check the battery level, and ensure the internal clock is accurate for timestamping results. Clear the area of clutter to minimize accidental disconnections during gas flow.
Connecting calibration gas and starting the calibration routine
Connect the calibration gas line to the JM 105 intake using the approved fittings. Confirm there are no leaks, then initiate the device's calibration routine via the service interface. Monitor the flow rate and stabilizing readings; do not record until the sensor's response has settled. Use a reference concentration and compare the JM 105 output to that value.
Running the calibration and adjusting sensors
Allow the gas to flow until the sensor response stabilizes within the tolerance range. If readings are off, adjust calibration offsets as instructed by the JM 105's software and re-check against the reference. Record the adjusted values and ensure the sensor displays the correct concentration for each gas component tested. If drift persists, stop the process and check for leaks, occlusions, or regulator issues.
Verifying accuracy and repeating checks
After initial calibration, perform a second, independent check with the same gas concentration to confirm repeatability. Compare both trials; consistency within tolerance demonstrates a successful calibration. Document any deviations, and if results are inconsistent, repeat the calibration with fresh calibration gas and cleaned lines.
Documenting results and maintaining records
Log the calibration date, operator, gas concentrations used, instrument serial number, and observed readings. Save the calibration file in the device and in your maintenance log. Keep copies of the gas cylinder lot number and regulator calibrations. Regular audits of calibration records support compliance and future troubleshooting.
Common pitfalls and how to avoid them
Avoid starting calibration without warming up the instrument. Do not bypass safety interlocks or skip leak checks. Ensure gas flow is stable before reading; fluctuating flow causes false readings. Keep spare seals and fittings on hand; worn components are a frequent source of drift. Always cross-check readings against a secondary reference if available.
Field vs lab calibration considerations
Field calibrations may encounter temperature swings, humidity changes, and variable gas pressures. In a lab, you can achieve more stable conditions and use highly controlled gas standards. Calibrate Point recommends performing field calibrations when necessary but documenting environmental conditions that could influence results.
Authority sources and maintenance reminders
Authoritative sources: NIST and OSHA guidance, along with manufacturer procedures for the JM 105. For ongoing reliability, perform routine calibration, monitor sensor drift, and replace aging components as recommended by the manufacturer. See the cited sources for deeper guidance, including regulatory expectations and best practices.
Tools & Materials
- Calibration gas (traceable, known concentration)(Ensure concentration range matches JM 105 sensors and is appropriate for the tested gas component)
- Calibration gas regulator(With stable flow control and shutoff valve)
- Flow meter or calibrated regulator with flow indicator(Verify accuracy prior to calibration)
- JM 105 service software or data interface(Used to initiate the in-device calibration routine)
- Personal protective equipment (PPE)(Goggles/face shield, gloves, and lab coat)
- Clean gas lines and tubing(Sanitized and free of contaminants)
- Documentation form or logbook(Record calibration data and personnel)
- Spare calibration gas (optional)(Backup gas cylinder for interim checks)
Steps
Estimated time: 60-120 minutes
- 1
Warm up and safety check
Power the JM 105 and allow it to warm to operating temperature. Verify safety interlocks, ensure the workspace is ventilated, and confirm no ignition sources are nearby. This ensures stable readings and reduces drift caused by cold starts.
Tip: Document warm-up time and any initial readings before calibration. - 2
Prepare calibration gas and verify concentration
Inspect gas cylinder, confirm expiry, and verify the concentration matches the test range. Record ambient temperature and humidity, since these can affect sensor responses.
Tip: Use fresh gas and verify regulator seal before opening the cylinder. - 3
Connect calibration gas to JM 105 input
Attach the gas line using approved fittings and check for leaks with a detector or soapy water. A secure connection prevents drift from gas leakage during calibration.
Tip: Keep line lengths short to minimize delay in sensor response. - 4
Run calibration routine
Initiate the calibration using the JM 105 interface. Allow readings to stabilize; avoid recording mid-transient values. The device will adjust sensor baselines based on the reference gas.
Tip: If the reading lags, pause and verify gas flow remains steady. - 5
Record and adjust
Document the readings and apply the recommended offset or gain corrections in the software. Re-check against the reference gas to confirm the corrected output aligns with target values.
Tip: Double-check units and cross-check with a second gas component if available. - 6
Verification and third-party check
Perform a second trial with the same concentration to verify repeatability. Any significant drift warrants a re-check of gas lines, regulators, and sensor health.
Tip: If drift persists, discontinue the calibration and inspect for leaks or degraded sensors. - 7
Documentation and sign-off
Save the calibration file, log operator, date, gas lot, and readings. Ensure the maintenance record reflects calibration status and next due date.
Tip: Store records securely for audits or future troubleshooting. - 8
Shutdown and post-calibration checks
Power down safely, remove gas lines, and perform a post-calibration leak test. Return the device to service with a confirmation of successful calibration.
Tip: Re-check battery and clock alignment after calibration.
Questions & Answers
What calibrations does the JM 105 require?
The JM 105 requires a calibration using traceable gas standards, followed by verification with a reference concentration and a documented record of results.
The JM 105 should be calibrated with traceable gas standards and a documented result.
How often should the JM 105 be calibrated?
Calibration frequency depends on usage, regulatory requirements, and manufacturer recommendations. Maintain a formal schedule and document each calibration event.
Calibration frequency depends on use and requirements; follow your schedule and document each event.
Can I calibrate using a portable gas cylinder?
Yes, portable gas cylinders can be used for field calibration if they are properly labeled, within expiry, and connected with a valid regulator and leak-check procedure.
You can use portable gas cylinders for field calibration with proper labeling and leak checks.
What safety steps should I follow during calibration?
Work in a ventilated area, wear PPE, and ensure all gas connections are leak-tested before initiating calibration. Never bypass interlocks.
Always ventilate, wear PPE, and test for leaks before calibrating.
What if readings drift after calibration?
If readings drift, re-check gas connections, leaks, and sensor health. Recalibrate with fresh gas and consider sensor replacement if drift persists.
If drift happens, re-check connections and gas, then recalibrate or replace the sensor if needed.
Is field calibration the same as lab calibration?
Field calibration accounts for environmental factors; lab calibration offers more controlled conditions. Document environmental conditions when calibrating outside the lab.
Field calibration differs due to environment; document conditions if done outside the lab.
Watch Video
Key Takeaways
- Calibrate with traceable gas standards for accuracy.
- Verify safe, leak-free connections before starting.
- Document every calibration step and result for traceability.
- Perform independent checks to confirm repeatability.
- Maintain logs to support future troubleshooting.