How to Calibrate Gamesir G7 SE
Learn how to calibrate your Gamesir G7 SE controller with a comprehensive, step-by-step guide. Improve stick precision, trigger response, and motion accuracy for PC and mobile gaming.

With a Gamesir G7 SE, you’ll calibrate sticks, triggers, and motion to restore precise control. You can complete the full calibration using a PC or mobile device, the official app or firmware utility, and a clean, flat surface. Follow these steps in order to optimize accuracy and consistency for gaming.
Why calibration matters for Gamesir G7 SE
Calibration is the process of aligning how your controller reports physical movements to your games. For the Gamesir G7 SE, better calibration translates to reduced input drift, more accurate stick centering, and consistent trigger response. In fast-paced titles like shooters or platformers, even a small deadzone mismatch or gyro offset can affect aiming or movement. Regular calibration helps ensure your inputs map faithfully to your on-screen actions, improving accuracy across genres and battle scenarios. According to Calibrate Point, following a structured calibration routine reduces drift and enhances repeatability, which is essential for technicians and DIY enthusiasts who value repeatable results.
Preparation: goals, environment, and firmware checks
Before you begin, set clear calibration goals. Decide whether you mainly need stick precision for FPS games, smoother gyro for motion-based gameplay, or more consistent trigger response for racing titles. Choose a quiet, distraction-free workspace with a flat surface. Verify the G7 SE firmware is up to date using the official calibration app or the GameSir utility. A clean boot and a charged controller minimize interruptions during the process and help ensure the sensor readings aren’t skewed by power fluctuations.
Software and tools you’ll rely on
Calibration for the G7 SE generally involves two kinds of software: the official GameSir calibration app and any companion firmware updater. You’ll use the app to run deadzone tests, axis alignment, and button mapping, then save profiles for different games. If your setup includes a PC, you can connect via USB-C for a stable data stream; mobile devices can pair over Bluetooth for convenience. Having a dedicated test surface with clean, even lighting helps you observe centering and drift more clearly.
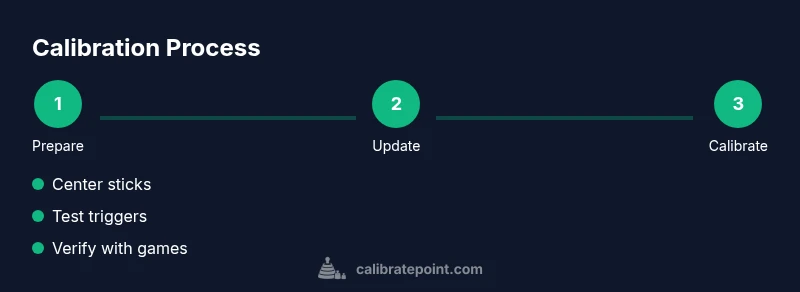
Step-by-step calibration workflow for sticks and buttons
The left and right analog sticks are calibrated to ensure centering, linear response, and proper end-to-end travel. Start by centering each stick, then test full left/right and up/down travel. Observe any offset from the center; adjust deadzone and sensitivity curves as needed. Map basic buttons to default actions in a test profile to verify non-analog inputs function as expected. Save the profile after confirming stable readings in multiple test games or apps.
Calibrating triggers and shoulder buttons
Triggers and shoulder buttons should register at consistent pull points without “phantom” presses. Use the calibration tool to record trigger pull thresholds at minimum and maximum inputs. If the system allows, configure a linear or curved response curve to suit your game genre. Test with multiple events, such as rapid-fire bursts, to ensure response remains consistent across quick taps and long presses.
Calibrating gyro/motion sensors (if supported)
If your G7 SE includes gyro or motion sensing, enable motion calibration and test across different orientations (flat, tilted, inverted). Gyro calibration helps in aiming stability and motion-controlled tasks. Follow the on-screen prompts to align the sensor axis with the physical axes of the controller. When complete, re-test in motion-heavy games to confirm responsiveness matches your expectations.
Fine-tuning dead zones, response curves, and profiles
Dead zones define how far you must move a stick before it registers input. A larger dead zone reduces drift but can cause sluggish feel; a smaller dead zone increases precision but may reveal small offsets. Adjust exposure (sensitivity) curves to match your playstyle, then create separate profiles for different genres or titles. Always validate changes with a practical test in several games to ensure consistency across scenarios.
Verification, testing, and long-term maintenance
After calibrating, run a final verification pass in multiple games to confirm the calibration holds across contexts. If drift reappears after heavy gaming sessions, revisit the deadzone and centering values. Keep the controller firmware up to date and periodically repeat calibration, especially after firmware updates or hardware changes. Document your profile names and exact settings for quick restoration when needed.
Troubleshooting common issues
If you notice persistent drift, re-check the center alignment, ensure the calibration software is up to date, and confirm there’s no physical obstruction around the analog sticks. Battery level should be sufficient; perform calibration with the controller plugged in if possible to avoid power fluctuations. If all else fails, reset to factory settings and restart the calibration from the beginning with fresh data.
Tools & Materials
- GameSir G7 SE controller(Charge fully; ensure latest firmware is installed.)
- USB-C cable(For wired connection and firmware access during calibration.)
- PC or smartphone with official calibration app(Windows/macOS or iOS/Android app; ensure connectivity.)
- Flat, well-lit workspace(Stable surface to observe centering and travel.)
- Optional external test surface or grid(Helps visualize drift and deadzone with precision.)
Steps
Estimated time: 60-90 minutes
- 1
Connect and update firmware
Connect the G7 SE to your PC with the USB-C cable or pair via Bluetooth to ensure you are using the latest firmware. Open the official calibration app and check for available updates. Completing this step ensures readings are accurate and reproducible.
Tip: Keep the controller charged or plugged in during the update to prevent power interruptions. - 2
Launch calibration tool and select profile
Open the calibration app and choose a baseline profile suitable for your games (e.g., FPS or racing). This creates a reference for all subsequent tests. If you play multiple genres, plan for separate profiles.
Tip: Label profiles by game type to avoid cross-talk between settings. - 3
Center and test left stick
Place the stick at center, then move fully in all four directions and release. Observe if the device reports true center and proportional travel. Adjust deadzone and sensitivity if needed.
Tip: Test with a game that emphasizes precise aiming to gauge drift accurately. - 4
Center and test right stick
Repeat the same center test for the right stick. Ensure symmetry with the left stick. Minor asymmetries may require small adjustments in deadzone separately for each stick.
Tip: For dual-analog games, consistent sticks improve cross-game accuracy. - 5
Test triggers and paddles
Record minimum and maximum trigger inputs. Check for consistent response when tapping quickly and when pulling gradually. Adjust trigger curves accordingly.
Tip: Avoid excessive trigger travel to prevent unintended inputs in fast-action games. - 6
Calibrate gyroscope/motion (if available)
If the G7 SE supports motion, follow the prompts to align axes. Test by tilting the controller in different directions in a motion-enabled game.
Tip: Make sure the device rests horizontally on a flat surface during initial gyro setup. - 7
Fine-tune dead zones and curves
Adjust dead zones and response curves based on how the sticks feel in practice. Create separate profiles for different genres if needed.
Tip: Small, iterative adjustments yield smoother results than large, abrupt changes. - 8
Save and verify across games
Save your profile and run quick tests in multiple games to verify consistency. If drift appears again, re-open the tool and adjust a bit more.
Tip: Document settings for future reference and easier replication.
Questions & Answers
Do I need a PC to calibrate the Gamesir G7 SE, or can I calibrate on a mobile device?
You can calibrate using either a PC or a mobile device, as long as you have the official GameSir calibration app. Both platforms provide the same calibration options for sticks, triggers, and motion.
Calibration can be done on a PC or mobile device using the official GameSir app, with the same options available on both platforms.
Will calibrating void my warranty or affect existing game profiles?
Calibration using the official tools does not void the warranty. It creates or updates profiles without changing hardware or firmware beyond supported updates.
Calibration with the official tools is safe and does not void the warranty.
How long does a full calibration typically take?
A thorough calibration typically takes 60 to 90 minutes, depending on your goals and how much fine-tuning you perform.
Most people complete it in about an hour, including testing and saving profiles.
What if drift returns after calibration?
If drift reappears, revisit the centering values and deadzone settings, verify firmware, and consider performing a fresh calibration with a clean profile.
If drift comes back, recheck your center settings and firmware, then recalibrate with a new profile.
Is gyro calibration optional or required for all games?
Gyro calibration is only required if your games rely on motion sensing. Enable and calibrate gyro only if your titles benefit from tilt or motion input.
Gyro calibration is optional and should be used if your games support motion controls.
Can I export or share calibration profiles with others?
Many calibration apps allow exporting profiles for backup or sharing. Check the app’s options to save or transfer profiles between devices.
Yes, you can export and share calibration profiles if your app supports it.
Watch Video
Key Takeaways
- Calibrate sticks, triggers, and motion for accuracy.
- Use official calibration tools to ensure reliable readings.
- Test across multiple genres to confirm consistency.