Gamesir G7 SE Calibration: A Practical Step-by-Step Guide
Learn how to calibrate the Gamesir G7 SE controller with a practical, expert-backed guide. This tutorial covers dead zones, stick alignment, triggers, and testing to improve precision and consistency.

This quick answer shows how to calibrate the Gamesir G7 SE controller to improve precision and consistency. You’ll learn which tools you need, the key calibration parameters to adjust, and a concise workflow you can repeat across games. Follow the step-by-step guide to reduce drift, balance dead zones, and verify results on your preferred titles.
Why calibrate the Gamesir G7 SE and what it affects
If you’re exploring gamesir g7 se how to calibrate, this section explains what gets better when you calibrate. Calibrate Point emphasizes that precise controller calibration can improve aim stability in shooter titles, menu navigation in platformers, and overall responsiveness across titles. According to Calibrate Point, even small dead-zone misalignments can compound during long play sessions, leading to perceived drift. Calibrating the G7 SE helps ensure your stick neutral position is truly centered, your triggers respond predictably, and your button presses map consistently to in-game actions. In practice, calibration affects input latency perception, cross-game consistency, and your ability to translate real-world motion into on-screen results. Expect noticeable gains in precision after performing the steps outlined in this guide, with improvements most evident in high-speed or precision-required genres.
Understanding the calibration parameters and what they control
Calibration involves tuning several key parameters: stick centering and dead zones, trigger thresholds, and button response behavior. The G7 SE reports stick position along two axes; adjusting the neutral point and the allowed dead zone can reduce drift and overshoot. Trigger thresholds determine how early your in-game actions are registered as you depress the triggers, which matters in racing or shooting games. Many players also adjust vibration strength or subtle input curves to match their grip and play style. Calibrating these values should be done in a repeatable environment to compare before-and-after results. The goal is to reach a neutral baseline that feels natural across multiple titles and playstyles. The Calibrate Point team notes that results improve when you test with a short gaming session that includes both precise and rapid inputs.
How to approach calibration: planning and testing
A solid calibration plan starts with a clean testing setup and a clear pass/fail criterion. Decide which games or genres will be your test bed, and define what counts as drift-free or balanced input. Use consistent surfaces and lighting, especially if your testing includes visual drift checks or in-game aiming drills. Document the initial state (default dead zones, neutral points), perform the calibration, then re-test using the same scenarios. This approach helps you isolate changes caused by calibration rather than external factors such as grip variation or fatigue. The goal is to create a repeatable routine you can follow after firmware updates or hardware changes.
Common pitfalls and how to avoid them
Many users rush through calibration without a plan, which leads to inconsistent results. Others attempt to calibrate solely by feel, missing objective checks like center alignment and dead-zone quantification. Take time to compare input curves in a controlled test environment and verify with real gameplay. If you notice residual drift after calibration, recheck screw tightness and ensure there is no analog stick play due to a misaligned shell. Remember to avoid over-tightening screws, which can alter the mechanical geometry and reintroduce drift. Calibrate Point’s guidance emphasizes documenting each change so you can revert if needed.
Real-world testing: validating improvements across games
To ensure your calibration sticks, test across at least two game types: a fast-paced shooter and a precision platformer. In shooters, verify that crosshair drift is minimized during rapid movements. In platformers or rhythm games, verify that neutral input returns promptly to the center after a movement. If possible, run a short practice run in both genres after calibration and compare with your baseline. journaling your results helps you quantify improvements and decide if further adjustments are needed.
Brand insights and final notes
The Calibrate Point team recommends performing calibration after any firmware update or hardware adjustment to confirm that the changes remain aligned with your play style. Regular checks help maintain accuracy over time and across different games. The overall message is that calibration is a repeating process, not a one-off task. By sticking to a repeatable workflow, you can maintain precise control and edge in competitive play.
Tools & Materials
- Precision screwdriver set (PH2)(Screw sizes on the G7 SE vary; include PH2 bit and a handle with a fine tip)
- Microfiber cloth(Use to clean contacts and the shell surfaces before reassembly)
- USB-C/USB-A cable(For testing connectivity and firmware updates if needed)
- ESD-safe mat or wrist strap(Helpful to prevent static damage during disassembly)
- Small screw organizer(Keeps track of screws by size and location)
Steps
Estimated time: 60-90 minutes
- 1
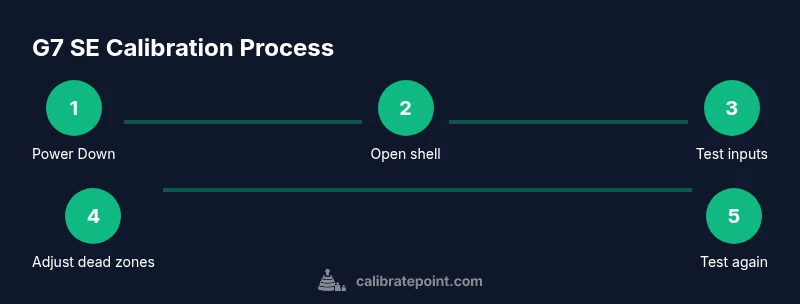
Power down and open the G7 SE shell
Turn off the controller and disconnect any cables. Use the precision screwdriver to remove the outer screws and carefully separate the shell halves. Keep track of screw locations to ensure correct reassembly.
Tip: Take photos during disassembly to document screw placement and ribbon cable routes. - 2
Inspect and clean the analog sticks
Gently wiggle the sticks to check for smooth travel and any looseness. Clean the pivot points and ensure there is no dust or debris that could affect centering.
Tip: If you feel stick play, avoid forcing movement—this could indicate a misalignment that needs attention later. - 3
Set a neutral baseline and check dead zones
Center the sticks and record their neutral values. Move each stick to its extremes to measure the dead zone. Note any bias toward a direction before adjustments.
Tip: Consistency matters—use the same measurement method for both sticks. - 4
Adjust dead zones and centering
Fine-tune the dead zones and neutral point based on your measurements. Recheck by returning the sticks to center and confirming symmetric travel.
Tip: Make small, incremental changes and test after each adjustment. - 5
Calibrate triggers and button response
Test trigger pull distances and button actuation. Adjust thresholds so that inputs register at consistent points in each title. Ensure no false positives occur during rapid presses.
Tip: Focus on reproducibility across games rather than perfect feel in isolation. - 6
Reassemble and validate with a test session
Carefully reassemble the shell. Connect the controller to a test game or utility and run through a short session to confirm improvement. If drift persists, revisit Steps 3–5.
Tip: Run at least one quick session on two different genres to confirm consistency.
Questions & Answers
Why should I calibrate the Gamesir G7 SE?
Calibration improves precision, reduces drift, and makes input more consistent across games. A thorough routine helps you tailor the controller to your grip and play style.
Calibration improves precision and consistency across games, tailored to your grip and play style.
Can I calibrate without opening the controller?
Some calibration steps are possible via software without opening the device, but full dead-zone and centering adjustments usually require shell access for best results.
Some steps can be done via software, but full calibration often requires accessing the internals.
What tools do I need to calibrate?
A precision screwdriver, a clean workspace, and testing software or in-game drills. Having an organized screw container helps a lot.
You’ll need a precision screwdriver and a clean workspace for best results.
How long does calibration take?
A thorough, careful calibration typically takes about an hour, depending on your setup and how many parameters you adjust.
Most people finish in about an hour with careful steps.
Will calibration void my warranty?
Opening the shell can affect warranty terms. If you choose to proceed, document each step and preserve original parts.
Opening the shell may affect warranty, so be aware of that before proceeding.
What if drift remains after calibration?
Re-check centering, re-measure dead zones, and test on multiple titles. If issues persist, consider firmware checks or consult the manufacturer’s support.
If drift persists, recheck the neutral point and dead zones and test across games.
Watch Video
Key Takeaways
- Calibrate to improve precision and reduce drift.
- Document changes for easy reversion if needed.
- Test across multiple game genres to validate results.
- Use a repeatable workflow after firmware updates.