Controller Calibrate: A Practical Step-by-Step Guide
Learn how to calibrate a game controller to ensure accurate input across sticks, buttons, and triggers. This practical, DIY-friendly guide from Calibrate Point covers tools, steps, verification, and troubleshooting for common controllers like PS5 and Xbox.

You will learn how to calibrate a game controller to restore accurate input across sticks, buttons, and triggers. This guide covers required tools, a clear step-by-step workflow, verification methods, and troubleshooting tips. Expect a practical, DIY-friendly process that suits casual gaming and professional testing alike.
Why calibration matters for game controllers
Controller drift, dead zones, and misalignment can derail gaming sessions and precision tasks. If you’re ready to optimize performance, you may want to controller calibrate to align physical movement with digital input. According to Calibrate Point, proper calibration starts with understanding the input signals and their boundaries, then translating that knowledge into repeatable actions. In practice, calibration reduces drift, centers sticks, and standardizes button responses across sessions. A well-calibrated controller yields more consistent aiming, quicker response times, and fewer accidental inputs during high-pressure moments. This matters whether you’re playing competitively, developing accessibility tools, or controlling academic or industrial interfaces. By mastering calibration, you can create a reliable baseline that transfers across games, applications, and devices.
Understanding calibration needs by device type
Different controllers and ecosystems require distinct calibration approaches. A first-party device may offer a built-in calibration flow with factory presets, while third-party controllers often rely on vendor software or universal calibration tools. For a console controller, you’ll typically calibrate stick centering, dead zones, and button mapping within the console’s settings or companion app. PC-based calibrations may involve test programs that reveal drift along the X and Y axes, allowing you to adjust interpretation thresholds. The core objective is to align the physical positions with digital inputs, ensuring consistent response across diverse conditions such as gesture control or precision moves in gaming.
Tools and environment setup
Before you begin, assemble essential tools and choose an appropriate environment. You’ll need the controller you intend to calibrate, a reliable USB cable if you’re using a wired connection, a computer or mobile device with a calibration utility, and at least one test map or profile to verify accuracy. Ensure the controller battery is charged or connected, the software is up to date, and you have a distraction-free workspace. A well-lit, quiet environment helps you notice subtle drift and dead-zone issues during tests. If you’re calibrating a PS5 or Xbox controller, check if vendor software provides a dedicated calibration module, and prepare any required driver updates beforehand.
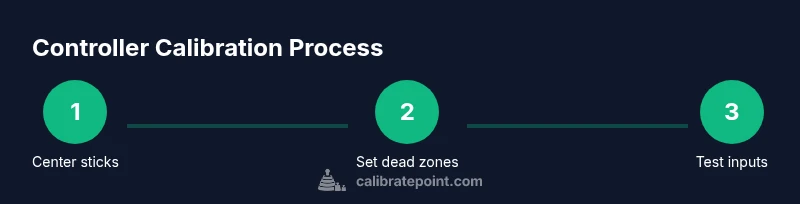
Step-by-step workflow for standard controllers
This overview outlines a repeatable workflow you can apply to most modern game controllers. It focuses on centering sticks, setting dead zones, and validating button responses. Start with a clean baseline; don’t skip the verification phase, as it confirms the calibration took effect. Document the initial readings, apply adjustments, then retest with the same test maps to ensure consistency. If your device supports profiles, save a labeled calibration profile for future use. Keep the calibration software or firmware up to date to avoid regression in later revisions.
Button, stick, and trigger calibration specifics
Joystick centering is the core of most calibrations. You should identify drift by recording neutral positions and comparing them to ideal centers. Dead zones determine how much you must push a stick before input is registered; too small can cause jitter, too large can reduce precision. Triggers and bumpers often have analog ranges that require calibration for consistent response curves. For buttons, verify that each press maps to the intended in-game action with consistent timing. If something feels off, re-run the calibration with a stronger emphasis on centering and return-to-neutral checks.
Calibrating specialized controllers (PS5, Xbox, and third-party)
System-level calibration paths can vary between brands. PS5 controllers may require updating firmware and using the DualSense calibration tools, while Xbox controllers often rely on Xbox Accessories App calibrations or Windows calibration utilities. Third-party controllers may present unique configurations or odd input mappings; in these cases, use vendor-provided utilities or universal calibration software and follow the manufacturer’s instructions closely. When in doubt, repeat the steps for standard controllers, then apply device-specific tweaks to center and friction-curve settings.
Verifying calibration with tests and test maps
Verification is critical. Use a consistent test map that exercises all axes: left/right, up/down, and trigger input ranges. Record readings across several cycles to ensure stability and repeatability. Look for consistent center values, minimal drift, and uniform response curves. If results vary, revisit centering, dead zones, and response curves. A good verification routine includes both quick impulse tests and longer-duration tracking to catch slow drift that emerges over time.
Maintenance, risks, and troubleshooting
Calibration is not permanent; environmental changes, controller wear, and software updates can influence results. Recalibrate when you notice drift, after firmware updates, or when switching to a different test profile. Avoid calibrating while the controller is physically damaged or intermittently connected, as this can produce misleading readings. If calibration fails to improve accuracy, test with a different USB cable, reset the controller to factory settings, or consult the vendor’s support resources for known issues and compatible firmware versions.
Next steps and best practices
Document each calibration session with date, device, firmware, and settings used. Maintain a dedicated calibration profile for quick restoration after system updates or device changes. Periodically re-run tests to ensure ongoing accuracy, especially if you use the controller for precise tasks or accessibility software. By following a consistent workflow and keeping notes, you’ll sustain high-quality input mapping across your projects.
Tools & Materials
- Controller (gamepad or joystick)(Ensure it’s fully charged before starting calibration)
- USB cable (for wired connection)(Use a high-quality cable to avoid disconnects during tests)
- Computer or mobile device(Windows/macOS/Linux or Android/iOS with calibration utility)
- Calibration software or built-in utility(Have the latest version; some controllers require vendor software)
- Test map or profile(Use a standard layout and repeatable tests for consistency)
Steps
Estimated time: 30-60 minutes
- 1
Prepare and connect
Power on the controller, connect it to your device, and launch the calibration tool. Confirm the device is detected and that the software shows the correct model and firmware version.
Tip: Use a direct USB connection when possible to minimize interference. - 2
Create a baseline
Record current neutral positions for all sticks and buttons. Note any existing drift or misalignment to identify what needs adjustment.
Tip: Take multiple readings from different angles to confirm the baseline. - 3
Center the sticks
Follow the tool prompts to center both analog sticks. Hold them at neutral and perform a few cycles to verify centering accuracy.
Tip: Keep hands relaxed and avoid applying pressure during centering. - 4
Set dead zones
Adjust dead zones so minor, unintended movements do not register while full-range inputs remain responsive.
Tip: Start with small dead zones and increase gradually if you notice jitter. - 5
Calibrate triggers and buttons
Calibrate analog triggers to reflect their real travel range. Verify that each button maps to the intended action with consistent timing.
Tip: Test rapid presses to ensure no ghost inputs occur. - 6
Save and apply profile
Save the calibration as a named profile and apply it to the controller so the settings persist across sessions.
Tip: Use a descriptive label like 'ProjA_StudioCal' for easy retrieval. - 7
Verify with tests
Run the test map again to confirm improvements. Look for reduced drift and stable input response.
Tip: Record a short video or screenshots for future reference. - 8
Document and back up
Document the settings and firmware version. Back up the profile so you can restore quickly after updates.
Tip: Keep your notes in a dedicated calibration log.
Questions & Answers
What does calibration fix on a controller?
Calibration corrects drift, centers analog sticks, and aligns button mapping with input signals. It improves accuracy for both gaming and precise control tasks.
Calibration corrects drift and alignment to improve accuracy when using your controller.
How often should I calibrate a controller?
Calibrate when you notice drift, after firmware updates, or when changing test profiles. Regular checks help maintain consistent performance.
Calibrate when you notice drift or after updates to keep performance consistent.
Do I need special software to calibrate?
Most controllers can be calibrated with built-in tools or vendor software. If unavailable, third-party calibration utilities offer a compatible workflow.
Most controllers use built-in or vendor software; third-party tools can help if needed.
Can calibration affect performance during play?
Proper calibration should improve performance by providing consistent input. Poor calibration can cause erratic input or dead zones.
When done correctly, calibration improves performance; poor calibration can cause issues.
What should I do if drift returns after calibration?
Revisit baseline readings, re-center the sticks, and consider adjusting dead zones or firmware updates. If problems persist, consult support.
If drift returns, redo the steps and check for firmware updates or contact support.
Watch Video
Key Takeaways
- Identify drift and baseline readings before changes
- Center sticks and set appropriate dead zones
- Test with consistent maps and verify results
- Document and back up calibration profiles