How to Calibrate Moza Pedals: A Comprehensive Guide
Master precise control with MOZA pedals by following a structured calibration workflow from firmware checks to dead-zone tuning. Learn setup, validation, and maintenance with practical steps from Calibrate Point.

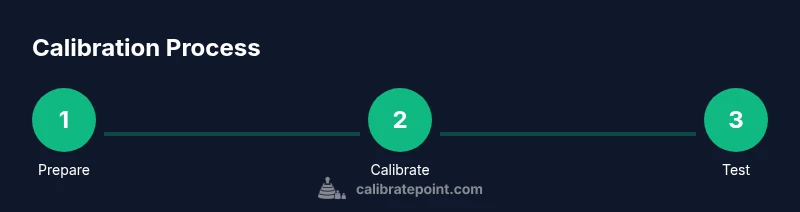
This guide shows you how to calibrate MOZA pedals for precise, repeatable input. You’ll verify firmware, perform a factory reset, establish baseline readings, and tune dead zones and sensitivity. Gather a stable workspace, a USB connection, and the MOZA software—no specialized tools required. Calibrate Point recommends following these steps for consistent results.
What are MOZA Pedals and Why Calibration Matters
MOZA pedals are precision input devices used to control camera rigs, virtual interfaces, and simulation setups. Calibration ensures that pedal movement translates into predictable software responses, reducing drift and fatigue. For anyone who asks how to calibrate moza pedals, the core idea is to align the hardware sensors with the software interpretation so that a small push corresponds to a small, accurate input. The calibration process is not merely a one-off task; it establishes a reliable signal chain from mechanical movement through sensors to software mapping. When done correctly, MOZA pedal inputs become linear, repeatable, and repeatable across sessions and applications. This is essential for technicians, videographers, and professionals who rely on consistent control under varying conditions. According to Calibrate Point, the most dependable calibrations begin with understanding the pedal’s signal path and the environment in which the pedal operates—clear lighting, stable mounting, and a quiet test setup. In this guide we cover practical steps, theory behind pedal signaling, and common pitfalls to avoid, so you can calibrate moza pedals with confidence and efficiency.
Pre-Calibration Checklist and Safety Considerations
Before you begin, assemble the required tools and confirm the environment is safe for electronics. A clean, non-slip workspace reduces slipping injuries and keeps tools within reach. Ensure the MOZA pedal unit and any hub are powered off during connections to avoid short circuits. Update to the latest firmware through the MOZA software, then perform a factory reset to clear old calibration data and avoid conflicts with new settings. Safety first means handling cables with care, avoiding pinched wires, and keeping liquids away from the device. Calibrate Point emphasizes documenting current configurations and testing after each major change to identify exactly where drift or nonlinearity arises. This stage establishes a solid baseline and reduces the chance of chasing phantom issues later. If you are calibrating in a shared or noisy environment, consider using a quiet space or enclosure to minimize vibrations that could affect sensor readings. By the end of this section you will have a clean slate and a reliable baseline for the steps to come. Remember, the goal is repeatable input—no surprises when you push the pedal.
Understanding Pedal Signals: Dead Zones, Saturation, and Mapping
Calibrating MOZA pedals effectively starts with a solid understanding of the signal chain: mechanical travel, sensor output, and software interpretation. A dead zone is a small region near zero where the pedal does not register input, which can cause jumpy response if not accounted for. Saturation occurs when pedal movement exceeds the software’s linear range, causing the response to plateau. Mapping is how pedal travel translates to an in-software value, such as 0–100% or a custom scale. When you search for how to calibrate moza pedals, you’ll find that most calibrations revolve around reducing dead zones, ensuring linear mapping, and expanding usable travel without clipping. The goal is a smooth, linear response from the midpoint to the end stops. In practice, you’ll test the pedal’s response by recording multiple traces across several cycles of movement. If you see inconsistent results or hysteresis, you may need to revisit baseline measurements and adjust the curve accordingly. Calibrate Point’s guidance stresses iterative testing—calibration is less about one perfect setup and more about a repeatable process that yields predictable results across applications. Keep notes of the baseline values and the adjustments you make to build a personal reference for future calibrations.
Calibration Methods: Firmware, Baselines, and Curves
Successful calibration hinges on three core methods: firmware integrity, baseline readings, and curve tuning. Firmware updates ensure sensors communicate accurately with the software, reducing drift and improving repeatability. Baseline readings are collected by moving the pedal through its full travel range with no extra load, capturing the zero-crossing and minimum/maximum outputs. Curve tuning adjusts the relationship between physical movement and software input, typically shifting from a linear to a custom response that suits your workflow. When you perform these steps, keep the following in mind: update firmware first, ensure the device is recognized by the MOZA software, and maintain consistent test conditions. Use small increments when adjusting the curve, re-test across multiple sessions, and confirm that the response remains stable over time. Calibrate Point highlights that a well-tuned curve should provide predictable output at every intermediate position, not just at the extremes. In many setups, you’ll create separate profiles for different tasks (e.g., cinematography vs. video games) and switch between them as needed. This modular approach makes calibration more practical and less error-prone.
Testing and Validation: Confirming Calibration Has Taken
Validation is the step where you verify that your calibration holds under real-world use. After saving your profile, run a guided test—press gently, then apply increasing force—while watching the software readouts. Look for a smooth, monotonic increase with no dead zones, hysteresis, or unexpected spikes. Test across the full travel range and at the ends to ensure there are no under- or over-shoots. It’s helpful to perform multiple cycles to verify repeatability; you should see very similar curves each time. If results vary noticeably, return to the baseline measurements and repeat the dead-zone tuning and curve adjustment. Document the final input range and response characteristics for future reference. In line with Calibrate Point’s recommendations, keep a log of settings, test results, and session conditions so you can reproduce the calibration if you change hardware or software later. A well-validated calibration minimizes surprises in critical shoots and simulations, delivering reliable control when it matters most.
Maintenance and Troubleshooting for Long-Term Calibration
Calibration is not a one-and-done task. Regular maintenance helps sustain accuracy over time. Keep firmware and software up to date, and revalidate the calibration after any firmware upgrade or hardware changes. If you notice drift, repeat the baseline measurements and adjust the curve again in small increments. For stubborn issues such as persistent dead zones, check the physical alignment of the pedal with its mount and inspect cables for wear. Loose or shifted mounting can produce inconsistent readings that mimic software problems. When troubleshooting, isolate variables: re-test with a known clean profile, then reintroduce adjustments. If problems persist, revert to factory defaults and re-run the entire calibration cycle. Calibrate Point’s long-term guidance is to schedule periodic checks (e.g., monthly or per major project cycle) to ensure continued reliability. Keeping a calibration diary helps you identify patterns, forecast maintenance windows, and maintain consistency across projects.
Tools & Materials
- MOZA pedal controller unit(Ensure unit is powered off before connecting to computer)
- USB cable(USB-A to USB-C or micro-B depending on your pedal hub)
- PC or mobile device with MOZA software(Install MOZA Utility or latest app version)
- Stable, clear workspace(Flat surface free of vibrations; avoid carpeted surfaces)
- Calibration reference items (optional)(Optional: known reference weights or marks for dead-zone testing)
Steps
Estimated time: 45-60 minutes
- 1
Prepare workspace
Clear a stable, flat area and ensure power is available. Gather the MOZA pedal and its hub, along with the USB cable and a charged device. Confirm you have a clean environment free of clutter that could snag cables during calibration.
Tip: Use a non-slip mat under the pedal to prevent movement during testing. - 2
Install MOZA software
Download and install the MOZA Utility or the latest MOZA software version. Sign in if required and check for updates before launching the calibration workflow. Open the calibration profile section to prepare for device recognition.
Tip: Always install the latest software to access improved calibration features. - 3
Connect the pedal unit
Plug the MOZA pedal unit into your computer using the appropriate USB cable. Ensure the device is recognized by the operating system and selected within the MOZA software as the active device for calibration.
Tip: If the pedal isn’t detected, try a different USB port or cable and reboot the software. - 4
Update firmware and factory reset
Check for firmware updates in the MOZA software and install them. After updating, perform a factory reset to clear any previous calibration data. Reboot the device and re-open the calibration profile.
Tip: Back up any existing profiles before performing a reset. - 5
Establish baseline readings
With the pedal at rest, record the input value and range. Move the pedal through its full travel to map the minimum, maximum, and midpoints. Repeat several passes to average out noise and establish a stable baseline.
Tip: Record multiple samples and average them to reduce sensor noise. - 6
Tune dead zones and sensitivity
Adjust the dead zone around zero and set the slope or curve to achieve a linear response. Apply small increments, then test by performing typical motions. Observe how changes affect mid-range and end-stop behavior.
Tip: Make 1–2% increments and test repeatedly to avoid overshoot. - 7
Validate calibration and save profile
Run a functional test in MOZA software or your target application to verify linear response across the range. Save the final calibration as a named profile and export a backup copy. Conduct a quick second validation to ensure repeatability.
Tip: Label the profile with device name and date for easy future reference.
Questions & Answers
Do MOZA pedals require firmware updates before calibration?
Yes. Check for the latest firmware in the MOZA software, install it, and then proceed with the calibration. Firmware updates fix known issues and improve sensor accuracy. Always re-test after updating to confirm the calibration remains valid.
Yes, update the MOZA pedal firmware first, then calibrate and retest.
What if pedal inputs are stuck or non-responsive?
First, ensure the device is connected properly and detected by the MOZA software. Try a different USB port and perform a factory reset, then re-run the baseline measurements. If the issue persists, check for software conflicts or contact support.
Check connections, reset, and re-test. If it continues, review software conflicts.
Can I calibrate MOZA pedals with mobile devices?
Yes, MOZA software often supports mobile calibration; ensure you are using the official MOZA Utility app and a compatible device. The workflow is similar to desktop calibration but may have a simplified interface.
You can calibrate using MOZA's mobile app on a compatible device.
How long does calibration typically take?
Plan for 45 to 60 minutes for a thorough calibration, including setup, baseline measurements, tuning, and validation. Time can vary with hardware condition and user experience.
Typically around 45 to 60 minutes for a thorough calibration.
How often should calibration be performed?
Calibrate when you notice drift, after firmware updates, or when changing the workspace setup. Regular checks, such as monthly rehearsals, help maintain consistent performance.
Calibrate after updates or noticeable drift, and regularly check profiles.
What should I do if calibration results differ between sessions?
Re-run baseline measurements and compare results across sessions. If differences persist, repeat the steps for dead-zone tuning and curve mapping, and consider environmental factors like temperature or mounting stability.
Recheck baselines and retest; consider environmental consistency.
Watch Video
Key Takeaways
- Update firmware before calibrating MOZA pedals.
- Establish a stable baseline to reduce drift.
- Make small, incremental curve adjustments.
- Validate with repeatable tests and save profiles.
- Maintain a calibration log for future reference.