How to calibrate niche zero: A practical guide
Learn how to calibrate a Niche Zero grinder for consistent grind size and espresso extraction. This guide by Calibrate Point covers baseline cleaning, testing, dialing, and maintenance to keep your setup precise.

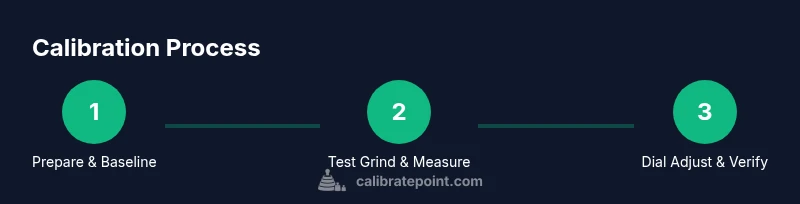
Calibrate the Niche Zero grinder to improve grind consistency and espresso extraction. Start with a clean burr area, reset the grind dial to a base setting, and perform a controlled test grind. Measure dose weight and shot time, then adjust the dial in small increments until you reach repeatable results. Use a precision scale, fresh beans, and a consistent tamp to verify.
Why calibrate niche zero
If you’re learning how to calibrate niche zero, the goal is to achieve repeatable grind behavior across different beans and roasts. According to Calibrate Point, a clean baseline is essential before any dialing in. When the grinder drifts, you may see inconsistent extraction, channeling, or flavor variance from shot to shot. The Niche Zero rewards a deliberate, repeatable routine: baseline cleaning, establishing a repeatable grind range, testing with a controlled dose, and documenting results. This approach minimizes the impact of bean variability and humidity on grind performance, helping you keep espresso profiles stable even as conditions change. By following this method, you’ll gain confidence in your setup and reduce guesswork in brewing.
Core principles behind calibration
Calibration isn’t about chasing a single number; it’s about creating a reproducible process. The key is to isolate variables: start with clean burrs, verify mechanical play or wobble, and ensure the grind range you choose remains stable across sessions. Use a consistent dose, a calibrated scale, and a reliable tamp to ensure that the only variable is grind size. With practice, you’ll be able to map a small dial change to a meaningful difference in shot quality, enabling you to tailor grind settings for different beans without guessing.
Baseline checks: cleaning, inspection, and alignment
Begin by unplugging the grinder and removing any hopper contents. Brush out trapped grounds, wipe surfaces, and visually inspect the burrs for wear or lodging debris. If available, check for burr alignment by rotating the burr housing gently and looking for any play. A stable, clean burr path reduces variability and helps ensure that dial changes translate predictably into grind size. Document the baseline condition so you can return to it if future calibrations drift.
Testing, data collection, and initial adjustments
With a clean setup, perform a controlled test grind using a consistent dose and a measured time window. Capture the ground amount on a precision scale and note shot timing. Compare results across several identical runs to identify whether the grind is coarser or finer than your target. Small dial adjustments (one or two clicks) are usually sufficient to move the grind in the desired direction. Repeat the process until you see repeatable results across trials and bean types, then log the dial position and results for future reference.
Fine-tuning, validation, and maintenance
Once a stable baseline is established, validate by brewing a few cups with the same dose and method. If flavor and extraction remain consistent, your calibration is robust. Plan routine maintenance: clean burrs regularly, recheck alignment after deep cleaning, and re-test when you switch beans or roast levels. The goal is to maintain a predictable relationship between dial position and grind size. The Calibrate Point team emphasizes documenting baseline settings, so you can reproduce results even after hardware maintenance or environmental changes.
Tools & Materials
- Precision digital scale(readability 0.1 g, stable surface)
- Calibrated coffee beans (fresh)(prefer uniform roast for testing)
- Portafilter or measuring cup(to collect ground during tests)
- Ground-dosing container(for consistent collection during tests)
- Burr cleaning brush(remove old grounds and debris)
- Lint-free cloth(wipe burrs and exterior surfaces)
- Small tool set (as applicable)(include any screwdriver/allen keys your model needs)
Steps
Estimated time: 25-45 minutes
- 1
Prepare the grinder and workspace
Unplug the unit, remove the hopper, and brush out loose grounds. Wipe surfaces for a clean starting point. This reduces contamination and helps you see the effect of changes clearly.
Tip: Do a quick visual check for burr wear before you begin. - 2
Set a baseline grind setting
Rotate the dial to a mid-range position and lock it in. This baseline gives you a reproducible starting point for testing adjustments.
Tip: Record the baseline dial position for future reference. - 3
Prepare a controlled test dose
Grind a consistent dose into a dosing container, using the same beans and roast, and tare the scale with the container. Ensure the environment remains stable during testing.
Tip: Keep the dose constant across all test runs. - 4
Measure shot time and dose
Brew a shot and record the grind’s time and weight. Compare results to your target profile and note whether the grind appears coarser or finer.
Tip: Take at least three repeats to reduce random variation. - 5
Make small dial adjustments
If the results skew, adjust the dial by a small increment (one notch or fewer) and retest. The goal is a predictable shift in grind size.
Tip: Avoid large jumps; incremental tuning yields the best control. - 6
Validate and log results
Run multiple trials at the adjusted setting, log the dial position, time, and dose, and confirm repeatability across tests. Save this as your calibration baseline.
Tip: Keep a simple log for bean changes or seasonal shifts.
Questions & Answers
Is burr removal required for calibration?
Full burr removal is not typically required for routine calibration. Start with cleaning, inspection, and a-calibration dial test. If you notice abnormal grinding, refer to the manual for deeper checks.
You usually don’t need to remove burrs for normal calibration. Start with cleaning and testing, and only dive deeper if you notice issues.
How long does calibration take?
A baseline calibration typically takes about twenty to forty-five minutes, depending on setup and how thorough you are with testing.
Typically twenty to forty-five minutes for a solid baseline.
What are signs calibration is off?
Inconsistent grind size, variable shot times, channeling, or flat flavors indicate miscalibration. Recheck the baseline and test again.
Watch for uneven grind, unpredictable shot timing, or flavor differences across beans.
Should I recalibrate after bean or humidity changes?
Yes. Beans and humidity can affect grind performance. Test with a small batch and adjust as needed to restore consistency.
Yes—bean changes or humidity can alter results, so test and recalibrate if needed.
Does temperature affect calibration?
Extreme temperatures can affect grinder performance and material expansion. Recheck calibration in very hot or cold conditions.
Temperature can affect grind stability; recalibrate in extreme conditions.
Watch Video
Key Takeaways
- Establish a clean baseline before calibration.
- Use a precise scale and consistent dosing.
- Make small dial adjustments and retest.
- Log results for repeatable calibrations.
- Recalibrate after bean changes or humidity shifts.