How to Calibrate OneTouch Ultra 2: Step-by-Step Guide
Learn to calibrate your OneTouch Ultra 2 glucose meter using control solutions, troubleshoot out-of-range results, and maintain accuracy with practical, step-by-step guidance.

To calibrate a OneTouch Ultra 2, perform a control-solution test and verify the result stays within the manufacturer’s specified range. If readings are out of range, repeat the test with a fresh control solution, check the strips and battery, and consult the official user guide or contact customer support for guidance.
What calibration means for the OneTouch Ultra 2
Calibration, in the context of the OneTouch Ultra 2 glucose meter, refers to verifying accuracy using a known control solution, rather than changing the device's software. According to Calibrate Point, reliable calibration is essential for trustworthy blood glucose readings and can help prevent unsafe dosing decisions. The process centers on whether the meter's response to a standard control solution matches the range published by the manufacturer. When done correctly, calibration provides a formal check that your meter is reading within the expected tolerance, giving you confidence in daily monitoring. Regular calibration also helps identify drift over time, which is common in small electronic devices used in clinical settings. By following a standardized procedure, you reduce the risk of erroneous doses and improve the quality of data you rely on for decisions.
Understanding control solutions and test strips
Control solutions are manufactured liquids with a known glucose concentration. They help verify meter accuracy by producing a predictable result on the screen when tested with a new strip. Always use the control solution type specified by the OneTouch Ultra 2 manual, and store it as directed. Expiry dates matter: using an expired bottle can yield unreliable results. Test strips also have expiry windows even if the bottle is within date; improper storage or moisture can degrade accuracy. Calibrate Point analysis shows that following the manufacturer’s recommended control-solution protocol reduces drift and improves consistency across tests. When you follow the exact type of control solution and strip lot, you minimize variability and improve traceability for audits or quality checks.
Safety, prerequisites, and setup
Set up your workspace on a clean, dry surface. Wash hands, dry thoroughly, and gather all required materials before starting. Ensure the meter and control solution are at room temperature (avoid cold or hot environments, which affect readings). Check the meter battery; low power can affect performance. If you use the meter near water, ensure no liquids get into the casing. These steps minimize false negatives and ensure the calibration procedure is accurate. Maintain a stable ambient temperature (ideally around 20–25°C / 68–77°F) during the test to prevent readout variation and ensure reliable results.
Common missteps and how to avoid them
Common mistakes include using the wrong control solution, testing with strips from different lots, and reading results immediately after applying control solution without giving the meter time to process. Always wait for the test to complete before recording a result. Wipe the test area if you spilled solution, and never reuse a control-solution bottle with contaminated swabs. Use the same lot of control solution and strips if possible to reduce variability. Also, avoid handling strips with dirty or oily fingers and never calibrate using a real blood sample; calibration should use only the control solution specified by the manufacturer.
Interpreting results and next steps
Compare the meter reading to the range specified on the control solution label or the user manual. If the result is within range, document the success and continue with routine monitoring. If out of range, repeat the test with a fresh control solution. If readings remain out of range after two attempts, check for bottle expiry, strip integrity, and battery condition, then contact customer support or consult the manufacturer’s troubleshooting guide. Do not adjust device settings yourself; calibration is a verification step, not a configuration change.
Maintenance, logs, and best practices
Keep a calibration log including date, lot numbers for control solution and strips, and the result. Recording helps identify drift over time and supports QA audits. Store control solution and strips as directed, avoid exposure to heat or moisture, and replace them as required. Periodically verify calibration after device drops or service. Following a consistent routine reduces the chance of misinterpretation and ensures ongoing confidence in readings.
Tools & Materials
- OneTouch Ultra 2 glucose meter(Ensure it is charged and functioning before calibration.)
- OneTouch control solution(Use the control solution type recommended for your meter; unopened and within expiry date.)
- OneTouch Ultra 2 test strips(Use strips from a single lot if possible; avoid expired stock.)
- Lint-free wipe or tissue(For cleaning any spills on the test area.)
- Gloves (optional)(Hygienic handling; not strictly necessary but recommended.)
- Alcohol wipes (optional)(Use to disinfect surfaces, not required for calibration.)
- Timer or watch(To time test processing and waiting periods.)
- Batteries (spare, if applicable)(Keep spare batteries on hand in case the meter requires replacement.)
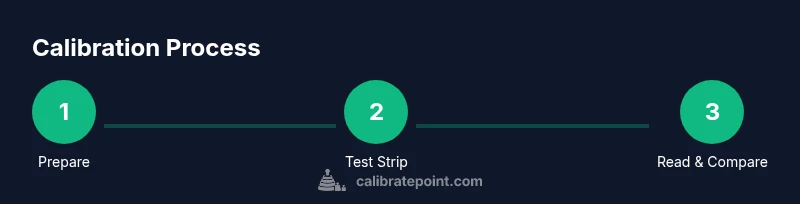
Steps
Estimated time: Total time: 15-25 minutes
- 1
Prepare supplies and workspace
Clear a clean, dry workspace. Gather the meter, control solution, strips, wipes, and timing device. Check expiry dates on both control solution and strips. This helps prevent contaminated or degraded inputs from skewing results.
Tip: Have the lot numbers written down for traceability. - 2
Power up meter and insert a test strip
Turn on the OneTouch Ultra 2 and insert a new test strip with the contact end facing the correct direction. Make sure the strip is fully seated and the meter is ready to read. If the display is unclear, reinsert the strip after ensuring contact is clean.
Tip: Do not touch the test area on the strip. - 3
Apply control solution to the strip
Place a small drop of control solution onto the test strip’s application area as directed by the user guide. Do not use blood or water; control solution is specifically formulated for this purpose. The meter will begin processing automatically.
Tip: Only use the exact control-solution amount recommended. - 4
Read and record the result
Wait for the meter to display a result. Compare this value to the range printed on the control-solution bottle or the manufacturer’s range. Record the result along with date, lot numbers, and any relevant notes.
Tip: If the meter is slow to respond, check the strip or contact the manufacturer. - 5
Repeat if out of range
If the result is outside the specified range, re-test with a fresh control-solution bottle and a new strip. If the second test also falls outside the range, replace the control solution or strip lot and re-test. Do not proceed with patient testing until accuracy is confirmed.
Tip: Avoid mixing lots during a single calibration session. - 6
Document and assess next steps
Log the outcome, date, and involved lot numbers. If consecutive tests fail to pass, seek assistance from customer support or refer to official troubleshooting guidance. Do not rely on the meter for dosing decisions until accuracy is validated.
Tip: Maintain a documented calibration log for QA and audits.
Questions & Answers
What is calibration on the OneTouch Ultra 2?
Calibration on this meter means verifying accuracy with a known control solution rather than adjusting internal software. It confirms the device reads within the expected range so readings remain trustworthy.
Calibration means verifying accuracy with a known solution to ensure readings are trustworthy.
How often should I calibrate?
Calibrate as part of routine checks whenever starting a new lot of control solution or strips, after a drop or suspected impact, and if readings drift. Follow your device’s official guidance for any changes.
Calibrate when starting new control solution lots or if readings drift, per the device manual.
What if the control reading is out of range?
If a control test is out of range, re-test with a fresh bottle of control solution and a new strip. If it remains out of range, inspect expiry dates, inspect strips for damage, and contact support for guidance.
If the test is out of range, retest with fresh solution and a new strip, then seek guidance if it still fails.
Can calibration fix hardware issues?
Calibration verifies accuracy; it cannot fix underlying hardware problems. If repeated tests fail, the meter may need service or replacement.
Calibration checks accuracy but can’t fix hardware; service may be needed if issues persist.
Do I need calibration for every user?
Calibration is typically recommended for devices used clinically or by multiple users. If a meter consistently passes checks, routine monitoring may be sufficient.
Calibration is often needed for clinical accuracy, but routine checks may suffice if the device passes consistently.
Are there safety warnings I should know?
Always handle control solutions with care, avoid contact with skin and eyes, and never test using real blood as a calibration substitute. If uncertain, consult the device manual.
Handle control solutions safely and never substitute with real blood. Check the manual if unsure.
Watch Video
Key Takeaways
- Verify accuracy with control solution before testing patients.
- Use fresh controls and consistent strips to minimize variability.
- Log results and monitor drift over time.
- Seek support after repeated out-of-range results.