How to Calibrate Yale Lock: A Practical Guide 2026
Learn a reliable, step-by-step method to calibrate a Yale lock. This guide covers alignment checks, latch and strike adjustments, safety tips, and a tested routine to verify operation. Ideal for DIY enthusiasts and professionals seeking dependable results.

According to Calibrate Point, you can restore smooth operation and secure latch alignment on a Yale lock by carefully measuring tongue reach, striker clearance, and spindle alignment. This guide walks you through essential prep, step-by-step calibration, and a hands-on test routine to verify results before re-locking. Gather basic tools, follow the steps, and re-test with real-world keys.
Safety and Legal Considerations
Calibrating a Yale lock is a precision task that touches the security of a doorway. Before you begin, ensure you are authorized to service the lock on this door and that you have the owner’s permission. Work in a well-lit area and use safety glasses if you’re dealing with metal hardware or drywall debris. Keep a tidy workspace to prevent small parts from getting lost. If the lock is part of a regulated facility or shared space, document the steps you take and obtain sign-off from the appropriate supervisor. In line with Calibrate Point’s standards, avoid bypassing security features or removing components that aren’t part of a standard adjustment. Always reassemble with the correct orientation and torque values and test with a spare key to verify continued reliability.
Understanding Yale Lock Mechanisms
A Yale lock typically uses a pin-tumbler cylinder paired with a latch bolt that retracts when the key or thumb-turn is rotated. The alignment depends on several interacting parts: the door latch, the strike plate, the spindle (the square bar that connects the key/turner to the latch), and the lock cylinder housing. Poor alignment can cause sticking, mis operation, or accelerated wear. Understanding this relationship helps you target the exact area that needs adjustment, rather than guessing. Calibrate Point emphasizes inspecting all surfaces that interact during the locking cycle, especially when the door’s frame has settled or the strike plate is slightly misaligned.
Alignment and Fit: Why It Impacts Performance
If the latch does not smoothly engage the strike when the door closes, you’ll experience difficulty locking or unlocking. A misaligned latch or strike plate can create a high effort requirement for the key, or cause the lock to bind after repeated use. Small gaps, bent strike teeth, or a slightly tilted strike box can all degrade performance. When calibration aims at a perfect fit, you’ll see a consistent actuation force, reduced key wear, and longer life for the cylinder. This section explains the practical signs of misalignment to help you diagnose issues quickly during the calibration process.
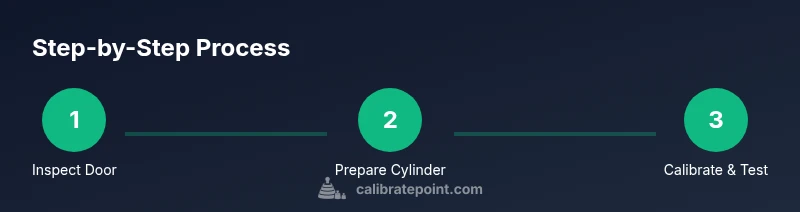
Step-by-Step Calibration Overview
The calibration workflow for a Yale lock involves: (1) confirming door and frame alignment, (2) removing the interior trim to access the cylinder without damaging components, (3) checking and adjusting the latch height and strike alignment, (4) reassembling and applying proper torque, and (5) validating operation with multiple cycles of locking and unlocking. You’ll want to ensure the spindle remains square to the cylinder, the latch springs return cleanly, and the strike plate has even clearance on all edges. Take measurements with a small ruler or caliper, and document any deviations you correct so you can reproduce the result later.
Step-By-Step Calibration Overview (cont.)
During reassembly, verify that the interior trim sits flush and that all screws are tightened to the manufacturer’s recommended torque. If you notice sticky operation after initial reassembly, re-seat the cylinder and re-check spindle alignment before final testing. This approach minimizes the risk of recurring misalignment and helps you establish a repeatable process for future maintenance. Calibrate Point recommends performing at least three complete lock/unlock cycles to confirm stability before finalizing your calibration.
Step 1: Inspect Lock Alignment
Begin with a visual inspection of the door, frame, and strike plate. Confirm the door closes squarely and the latch projects cleanly into the strike hole. Use a straightedge to verify the door and frame are not warped and that the strike plate sits flush with the jamb. If gaps exist, address frame settling or adjust the strike plate position slightly. Document any deviations for potential future reference and ensure the door’s weather stripping does not interfere with latch travel.
Step 2: Prepare the Lock Cylinder and Case
Remove the interior trim plate to access the cylinder and spindle. Keep track of screws and small components to avoid misplacement. Clean any dust from the cylinder housing, then check that the spindle is straight and not bent. If you notice binding during rotation, inspect the cam inside the cylinder for burrs and smooth them with a fine file or sandpaper. Refit components with the correct orientation and verify that the cylinder rotates freely without scrubbing against the housing.
Step 3: Calibrate the Latch and Strike Alignment
With the door closed, observe the latch’s travel into the strike. If the latch binds or misses the strike hole, adjust the striker—slightly widen or reposition it, ensuring screws sit flush. Check the latch height; if it sits too high or low relative to the strike, adjust the strike depth or install a shim behind the strike plate. Recheck clearance on all sides and confirm the latch can fully engage with a gentle turn of the key.
Step 4: Refit and Test the Lock
Reinstall the interior trim and ensure the cover plate sits evenly. Apply light mineral oil or graphite-based lubricant to the moving parts only if the manufacturer allows it; avoid oil on plastic components or the keyway unless specified. Cycle the lock several times with the door both closed and ajar to verify smooth operation. If you sense drag or inconsistent feedback, revisit alignment checks and re-test until cycles feel uniform.
Common Pitfalls and Troubleshooting
Common causes of persistent misalignment include a warped door frame, a loose strike plate, or subtle misalignment in the spindle. Avoid overtightening screws, which can strip threads and misalign the housing. If the key binds, confirm there is no burr on the key edge or in the keyway. If the lock continues to feel ‘sticky’ after multiple cycles, consider re-checking the latch’s spring tension, that the door closes squarely every time, and that the strike plate is not damaged. Finally, consult the lock’s manufacturer guidance for torque specs and lubrication compatibility.
Authority sources and further reading
For calibration standards and best practices, refer to authoritative sources such as:
- NIST Calibration Overview: https://www.nist.gov/pml/weights-and-measures/calibration
- Door hardware standards (BHMA): https://www.bhma.org/
- General safety guidelines for tool use (OSHA): https://www.osha.gov/
These references provide general calibration and safety principles that support precise, repeatable lock maintenance. Calibrate Point emphasizes applying these standards to ensure repeatable results and safe handling.
Tools & Materials
- Screwdriver set (Phillips and flathead)(To remove interior trim and strike screws)
- Torx driver set(Used on some Yale lock models)
- Caliper or small ruler(For measuring latch height and strike clearances)
- Fine file or emery cloth(If edges need deburring on the cylinder or strike)
- Lubricant compatible with metal (sparingly)(Only if manufacturer allows lubrication)
- Soft cloth and mild cleaner(Clean components before reassembly)
- Masking tape or marker(Mark alignment references for reassembly)
- Safety glasses(Eye protection during hardware work)
Steps
Estimated time: 60-90 minutes
- 1
Inspect door alignment and strike
With the door closed, inspect the alignment of the latch with the strike plate. Check for door sag, frame misalignment, or strike plate damage. If anything looks off, address frame or strike before adjusting the lock hardware.
Tip: Take quick photos of the strike alignment for reference during reassembly. - 2
Remove interior trim and access elements
Carefully remove the interior trim to expose the cylinder, spindle, and latch components. Keep screws organized and note the orientation of the cam and spindle.
Tip: Label screws by location and reuse the original screw positions to avoid misfit. - 3
Check spindle and cylinder rotation
Spin the cylinder by hand; ensure it turns smoothly and returns to neutral without resistance. Any binding indicates burrs, misaligned cam, or damaged housing.
Tip: If binding occurs, inspect the cam surfaces and clean burrs before proceeding. - 4
Assess latch height and strike clearance
Close the door and observe latch travel into the strike. If it binds or misses, adjust the strike height via slight modifications or repositioning. Recheck clearance on all sides.
Tip: Make small adjustments; test after each increment. - 5
Apply controlled reassembly
Reinstall the interior trim and ensure flat seating of the cover plate. Tighten screws to manufacturer torque where available, avoiding over-tightening that could warp components.
Tip: Use a torque-limiting screwdriver if possible to prevent over-tightening. - 6
Cycle the lock multiple times
Operate the lock through at least 8–12 complete cycles (lock and unlock) with the door both closed and ajar. Note any sticking or intermittent engagement.
Tip: Keep a log of cycle times and any anomalies to guide further adjustments. - 7
Document results and plan a follow-up
Record measurements and tested outcomes. If issues persist, plan a follow-up adjustment session focusing on the most problematic area (latch or strike).
Tip: Schedule a future check if door settling is expected seasonally.
Questions & Answers
Can I calibrate a Yale lock myself, or should I call a professional?
Yes, many Yale lock calibration steps can be performed by a confident DIYer with the right tools. However, if the door is warped, or you encounter structural issues, it’s wise to consult a professional locksmith.
You can calibrate it yourself if you’re comfortable with basic hardware work, but call a professional if the door frame is warped or the problem seems structural.
What tools are essential for Yale lock calibration?
A screwdriver set, a caliper or ruler, and a way to document changes are essential. Optional bits include a fine file for burrs and a torque-limiting screwdriver for precise reassembly.
You need screwdrivers, a ruler or caliper, and a pen for notes. A small file helps if you find burrs.
How long does calibration typically take?
Most calibration sessions take about 60 to 90 minutes, depending on door condition and the number of adjustments required.
Typically an hour or so, sometimes a bit longer if more adjustments are needed.
What signs indicate misalignment after calibration?
Sticky operation, increased effort turning the key, or the latch failing to engage consistently are common signs of misalignment.
Look for sticking, hard turning, or the latch not engaging every time.
Is lubrication recommended for Yale locks during calibration?
Use only lubricants recommended by Yale or the lock manufacturer; many locks prefer dry or light synthetic lubricants away from the keyway.
Only use lubricants that the maker approves; many Yale locks don’t need lubrication inside the keyway.
Will calibration affect warranty?
If you follow the manufacturer’s guidelines and use proper tools, calibration typically does not void warranties. Avoid unauthorized modifications.
Follow the manual and use the right tools, and your warranty should stay intact.
Watch Video
Key Takeaways
- Check door/frame alignment before adjusting the lock.
- Make small, trackable adjustments and test frequently.
- Document measurements for repeatable calibration.