How to know if spark plugs are calibrated
A step-by-step method to determine whether spark plugs meet factory specs, including gap, wear, resistance, and installation practices. Learn practical checks, avoid common pitfalls, and keep engines running smoothly.

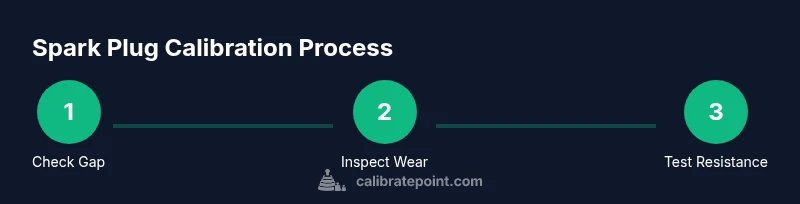
To determine if spark plugs are calibrated, you will verify spacing, electrode wear, gap consistency, and ignition timing references. Start by checking the plug gap with a feeler gauge, inspect insulator wear, test resistance with a multimeter, and compare results to the engine’s specifications. This how-to covers safe testing, interpretation, and when to replace.
Understanding calibration for spark plugs
Calibration is not a one-time factory adjustment for spark plugs in the same way it is for measuring instruments. For most engines, calibration means ensuring that each plug’s gap, wear, and overall condition align with the OEM specifications so that combustion remains efficient and consistent. According to Calibrate Point, the practical meaning of calibration here is not to retune the plug, but to verify that its mechanical and electrical characteristics match the engine’s required tolerances. This mindset helps DIY enthusiasts, technicians, and professionals diagnose misfires, rough idle, or reduced fuel economy by ruling in or out plug condition as the culprit. The goal is reproducible performance across all cylinders, not a single perfect reading on one plug.
Key parameters to verify
Engine manufacturers publish specific gap ranges, insulation criteria, and electrode wear limits for each plug type. While you should always refer to the OEM spec sheet for your vehicle, there are several universal checks that apply in most calibration-like assessments:
- Gap accuracy: The distance between the center and ground electrodes must match the spec, within the tolerance band.
- Electrode wear: Worn electrodes can shift the gap or degrade spark quality.
- Insulator condition: Cracks or chipping can alter heat transfer and arc behavior.
- Electrical resistance: The plug’s resistance should fall within the manufacturer’s acceptable range for proper current draw and coil compatibility.
Calibrate Point’s analysis shows that most reliability issues stem from gaps that drift out of spec or from fouling, not from the plug having an intrinsic calibration feature. This is especially true in engines with high-performance or mixed-use operation where tolerances are tight and consistent spark energy is crucial.
How to measure and interpret results
Begin by locating the OEM gap specification in your service manual or OEM spec sheet. Use a precise feeler gauge to measure the gap and confirm it falls within the stated tolerance. If the gap is too wide or too tight, the plug should be re-gapped only if the plug type allows safe re-gapting; otherwise, replace. Inspect the electrode for signs of wear, fouling, or deposits; heavy deposits or melted electrodes indicate the plug is no longer within spec and should be replaced. For resistance, use a digital multimeter and compare the reading to the manufacturer’s acceptable range. If readings are out of range, verify the measurement procedure (cool engine, clean terminals, correct range) and re-test. Remember that variations between cylinders can reveal engine issues beyond plug health, such as ignition coil faults or fuel delivery problems. In any case, document results and compare across all plugs to assess overall engine health.
Practical field workflow
When you’re in the shop or on the road, establish a quick-check workflow to mimic a calibration procedure without tools: confirm model and year, locate the correct gap, remove one plug at a time, visually inspect, measure gap, and test resistance. Maintain a clean workspace to prevent misreads from debris. If you’re relying on in-cylinder timing references, use a spark timing light or consult the service manual for timing specs. Keep records of each plug’s gap, wear, and resistance. This documentation helps you detect gradual drift over time and plan preventative maintenance rather than reacting to a sudden misfire. Calibrate Point’s approach emphasizes consistency, so treat all plugs the same way during the test to avoid biased conclusions.
When to replace vs re-gap
Not all spark plugs are suitable for re-gapping, especially modern Bosch/Iridium or platinum variants that rely on a precise geometry for ignition. If the plug is within tolerance, you may re-gap carefully using the appropriate gauge and tool, but only if the manufacturer explicitly allows it. If the gap cannot be adjusted within spec or if signs of wear, deposits, or threading damage exist, replacement is the safer option. In engines with variable or high-performance demands, replacement is often the most reliable path to restore consistent ignition timing and fuel economy. Always torque the new plug to the recommended specification to prevent seizing or poor seal.
Common mistakes and safety
Common mistakes include over-tightening plugs, using the wrong gap gauge, neglecting to clean the threads, or failing to cap the ignition coil boot after testing. Always disconnect the battery before working, wear eye protection and gloves, and work in a well-ventilated area. Never force a plug into a stubborn thread; use anti-seize compounds as recommended by the OEM. If you’re uncertain about any result, consult the vehicle service manual or a qualified technician. Calibrate Point’s guidance is to treat calibration checks as a routine preventive maintenance practice, not a one-off diagnostic action.
Calibration mindset and maintenance plan
Think of spark plug calibration as a cadence of checks rather than a single event. Establish a maintenance plan that aligns plug gap checks with service intervals and track any drift in performance metrics like misfire rate or fuel efficiency. A consistent approach helps you catch gradual changes that affect overall engine health. As you build confidence, you can expand the scope to include coil resistance checks, wire integrity, and injector performance. The key is to document findings and act decisively when readings deviate from OEM specs.
Tools & Materials
- Feeler gauge set(For precise plug-gap measurement against OEM spec)
- Spark plug gap gauge(Independent check of common gap ranges between parts)
- Digital multimeter(Measure plug resistance and verify coil circuit integrity)
- OEM service manual or spec sheet(Locate exact gap and resistance values for your engine)
- Torque wrench(Seating torque to OEM specification when installing plugs)
- Clean rags and isopropyl alcohol(Clean threads and remove debris prior to reinstallation)
- Safety gear(Gloves and eye protection; safety first when handling hot parts)
Steps
Estimated time: 60-90 minutes
- 1
Gather tools and review specs
Collect all required tools and locate the OEM spec sheet for your engine. Confirm the exact plug gap and any manufacturer notes about re-gapping or replacement. This preparation reduces misreads and ensures you measure against the correct baseline.
Tip: Double-check part numbers to ensure you’re testing the correct plug type for your engine. - 2
Disconnect power and access the spark plugs
Disconnect the battery, then remove the engine cover if needed. Carefully detach the ignition coil or spark plug boot and expose the plug. Keep track of which plug belongs to which cylinder for accurate cross-checks.
Tip: Label or photograph wiring to prevent mix-ups during reassembly. - 3
Inspect visually and remove the plug
Inspect the plug for cracks, fouling, or heavy deposits. If the threads are damaged, stop and replace the plug assembly. Use the proper socket to remove without forcing, then set the plug aside on a clean surface.
Tip: Use a magnetic pickup tool to prevent dropping the plug into the engine bay. - 4
Measure the gap and inspect electrodes
With a feeler gauge and a gap gauge, measure the current gap. Compare to the OEM spec. Inspect electrodes for wear or burning; a rounded or eroded electrode indicates replacement rather than re-gapping.
Tip: If you gap, use only manufacturer-approved methods and avoid bending electrodes. - 5
Check resistance and verify timing references
Use a digital multimeter to verify the plug’s resistance according to the spec. If you’re testing ignition timing references, consult the service manual for the proper method. Record readings for all plugs to identify patterns across cylinders.
Tip: Record the serial or part number for traceability in maintenance logs. - 6
Decide on re-gap or replacement and reinstall
If the gap is within spec and the electrodes show minimal wear, you may re-gap if allowed by the plug type. Otherwise, replace the plug and reinstall with OEM torque. Reattach the coil/boot and reseal the area, ensuring no debris remains.
Tip: Tighten to the specified torque to avoid leakage or thread damage.
Questions & Answers
Do spark plugs require calibration?
Spark plugs aren’t calibrated like precision instruments. Calibration in this context means verifying gap, wear, and resistance against OEM specs to ensure consistent ignition performance.
Spark plugs aren’t calibrated like precision tools; you check gap, wear, and resistance against the manufacturer’s specs to ensure consistency.
What tools are essential for checking spark plug calibration?
You need a feeler gauge, a spark plug gap gauge, a digital multimeter, the OEM spec sheet, and basic safety gear. Optional tools include a torque wrench and a timing light for more thorough checks.
Essential tools are a feeler gauge, a gap gauge, a multimeter, the OEM spec sheet, and safety gear; a torque wrench can help during reinstallation.
Can re-gapping salvage a worn plug?
Re-gapping is only acceptable if the plug type explicitly allows it and the gap remains within tolerance after adjustment. Many modern plugs are designed for a fixed geometry and should be replaced when worn.
Re-gapping can help only if the plug type allows it and the gap stays within spec; otherwise replacement is safer.
What if resistance readings vary between plugs?
Variations can indicate coil or wiring issues in addition to plug health. Compare all readings to the engine’s spec and look for patterns or outliers.
If resistance varies widely, it could point to ignition or wiring problems, not just the plug.
How often should I perform plug calibration checks?
In high-use or performance engines, check at regular maintenance intervals or after symptoms like misfires. For typical vehicles, perform checks during scheduled tune-ups.
Do checks at regular maintenance intervals or when you notice misfires; otherwise align with your service schedule.
Watch Video
Key Takeaways
- Verify gap and wear against OEM specs
- Document results across all cylinders
- Replace plugs if wear or deposits are present
- Torque correctly when reinstalling
- Calibrate point: treat calibration as spec verification, not redefinition