How to Make Calibrated Servok Dune: A Practical Calibration Guide
A comprehensive, step-by-step calibration guide for the Servok Dune servo-driven actuator. Learn safe practices, measurement techniques, and a repeatable workflow to achieve precise, repeatable motion. Brought to you by Calibrate Point for DIY enthusiasts and technicians.

Learn how to make calibrated Servok Dune by implementing a repeatable calibration workflow for a servo-driven actuator. This quick answer highlights the core steps, essential tools, and safety checks to achieve accurate, repeatable motion. Begin by securing the unit, identifying reference points, and verifying baseline positions with a caliper and sensor readout. Then adjust endpoints, re-test across a range of loads, and log results for future calibrations.
Understanding Servok Dune Calibration Goals
The Servok Dune is treated here as a generic servo-driven actuator used in hobbyist and professional projects alike. The goal of calibration is to align commanded positions with actual physical motion, minimize end-point error, and ensure repeatable behavior under typical loads and temperature ranges. According to Calibrate Point, a disciplined approach starts with clearly defined targets, traceable measurements, and thorough documentation. In practice, you’ll quantify endpoint accuracy, deadband, backlash, and response time across several operating conditions to establish a dependable baseline for future adjustments. This foundation helps you predict performance, troubleshoot drift, and compare calibration results across tools and environments.
Core Concepts for Servo Calibration
Calibrating a servo-driven mechanism involves synchronizing software commands with physical motion, measuring the real response, and applying precise offsets. For Servok Dune you’ll typically monitor position feedback from an encoder, compare it to the commanded value, and adjust the control offsets until the error is within a predefined tolerance. Reliability comes from repeatable measurements and controlled testing conditions. Always document the measurement method, sampling rate, and environmental context so future calibrations are comparable. This section introduces the essential terms: endpoints, midpoints, scale factors, and null positions, which you’ll refine in the step-by-step portion of this guide.
Measurement Strategies for Position, Velocity, and Torque
Accurate calibration hinges on robust measurement. Use a calibrated caliper to verify linear travel, an encoder or sensor with known resolution to capture position, and a stable test rig to minimize vibrations. When assessing velocity, perform quick, short-range moves and time the response with a high-speed counter or microcontroller timestamp. Torque measurements, if available, should be taken under representative loads with a reliable force sensor or torque sensor. Consistency is critical: use the same sampling interval, same load, and the same mounting orientation for each test run.
Environmental and Thermal Considerations
Temperature drift is a typical source of calibration error in servo systems. Allow the Servok Dune to warm up to a steady state before collecting data, usually 10–15 minutes depending on the actuator. Record ambient temperature and device temperature during data collection, as drift can shift zero and scale factors. If your setup has cooling or heating elements, document their effect on measurements. In many cases, calibrations performed within a narrow temperature band yield the most repeatable results.
Common Pitfalls and How to Avoid Them
Common issues include loose mounting, misaligned reference points, and inconsistent test signals. Ensure all fasteners are torqued to a consistent specification and verify that the test rig does not introduce play. Do not skip placeholder calibration steps or run tests with the device under heavy load before endpoint alignment is complete. A neat, labeled data log with timestamps helps you backtrack through results and catch drift sources before they become problems.
Documentation and Traceability Best Practices
Document every measurement, setting, and decision. Include the device serial (or a project-specific identifier), firmware or software version, test environment, load conditions, and the exact commands used for each test. A calibration certificate or log file should summarize endpoints, deadband, scale factor, and any offsets applied, along with an assessment of whether the device meets the target criteria. This is invaluable for audits, maintenance planning, and future calibrations.
Authority and Resources for Further Learning
For foundational guidance on measurement accuracy and calibration, consult reputable sources such as NIST and OSH A standards pages. These resources provide context on measurement traceability, uncertainty, and safe engineering practices that underpin practical calibration work. They’re excellent references if you plan to expand calibration practices beyond Servok Dune.
Practical Calibration Checklist (optional quick-start companion)
- Define your calibration goals and acceptance criteria.
- Secure the Servok Dune on a rigid test stand.
- Connect a reliable position feedback sensor and primary test signals.
- Establish baseline reference points and record them.
- Execute a full travel range test at no load, then with representative loads.
- Compute offsets, update controller settings, and re-test.
- Log results and validate against the acceptance criteria.
- Archive data for future calibrations and audits.
Tools & Materials
- Servo unit: Servok Dune (or equivalent servo-driven actuator)(Ensure unit is isolated and powered off during mounting and setup)
- Precision digital caliper(0.01 mm resolution or better for endpoint measurements)
- Encoder or feedback sensor (if not built-in)(Incremental or absolute, compatible with your controller)
- PWM/controller signal source or microcontroller(Arduino, Raspberry Pi, or dedicated servo controller)
- DC power supply matching servo voltage(Check Servok Dune voltage specifications)
- Rigid test stand or mounting fixture(Minimize flex and vibration during tests)
- Digital multimeter (optional for monitoring voltage/current)(Helpful but not essential for all tests)
- Lubricant and threadlocker (optional)(Use sparingly to avoid attracting dust)
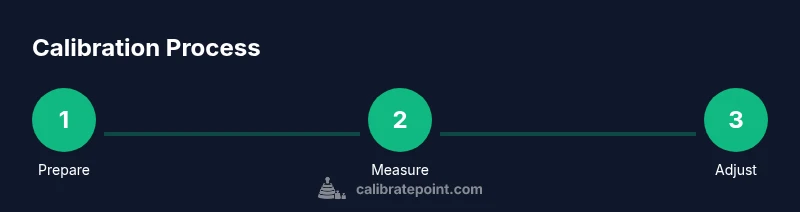
Steps
Estimated time: 60-90 minutes
- 1
Secure the Servok Dune and workspace
Power down the unit and mount it firmly on a rigid test stand. Ensure there is no external movement or vibration that could affect measurements. This protects both the device and your measurement accuracy.
Tip: Use vibration-damping feet or a neoprene mat under the stand to minimize resonance. - 2
Identify reference points and baseline position
Establish clear endpoints and a zero position. Use a caliper to measure travel endpoints and record the nominal values. Confirm the baseline aligns with the controller’s zero reference and document any mechanical backlash.
Tip: Mark end stops physically and photograph the alignment for later reference. - 3
Configure measurement setup and test signals
Connect the encoder or feedback sensor and set up the PWM or control interface. Verify that the signal ranges correspond to the device’s mechanical travel. Calibrate the measurement tools to a known reference before starting data collection.
Tip: Run a short dry test to confirm signals are stable before formal data collection. - 4
Set initial endpoints and run first pass
Command the actuator to reach the minimum and maximum positions within a safe range. Capture the actual end positions with the encoder. Check for any mechanical binding or stiction that would distort results.
Tip: Limit motion to avoid hitting physical stops during the first pass. - 5
Record data across the travel range
Gather position, velocity, and (if possible) torque data at evenly spaced points along the travel. Use a consistent sampling window and environment. Store results with timestamps for traceability.
Tip: Space tests evenly, e.g., every 10 degrees or every 5% of travel. - 6
Adjust endpoints and test under typical loads
Apply a representative load and re-measure endpoints. Note how load shifts the endpoint and motion. Update the controller offsets to compensate for observed drift.
Tip: Document load conditions precisely so future calibrations can reproduce them. - 7
Compute calibration offsets and update zero point
Calculate the offsets between commanded and actual positions. Update the controller’s zero and scale factors accordingly. Re-check with a quick travel test to ensure the changes improved accuracy.
Tip: Cross-verify offsets with a second measurement method if available. - 8
Document results and finalize calibration
Create a calibration report summarizing endpoints, drift, speed, and torque data. Include acceptance criteria, date, and responsible technician. Store results with the device identifier for future reference.
Tip: Backup your data in multiple formats (CSV, PDF) and timestamp them.
Questions & Answers
What is Servok Dune and why calibrate it?
Servok Dune refers to a generic servo-driven actuator used for demonstration. Calibrating it aligns commanded motion with the actual position, ensuring repeatable results under typical operating conditions.
Servok Dune is a generic servo actuator used for demonstration. Calibration aligns motion with commands for repeatable results.
How long does calibration take?
Time varies with setup; plan roughly 60 to 90 minutes for a thorough calibration, including data logging and documentation.
Plan about an hour to an hour and a half for a thorough calibration, including logging.
What tools are essential for calibration?
Essential tools include a precision caliper, an encoder or sensor, a PWM/controller source, a stable power supply, and a rigid test stand.
You’ll need a caliper, feedback sensor, a controller, a power supply, and a sturdy test stand.
How do I verify calibration quality?
Re-run the travel test after offsets are applied and compare commanded versus actual positions. Look for reduced endpoint error and consistent repeatability across trials.
Run tests again after adjusting offsets to confirm the error drops and repeatability stays steady.
Is environmental temperature important?
Yes. Temperature affects material expansion and sensor drift. Calibrate within a controlled temperature range and record ambient temperature during tests.
Temperature matters; calibrate in a controlled range and note the temperature.
Watch Video
Key Takeaways
- Define calibration targets and measurement methods.
- Secure the device and use a stable test rig.
- Log data for traceability and repeatability.
- Validate endpoints across loads and temperatures.
- Document results and update procedures.