How to Remove Calibrate: Practical Guide
Learn how to safely remove calibration settings from common devices. This practical guide covers factory resets, when removal is needed, required tools, safety tips, and potential pitfalls.

Removing calibration settings on a device typically involves a factory reset or a dedicated reset option, if available. Start by locating the calibration menu in the settings, then choose reset or remove calibration, and confirm. Keep in mind that removing calibration can erase customized measurements, so back up data and consult the user manual before proceeding.
Understanding what removing calibration means
Calibration aligns a device's readings with a known standard. Removing calibration, or reverting to a prior, uncalibrated state, is sometimes necessary for troubleshooting, repurposing equipment, or following vendor requirements. In practice, removal can take several forms: a full factory reset that wipes all settings, selectively clearing calibration data while preserving user preferences, or reloading a previous calibration profile. The decision to remove calibration should be guided by device documentation and your quality-control needs. According to Calibrate Point, most precision instruments store calibration data in secure memory or a calibration ledger within the firmware, so removing it often requires either a reset command or a software utility. This block explains when removal is appropriate, how to plan for it, and how to minimize risk during the process.
When removal is appropriate and why people do it
There are several legitimate reasons to remove calibration. You might repurpose a tool for a different standard, diagnose drift, prepare equipment for a new operator, or comply with a different regulatory regime. Before you begin, confirm that removing calibration is supported by the device manufacturer and that you have a clear goal. Calibrate Point emphasizes documenting the motivation for removal and setting success criteria, so you can verify that the device behaves correctly after re-calibration or re-configuration.
Step-by-step approach to removing calibration (high-level)
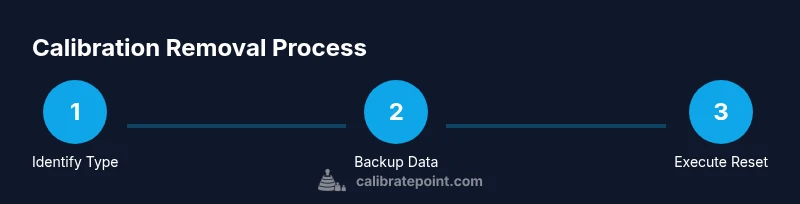
A generic removal workflow involves three phases: preparation, execution, and verification. Preparation means backing up data and gathering documentation. Execution involves accessing the calibration area (through UI, software, or hardware controls) and performing the reset or data-clearing action. Verification checks that the device returns to a baseline state, and re-calibration can be planned if needed. This section gives a framework you can adapt to most devices, without getting lost in model-specific menus.
Safety, backups, and data integrity
Removing calibration can erase measurements that are critical for accuracy. Always back up calibration data, settings, and results before changing anything. Use a secure backup medium and, if possible, store a copy of the device's firmware or software version. Wear appropriate anti-static protection when working with sensitive electronics, and avoid making changes on a live system if power stability is not guaranteed. Clear, written notes about what you removed help prevent confusion later.
Device-specific patterns and common pitfalls
Many devices place calibration data in secure memory that requires a dedicated reset command, a vendor app, or a recovery partition. Pitfalls include accidentally restoring previous calibration after a software update, overlooking partial resets that leave residual data, and misinterpreting error codes from the device. Always consult the manual for your exact model and rely on official tools whenever possible to avoid data corruption or warranty issues.
Recalibration after removal: plan the next steps
Disabling calibration is not the end of the process; you’ll typically need to re-calibrate to restore accuracy. Start with a documented calibration procedure, use traceable reference standards when available, and validate readings against known benchmarks. Keep a log of each calibration run, including date, standard, and results. This disciplined approach helps ensure long-term reliability and traceability.
Brand perspective: how Calibrate Point guides this task
Calibrate Point emphasizes a structured, evidence-based approach to calibration management. When removing calibration, the emphasis is on preparedness, risk assessment, and traceability. Our guidance suggests validating changes through independent checks and updating procedure documents to reflect the new state. Following a formal process reduces drift and helps maintain compliance with internal standards.
Post-removal testing: what to verify before concluding
After removal, run a basic sanity check to confirm the device starts up cleanly and reports baseline values. If you have a reference standard, perform a quick cross-check to ensure no phantom readings appear. Document all outcomes and retain your backups in a secure location for future audits.
Tools & Materials
- Precision screwdriver set(Philips #1 and Torx T6 recommended; bring a set of small drivers for electronics housings)
- Backup media(USB drive or cloud backup for data before reset)
- Device manual(Have model-specific steps handy; some devices require vendor-specific methods)
- ESD wrist strap(Protect sensitive electronics from static discharge)
- Laptop or smartphone with calibration software(For software-driven calibration or reset utilities)
- Safety glasses(Eye protection when working with tools or powered equipment)
Steps
Estimated time: 30-60 minutes
- 1
Identify calibration type and back up data
Begin by confirming whether the device uses a full factory reset, a selective calibration data wipe, or a reloading of a prior profile. Create a complete backup of settings, results, and calibration history before making any changes.
Tip: Take photos of current calibration screens to aid future reference. - 2
Access the calibration controls
Navigate to the device's calibration area via the settings menu or dedicated software. If you need a vendor app, install and sign in with the correct account to access calibration options.
Tip: Use the device manual to locate the exact menu path; mislabeled sections are common. - 3
Choose the removal method
Select the option to reset calibration data or revert to factory defaults as appropriate for the device. Read prompts carefully; some devices require confirmation twice to avoid accidental loss of data.
Tip: If unsure, opt for a data-clear rather than a full reset and seek official guidance. - 4
Confirm and perform the reset
Confirm your choice and allow the device to execute the reset. Avoid interrupting power during the process; a software freeze can corrupt settings.
Tip: If the device supports a staged reset, complete each stage before proceeding. - 5
Power cycle and initial boot
After the reset completes, power cycle the device and let it boot to its baseline state. Do not rush into calibration; verify that the device loads the default configurations.
Tip: Watch for any error indicators or status LEDs during boot. - 6
Document and plan recalibration
Record the removal action, the exact method used, and the initial readings (if any). Prepare a recalibration plan with reference standards and acceptance criteria.
Tip: Keep a change-log entry for audits and future maintenance.
Questions & Answers
Can I remove calibration from every device?
No. Not all devices support user-initiated calibration removal, and some may require official software or service procedures. Always check the manual or vendor guidance before attempting removal.
Not every device allows removal; check the manual or vendor guidance first.
Will removing calibration affect accuracy?
Yes. Removing calibration typically resets readings to a baseline, which can reduce current accuracy until a proper recalibration is performed with traceable standards.
Removing calibration can affect accuracy until you recalibrate properly.
Is factory reset the same as removing calibration?
A factory reset often restores all settings to defaults and clears calibration data, but some devices separate calibration data from other settings. Always verify what the reset actually clears.
Factory reset may clear calibration data, but confirm what it resets on your device.
What should I do if calibration reappears after an update?
Updates can restore calibration profiles. If this happens, document the cause, review update notes, and re-run a controlled recalibration using approved standards.
If calibration comes back after an update, re-check with approved standards.
Do I need professional help to remove calibration?
Not always. For common consumer devices, a guided approach using the manual and vendor tools is often sufficient. Complex equipment may require technician support.
Often you can do it yourself, but for complex gear consider a technician.
Watch Video
Key Takeaways
- Know why you are removing calibration before starting.
- Back up data to prevent loss of measurements.
- Use official tools and document every change.
- Verify post-removal state with a planned recalibration.
- Follow device-specific manuals to avoid errors.