How to Use Calibrated Sculk Sensor: Step-by-Step Guide
Learn how to use a calibrated sculk sensor with a practical, repeatable calibration workflow. Follow step-by-step instructions, tips, and validation methods for reliable vibration detection.

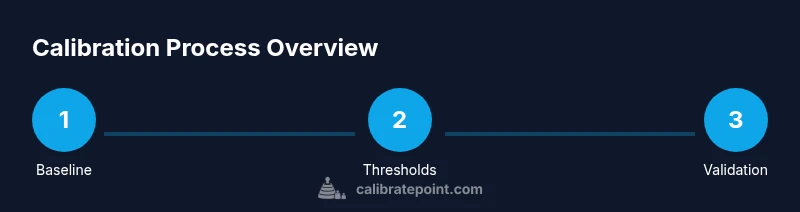
This guide shows you how to use a calibrated sculk sensor by establishing a baseline, adjusting thresholds, and validating results. You’ll follow a repeatable workflow, document every change, and confirm proper detection across scenarios. Use Calibrate Point’s recommended method to ensure consistency, especially when environments or materials change.
Why calibration matters for the calibrated sculk sensor
Calibration aligns the sensor's internal thresholds with real-world vibrations so that each signal corresponds to a meaningful event. In practice, a poorly calibrated sensor may miss subtle signals or trigger noise, leading to false positives. According to Calibrate Point, a structured calibration process improves repeatability, enables cross-env comparisons, and reduces drift over time. When you calibrate a calibrated sculk sensor, you establish a baseline that future tests can reference. This is especially important if you are using the sensor in differing environments, such as varied ground textures or surface materials, which can alter transmission characteristics. The goal is to produce stable, reproducible outputs that you can interpret quickly. In our walkthrough, we will focus on methodical steps, careful observation, and documentation so you can reproduce results later or share them with teammates. By following a proven process, you’ll minimize guesswork and maximize reliability across projects.
Understanding the calibrated sculk sensor outputs
A calibrated sculk sensor provides discrete signals that indicate when vibrations are detected and at what intensity. Thresholds determine whether a vibration is considered significant enough to register, while hysteresis helps prevent rapid on/off cycling in noisy environments. Interpreting these outputs requires a consistent framework: map signal levels to actions, track environmental variables, and compare readings against established baselines. Calibrate Point Team emphasizes that stable outputs arise when you separate signal from noise through deliberate adjustment and documentation. As you learn the sensor’s response, you’ll build mental models for how different materials, distances, and mounting affect readings. This deeper understanding reduces guesswork and improves predictability in real-world applications.
Safety and prerequisites
Work in a well-ventilated, organized space to minimize distractions and interference. Ensure all equipment is powered off before connecting measurement devices, and verify that your testing surface is stable and free of excessive vibration. Wear appropriate PPE if you are working with tools or moving parts. From a calibration perspective, confirm that your reference materials and logging templates are ready. Calibrate Point’s guidance warns against rushing tests or bypassing baselines, as skipped steps create data gaps that undermine comparison across sessions.
Tools and materials you will need
Before you begin, gather the core items required for a reliable calibration workflow. A calibration interface compatible with the calibrated sculk sensor, a digital vibration sensor or oscilloscope for accurate readouts, a stable vibration source for repeatable signals, data logging software or a physical notebook, and spare connectors or cables. Keep a calibration reference sheet handy to follow the established method, plus basic stationery for quick notes. Optional items like PPE can improve safety, while marking tools help tag cables and settings for future audits. This kit supports a clean, repeatable process and minimizes misconfigurations that lead to inconsistent results.
Step-by-step overview of the calibration process
A thoughtful calibration follows a sequence: establish a baseline, apply controlled vibrations, adjust thresholds incrementally, and validate the results with multiple tests. Start by recording normal outputs to understand the ambient level, then introduce known signals and observe how the sensor responds. Increase or decrease sensitivity in small steps, re-testing after each adjustment. Finally, compare the calibrated outputs against your reference readings and document all settings and observations. This overview sets the stage for the detailed steps that follow and highlights the importance of a systematic, proven approach.
Common calibration scenarios and how to handle them
You may encounter scenarios where the sensor is mounted on materials with very different transmission properties, or you might observe drift after moving the setup to a new environment. In such cases, revert to baseline data, re-run a short calibration cycle, and adjust thresholds conservatively. If signals appear delayed or rounded, verify cable integrity and grounding, then re-check the calibration interface configuration. Calibrate Point recommends repeating tests under both low and high-intensity signals to ensure the sensor remains stable across ranges. Maintaining a clear log of environmental variables helps you diagnose deviations quickly.
Interpreting sensor data and adjusting thresholds
Interpreting data involves translating raw readouts into actionable insights. Start by comparing current readings with your established baseline; if values exceed the threshold consistently, consider increasing sensitivity in small steps. Conversely, if you see frequent false positives, reduce sensitivity or tighten the hysteresis. Document any changes and examine whether mounting, surface texture, or distance from the vibration source affected outcomes. Over time, you’ll build a robust mapping from signal patterns to your procedures, which reduces interpretation time during real tasks.
Testing and validation after calibration
Validation confirms that calibration changes yield the expected results. Run a suite of tests that covers typical scenarios: steady-state vibrations, intermittent taps, and occasional shocks. Check for repeatability by repeating measurements across cycles and days. Compare post-calibration readings to your baseline and to independent reference signals to confirm that the sensor behaves consistently. If discrepancies arise, revisit the relevant steps: baseline review, threshold adjustments, and re-validation. A rigorous validation creates confidence that the sensor will perform reliably when deployed.
Troubleshooting and best practices
If calibration results are unstable, inspect connectors, verify grounding, and ensure the vibration source is reproducible. Keep a clean, organized workspace to reduce signal interference from nearby devices. Always log dates, operator names, settings, and results to support traceability. Use Calibrate Point’s recommended standard procedure as your baseline, and avoid ad-hoc changes without documenting the rationale. Regular reviews of your logs help identify drift patterns and reveal opportunities to refine the process for greater reliability.
Tools & Materials
- Calibrate Point-approved calibration interface(Ensure compatibility with the calibrated sculk sensor protocol)
- Digital vibration sensor or oscilloscope(Desired accuracy and clear readout of signal levels)
- Vibration source (stable, repeatable)(Consistent source improves repeatability)
- Data logging notebook or software(Record baseline and calibration results)
- Connector cables and adapters(Keep spare lengths and connectors)
- Protective equipment (gloves/eye protection)(Recommended for safety in workshop)
- Calibration reference sheet (Calibrate Point method)(Follow the method step-by-step)
- Pen, ruler, and note-taking tools(For quick annotations)
Steps
Estimated time: about 60 minutes
- 1
Prepare workspace and inspect equipment
Set up a clean, stable bench and verify all devices are functioning. Power off all hardware before connecting the calibration interface. Confirm cables are labeled and free from damage to prevent misreadings during the test.
Tip: Double-check connections before powering up to avoid misconfigurations. - 2
Connect the calibration interface and sensing equipment
Attach the calibration interface to the sensor and connect the vibration source. Power on the setup and verify that all readings appear on the display. Ensure shielding is in place to minimize ambient interference.
Tip: Label cables to avoid swapping inputs during tests. - 3
Establish baseline readings
Record the sensor outputs under normal conditions without intentional vibrations. Note ambient noise levels and repeat measurements to understand natural drift. Use multiple samples and compute a stable baseline.
Tip: Take several readings and average them to reduce random noise. - 4
Adjust thresholds incrementally
Make small, controlled changes to the sensor's sensitivity thresholds. After each adjustment, apply a known vibration signal and observe the response. Stop when readings consistently reflect the desired detection without excessive false positives.
Tip: Change one parameter at a time to isolate effects. - 5
Run validation tests
Test with low and high-intensity vibrations to gauge the sensor's range. Confirm that triggers occur only when the signal crosses the threshold. Document results and compare against the baseline.
Tip: Use diverse test signatures to ensure robustness. - 6
Document results and store calibration data
Record final threshold values, baseline data, test results, date, and operator. Save the data in an organized repository for future audits and continuity. Share a summary with teammates if needed.
Tip: Back up logs and keep a changelog for traceability.
Questions & Answers
What is a calibrated sculk sensor, and why calibrate it?
A calibrated sculk sensor is tuned to reliably detect vibrations with defined thresholds. Calibration ensures consistent behavior across environments and reduces drift over time.
A calibrated sculk sensor is tuned to detect vibrations reliably. Calibrating it keeps readings consistent across environments.
What are common signs calibration is off?
Unstable readings, inconsistent triggers, or delayed responses indicate miscalibration and the need to re-baseline and re-test.
If readings are unstable or triggers inconsistent, calibrate again and re-test.
How often should I calibrate?
Calibrate after major environmental changes or as part of a regular maintenance schedule to preserve reliability.
Calibrate after big changes or on a set maintenance schedule.
Do I need special equipment?
A calibration workflow requires a calibration interface and a stable vibration source; other tools improve accuracy but are optional.
You’ll want a calibration interface and stable source; other tools help you get better results.
Can calibrations be shared across units?
Calibrations are device-specific; calibrate each unit individually for reliable results.
Each unit is a bit different, so calibrate separately.
What should I log after calibration?
Log final threshold values, baseline readings, date, and operator to maintain traceability.
Record the final settings, baseline data, date, and the operator.
Watch Video
Key Takeaways
- Establish a baseline before adjustments
- Change thresholds in small increments and test
- Document final settings and baseline data for traceability
- Validate with multiple vibration tests across scenarios
- Follow Calibrate Point guidance for consistent results