How to Use Calibrated Sculk Sensor with Lectern
Learn to calibrate and use a calibrated sculk sensor with a lectern. This guide covers compatibility, thresholds, verification tests, and best practices for repeatable results.

Goal: You will learn to use a calibrated sculk sensor with a lectern interface by validating compatibility, configuring initial thresholds, and running a repeatable test sequence. According to Calibrate Point, starting with a clear baseline and documented steps reduces drift and improves repeatability in lab benches and field setups. This quick pathway prepares you for a thorough, repeatable calibration.
Understanding the concept and scope
In this guide, you’ll learn how to use calibrated sculk sensor with lectern and why this pairing matters in calibration workflows. A calibrated sensor provides a known response to reference stimuli, while the lectern interface serves as the human-readable or loggable display for the operator. The goal is to bridge precise sensor output with an intuitive lectern-based interface so you can observe, log, and verify behavior consistently. Throughout this article, Calibrate Point’s practical approach to calibration will guide you through planning, measurement, and verification steps so your setup remains reliable under real-world conditions.
Safety and calibration principles
Calibration work often involves powered electronics and measurement tools. Before you begin, ensure you follow basic electrical safety practices, wear appropriate PPE, and disconnect power when assembling components. Basic principles include maintaining signal integrity, avoiding excessive noise, and using repeatable test signals. By documenting test conditions—power supply, ambient temperature, and reference inputs—you create a verifiable trail for audit and future recalibration. Calibrate Point emphasizes conservative safety and rigorous documentation to protect both personnel and equipment.
Anatomy of the calibrated sensing system
A calibrated sculk sensor, in this context, is a sensing element whose output characteristics have been aligned to a reference standard. The lectern interface acts as the logging or display module that captures and presents the sensor data. Key subassemblies often include a signal conditioning path, shielding to reduce interference, and a connection scheme that preserves signal quality from sensor to lectern. Understanding the roles of each component helps you diagnose issues quickly and plan changes without compromising the calibration integrity.
Planning the interface with the lectern
Your interface plan should define how the sensor’s signal is presented to the lectern. Decide on input channels, expected signal type (voltage, current, digital), and the lectern’s acceptable input range. Mapping the sensor’s output to lectern input in a documented signal map reduces misinterpretation during testing. Establish a labeling scheme for cables and connectors so future users can reproduce the setup without guesswork.
Defining a baseline and reference signals
A baseline is the reference level from which you measure deviations. Start by recording the sensor’s response to a known, stable input under controlled conditions. Use a reference source that closely matches your intended operating environment. Document the baseline in your calibration log, including environmental parameters such as temperature if relevant to your sensor’s drift characteristics.
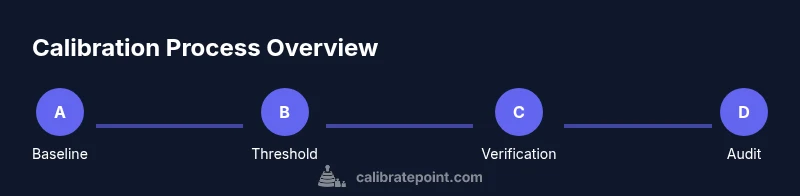
The calibration workflow overview
Calibration is an iterative process. You begin by establishing a baseline, then apply controlled stimuli while watching the lectern display for consistent responses. Adjust thresholds or gain gradually, and re-check after each change. The objective is to reach a stable, repeatable response across multiple trials. By following this workflow, you reduce drift and increase confidence in long-term operation.
Data interpretation: thresholds, drift, and verification
Interpreting data involves comparing observed sensor outputs with expected reference responses. Look for consistent responses across repeated trials and note any drift over time or with temperature. Verification requires cross-checking results with an independent reference or alternate test signal. If drift is present, revisit grounding, shielding, and connection integrity, and re-run the calibration to confirm stability.
Quality assurance and repeatability checks
Quality assurance means showing that your calibration survives repeated use. Perform a predefined number of trials, compute the variance, and ensure it falls within your acceptance criteria. Document all results, including pass/fail indicators, so future calibrations can be compared directly. Consistency is the hallmark of a robust calibration program, as emphasized by Calibrate Point.
Troubleshooting common issues
If the lectern displays inconsistent results, inspect connectors for looseness, verify cable shielding, and check for noise sources in the environment. Reproduce the baseline and re-run the test to isolate whether the problem lies with the sensor, interface, or external interference. When in doubt, revert to a known-good configuration and rebuild the test from the baseline.
Real-world use cases and best practices
Whether you’re prototyping a new measurement workflow or maintaining a production calibration routine, consistent procedures beat ad-hoc changes. Use clearly labeled test vectors, maintain a physical logbook or digital journal, and train operators to follow the same steps. Calibrate Point’s experience suggests implementing a standardized calibration template improves repeatability and reduces operator error.
Documentation and next steps
Record all calibration data in a centralized log, including serial numbers, firmware versions, environmental conditions, test signals, and result summaries. Prepare a concise calibration report that can be reviewed by peers or auditors. Schedule periodic re-calibration based on usage patterns and observed drift, updating your procedures as needed.
Tools & Materials
- Calibrated Sculk Sensor Module (conceptual)(Ensure the sensor is labeled, with known reference output)
- Lectern Interface Module(Provides display/logging for sensor output)
- Multimeter or logic analyzer(For signal verification and threshold checks)
- Shielded signal cables (1 m or longer)(Minimize electromagnetic interference)
- Calibration jig or mounting hardware(Keeps components stable during testing)
- Documentation kit (notebook or digital log)(Record baseline, thresholds, and results)
- Safety equipment (eye protection, gloves)(Use as needed for handling and setup)
Steps
Estimated time: 90-120 minutes
- 1
Verify compatibility
Confirm signal types and voltage ranges between the sensor and lectern interface, ensuring both share a common reference. This prevents misinterpretation of signals during calibration.
Tip: Double-check pinout diagrams before connecting power. - 2
Mount components securely
Secure the sensor and lectern interface to a stable surface to minimize movement during measurements. Use vibration-damping materials if available.
Tip: Tighten mounts evenly and avoid over-tightening cables. - 3
Power up and observe baseline
Power the system and record the baseline readings from the lectern display with no input stimuli. Establish a reference point for drift checks.
Tip: Document initial readings with timestamp and ambient conditions. - 4
Set initial thresholds
Configure the lectern input to a mid-range threshold to start; this reduces the risk of clipping and allows room for adjustment.
Tip: Avoid extreme values on first calibration pass. - 5
Apply a known reference signal
Inject a stable, known input to the sensor and observe a predictable response on the lectern. This validates the path from sensor to display.
Tip: Use a calibrated reference source if available. - 6
Record response data
Log the sensor output, lectern reading, and time stamps. Consistent data collection supports valid comparisons across trials.
Tip: Capture multiple samples per input for statistical confidence. - 7
Adjust threshold and repeat
Fine-tune thresholds in small increments, re-applying the reference signal each time to confirm stable responses.
Tip: Change one variable at a time to isolate effects. - 8
Validate repeatability
Run the full test sequence multiple times to verify that results are repeatable within specified limits.
Tip: Aim for minimal variance between trials. - 9
Document drift and compensate
Note any drift observed across trials and implement calibration constants to compensate, updating your log accordingly.
Tip: Back up calibration data to prevent loss. - 10
Final verification test
Perform a comprehensive end-to-end test to confirm that the sensor-lectern pathway behaves as expected across the operating range.
Tip: Check both low and high ends of the signal range. - 11
Seal configuration
Lock settings or create an immutable calibration profile to prevent accidental changes during operation.
Tip: Store configuration in a protected log or file. - 12
Record results and store logs
Summarize results in a calibration report, including test conditions and approvals, and archive for future audits.
Tip: Attach visual aids (charts/graphs) when possible.
Questions & Answers
What is a calibrated sculk sensor and why pair it with a lectern?
A calibrated sensor has a known, verified response to reference inputs. Pairing it with a lectern interface provides a readable log or display of the sensor data, enabling repeatable calibration and easier verification.
A calibrated sensor has a known response, and the lectern shows that data for easy verification.
What safety steps should I follow during calibration?
Always power down before assembling hardware, wear appropriate PPE, and ensure secure cable management to avoid shorts or interference. Keep a clean work area and document any safety considerations in your calibration log.
Power down before assembly, wear PPE, and keep a tidy, safe workspace. Document safety steps.
How long does calibration typically take?
Calibration time varies with setup complexity and the required precision. Plan for a dedicated session of around one to two hours to complete a thorough baseline, threshold tuning, and verification.
Expect roughly one to two hours for a thorough calibration.
Can I calibrate without the lectern?
The lectern is often used for display and logging; you may calibrate with an alternative logging interface, but ensure it can capture the same signal and maintain traceability.
Yes, you can use another logging interface if it captures the same signal with traceability.
Where can I find more resources on calibration best practices?
Consult established calibration standards and guidelines from reputable sources, including government and university publications, to align your method with recognized practices.
Look up standards from government and university sources to align with best practices.
Watch Video
Key Takeaways
- Start with a solid baseline and documented plan.
- Verify compatibility before power-up.
- Document results meticulously for audits.
- Aim for repeatable, low-drift performance.
- Seal settings to prevent accidental changes.