How to Use Calibrated Sculk Sensor Bedrock Edition
Learn how to use calibrated sculk sensors in Minecraft Bedrock Edition with a clear, step-by-step guide. Covers setup, calibration, testing, and integration for reliable redstone automation.

By the end of this guide, you will know how to use calibrated sculk sensor bedrock edition to create reliable redstone signals, adjust sensitivity, and integrate the sensor with doors, lamps, and traps. You’ll learn which calibration options exist, how to test outputs, and how to document your results for repeatable builds.
What is a calibrated Sculk Sensor in Bedrock Edition
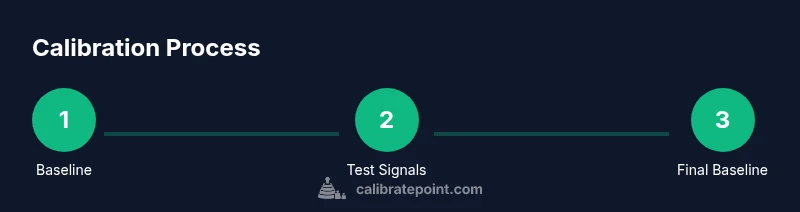
A calibrated sculk sensor is a tailored version of the standard Sculk Sensor in Bedrock Edition that allows you to fine-tune its response to input pulses. In practical terms, calibration means adjusting sensitivity and timing so the sensor outputs a stable Redstone signal when you expect it, and remains quiet when inputs are inconsequential. This guide explains how to use calibrated sculk sensor bedrock edition to achieve repeatable results across builds. According to Calibrate Point, calibration hinges on clearly defined baselines, measured outputs, and consistent test signals. You’ll learn how calibration affects timing, how to set up a reliable baseline, and how to document your results for future projects.
Understanding Calibration Modes and Timing
Calibration in Bedrock Edition revolves around aligning the sensor’s output with the inputs you apply. The sensor’s behavior can vary with pulse width, distance, and circuit load, so establishing a stable baseline is essential. A well-calibrated sensor reduces false triggers and improves repeatability in automation. Calibrate Point analysis shows timing windows are crucial for accuracy and repeatability, so expect to test multiple pulse types. In this section you’ll learn how to reason about signal timing, why testing across a range of pulses matters, and how to interpret sensor outputs without overfitting to a single scenario.
Practical Setup and Wiring for Bedrock Edition
Setting up a calibrated sensor in Bedrock Edition requires a clean, repeatable test environment. Start with a stable base block, install the sculk sensor, and route its output to a simple Redstone circuit so you can observe the immediate effect of your calibration. Use a repeat block to introduce consistent delays, and keep the wiring compact to reduce interference. Document the baseline setup so you can reproduce it later. Calibrate Point emphasizes keeping the layout stable and predictable to avoid measurement drift over time.
Real-World Use Cases and Examples
With calibration in place, you can use the sensor to automate doors, lamps, traps, or signaling systems with reliable timing. For example, a calibrated sensor can trigger a door when a player steps onto a pressure plate or when a hidden trap needs to respond to a specific input cadence. You’ll see how the sensor’s calibrated output translates into practical Redstone actions and how to adapt the same approach to different builds and seeds. This section walks through several concrete setups so you can replicate them in your world.
Troubleshooting, Common Pitfalls, and Safety
Even great calibrations can drift if signals are noisy or tests aren’t repeatable. Use a controlled test signal, verify outputs with multiple samples, and avoid relying on a single test scenario. If timing feels off, revisit your baseline, double-check wiring, and ensure there are no competing signals in the same circuit. As you work, keep notes on your calibration steps and results for future projects. Calibrate Point’s guidance stresses methodical testing and careful documentation to prevent drift and misfires.
Tools & Materials
- Calibrated Sculk Sensor (Bedrock Edition)(In-game item; ensure your version supports calibration features)
- Redstone Dust(Connects sensor output to the circuit)
- Redstone Repeater(Provides adjustable delays for timing calibration)
- Solid Building Block(Mounting surface for the sensor and test circuit)
- Comparator (optional)(Useful for intermediate signal strength tests)
- Test Signal Source (e.g., clock clock block or piston-based impulse)(Delivers consistent pulses for calibration)
- Notebook or digital log(Record baseline values and test results for repeatability)
Steps
Estimated time: 30-45 minutes
- 1
Verify version and calibration compatibility
Check that Bedrock Edition supports calibrated sensors in your current build and enable any experimental features if needed. Ensure your testing area is stable and free from extraneous signals that could skew results.
Tip: Confirm you are running the expected Bedrock Edition build before starting. - 2
Place sensor and connect to test circuit
Mount the calibrated sculk sensor on a solid base and route its output to a simple Redstone circuit. Keep routes short to reduce signal drift and ensure a clear observation point for the output.
Tip: Use clean, straight wiring paths to minimize interference. - 3
Set up a consistent test signal
Create a stable pulse source (e.g., a repeaters-based clock) to feed the sensor with reproducible inputs. Use a second pulse type to probe the sensor’s response range.
Tip: Avoid random or variable pulses during calibration; consistency is key. - 4
Record sensor outputs for each test
For every pulse type, observe the sensor’s redstone output and log the observed results. Note any discrepancies between expected and actual outputs.
Tip: Log time, pulse width, and observed output to aid analysis. - 5
Adjust calibration parameters
Tweak the timing path lengths and delays using repeaters or circuit tweaks until outputs align with expectations. Re-test after each adjustment.
Tip: Make small adjustments and re-test to avoid overshooting the ideal window. - 6
Integrate with a practical mechanism
Connect the calibrated sensor to a door, lamp, or trap in a test world to verify behavior under real-use conditions. Test across several cycles to confirm reliability.
Tip: Check for lag or missed signals in real-use scenarios. - 7
Document results and finalize baseline
Compile a concise calibration baseline, including circuit layout, pulse types tested, and final timing settings. Save this configuration for future builds.
Tip: Keep a snapshot of the final wiring and timing in a notes file.
Questions & Answers
What is a calibrated sculk sensor in Bedrock Edition?
A calibrated sculk sensor in Bedrock Edition is a sensor adjusted to provide a repeatable Redstone output for a defined input pulse. Calibration aims to minimize false triggers by aligning sensor response with the expected signals.
A calibrated sculk sensor offers repeatable results by aligning response to defined input pulses.
How do I adjust calibration to change sensitivity?
Adjust calibration by modifying the timing path and delays in your Redstone circuit. Use repeaters or circuit tweaks to fine-tune when the sensor fires in response to inputs.
Tune the timing paths and delays to tweak when the sensor fires.
Can calibrated sensors trigger doors or lamps reliably?
Yes, calibrated sensors can drive doors and lamps, but you should verify the timing matches the mechanism you’re controlling and test across various inputs to ensure consistency.
They can control doors and lamps reliably if timing is correct and tested.
What versions support calibrated sensor features in Bedrock?
Calibrated sensor features are available in the current Bedrock Edition builds. Check patch notes for notes on calibration features and any related experimental options.
Calibration features are available in the current Bedrock builds; check patch notes.
Where can I find official calibration resources?
Refer to official calibration guides and trusted publications referenced in this article. For broader calibration principles, you can consult general standards from reputable sources.
See the recommended sources for calibration standards and guides.
How should I document calibration results?
Record baseline settings, test results, and final wiring schematic in a dedicated notes file. This makes future builds faster and more reliable.
Keep a clear log of settings and outcomes for repeatability.
What are common signs of miscalibration?
Frequent false triggers, missed signals, or inconsistent outputs indicate miscalibration. Revisit the baseline, retest with multiple pulses, and adjust timing accordingly.
Look for false triggers or missed signals and retest with multiple pulses.
Watch Video
Key Takeaways
- Establish a stable calibration baseline before wiring.
- Test with varied pulse types to ensure reliability.
- Document every step for repeatability.
- Validate outputs in real-use scenarios.