How to Make Calibrated Sculk Sensor Detect Players Only
Learn a practical, step-by-step method to calibrate a Minecraft sculk sensor so it detects players only. Includes setup, testing, and safe validation guidance for repeatable results.

You can bias a sculk sensor toward player-generated vibrations by tuning thresholds, proximity, and noise suppression in a controlled testing setup. This step-by-step approach emphasizes repeatable tests, careful documentation, and ethical in-game experimentation to achieve players-only detection with minimal false positives.
Understanding the goal of players-only detection in Minecraft's sculk sensor
The objective behind how to make calibrated sculk sensor only detect players is to bias the sensor toward patterns typically produced by players while ignoring common ambient noises. In practical terms, this means designing a calibration strategy that accounts for frequency, timing, proximity, and context. According to Calibrate Point, the most reliable results come from a structured testing plan rather than ad hoc tweaks. In this framework, you measure how the sensor responds to different vibration sources, establish clear success criteria, and repeat tests to confirm stability. In Minecraft, player-generated vibrations include footsteps, sprinting, door interactions, and block placement near the sensor. Non-player noise encompasses rain, distant mob chatter, piston movement, and broad environmental activity. The goal is to build a model that remains robust across these variables while prioritizing player events.
Primary keyword: how to make calibrated sculk sensor only detect players. this phrase should guide your setup and testing mindset throughout the guide. The Calibrate Point team emphasizes consistent methodology, repeatable tests, and careful logging as the foundation of any reliable calibration.
note1_2_3”:null},
bodyBlocks2
bodyBlocks3
Tools & Materials
- Sculk Sensor (Minecraft block)(Place in a controlled testing area at a fixed height to standardize measurements.)
- Controlled vibration sources (e.g., note blocks, pistons)(Limit sources to mimic player movement patterns without introducing unrelated noise.)
- Distance markers and blocks for proximity testing(Use consistent grid spacing to test how proximity affects detection.)
- Test world in Creative mode or a controlled server(Facilitates rapid iteration and reduces risk of unintended effects.)
- Notebook or logging tool (in-game or external)(Record thresholds, sources, and outcomes for reproducibility.)
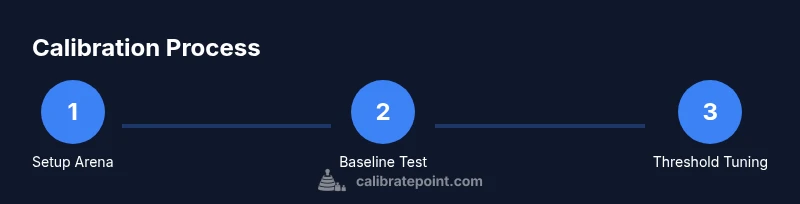
Steps
Estimated time: 60-120 minutes
- 1
Set up a controlled testing arena
Create a compact area with a sculk sensor mounted at a fixed location. Surround the sensor with uniform blocks to minimize unintended air vibrations. Establish a baseline by running ambient conditions (no inputs) and recording the sensor's baseline response.
Tip: Keep lighting and weather conditions constant to reduce confounding factors. - 2
Place the sensor and mark reference points
Position the sculk sensor so its detection range is centered on the testing zone. Mark key distances with blocks or markers to standardize proximity tests. Document the exact coordinates for future replication.
Tip: Use a consistent grid to avoid drift in future tests. - 3
Generate repeatable, player-like vibrations
Use repeatable in-game actions to simulate player activity (e.g., a specific cadence of block placements or stepping patterns). Record the timing and source location for each event so you can compare responses across runs.
Tip: Avoid real player activity during baseline measurements. - 4
Tune preliminary thresholds
Adjust the sensor’s sensitivity and threshold values so that player-like vibrations produce a measurable response while the ambient baseline remains quiet. Keep track of the changes and test each adjustment with the same vibration set.
Tip: Change one parameter at a time to isolate effects. - 5
Test with varied distances and patterns
Repeat tests at multiple distances and with different timing to assess how thresholds hold up. This step helps reveal whether the sensor reliably distinguishes players across typical in-game scenarios.
Tip: Document the exact distance and pattern for each test case. - 6
Validate against non-player noises
Introduce non-player sources such as ambient noise, rain, or piston activity and confirm the sensor largely ignores these events. If a non-player source triggers the sensor, re-evaluate thresholds and proximity handling.
Tip: Prioritize false-positive reduction over aggressive sensitivity. - 7
Record results and establish success criteria
Compile results into a structured log, noting which scenarios met the players-only condition and which did not. Define clear success criteria (e.g., % of player events detected with minimal non-player triggers).
Tip: Use a consistent scoring rubric for easy comparison. - 8
Finalize calibration and document
Lock in the final thresholds that consistently meet the success criteria. Create a concise calibration sheet with environment setup, test cases, results, and recommended usage guidelines.
Tip: Store your calibration sheet with the test world for future reference.
Questions & Answers
Can you reliably make a sculk sensor detect only players in all Minecraft environments?
Reliability depends on a controlled setup and consistent testing. In practice, you can bias the sensor toward player-like vibrations, but external factors like server latency and ambient noise can affect results. A disciplined calibration plan improves consistency.
With careful setup and repeatable tests, you can bias the sensor toward players, but expect some variability in real-world environments.
What counts as a player vibration in this context?
Player vibrations typically include footsteps, sprinting, door actions near the sensor, and block interactions. Patterns such as timing and proximity help distinguish these from ambient activity.
Think of footsteps and nearby actions as the primary signals to distinguish from ambient noise.
Will server performance affect calibration results?
Yes, server performance can influence timing and event processing, which in turn affects sensor responses. Calibrate with the same server conditions you expect to run in production.
Performance matters; calibrate under the same conditions you plan to deploy in.
Do I need any mods to do this calibration?
No mods are required for a careful calibration in a controlled test world. You can use vanilla game mechanics to simulate player vibrations and measure sensor responses.
You can do this with vanilla Minecraft in a dedicated testing world.
How should I test for false positives?
Introduce non-player noises in a structured way and monitor for unexpected triggers. Use repeated trials to confirm the sensor’s robustness to non-player events.
Test with non-player noises and note any false positives to refine thresholds.
What if I need to adjust for different game modes?
Test in the modes you plan to use (creative vs survival) because different action patterns can affect vibration sources. Maintain mode-specific calibration logs.
Mode differences matter; keep separate calibration logs for each mode.
Watch Video
Key Takeaways
- Define a clear player-focused objective
- Use repeatable tests to build reliable thresholds
- Control ambient noise and proximity effects
- Document all steps for reproducibility
- Validate with multiple, varied scenarios