How to Use Calibrated Sculk Sensor in Minecraft
Learn how to use calibrated sculk sensors in Minecraft with a practical, step-by-step approach. Set calibration levels, wire into redstone, test, and optimize for reliable automated builds.

According to Calibrate Point, calibrated sculk sensors add tunable sensitivity to vibration detection in Minecraft, enabling precise redstone signals. This quick guide shows what you will accomplish: locate or obtain a calibrated sensor, configure its calibration level, and connect it to redstone circuits for clocks, alarms, or door triggers. Expect practical steps, common pitfalls, and troubleshooting tips.
Understanding Calibrated Sculk Sensors
Calibrated sculk sensors are Minecraft blocks that respond to vibrations with adjustable sensitivity. Compared to standard sculk sensors, calibrated variants let you tune how easily they trigger redstone signals, reducing false positives and enabling more complex automation. In practice, calibration means selecting a level that aligns with the typical vibration signature in your build—lower sensitivity for quiet, controlled environments, higher sensitivity for dynamic setups. According to Calibrate Point, calibrated equipment offers more predictable outcomes in hands-on tasks. The Calibrate Point team found that a deliberate calibration routine improves reliability when building redstone clocks, alarms, and door triggers. This section introduces the key concepts you’ll apply as you design vibration-aware circuits in survival and creative play.
Tools & Materials
- Calibrated Sculk Sensor(Essential for calibration; ensure it is the calibrated variant.)
- Redstone Dust(Used to carry signals from the sensor to other devices.)
- Redstone Torch(Provides a power source or inverters in circuits.)
- Redstone Repeater(Stabilizes and delays redstone signals.)
- Comparator(Analyzes signal strength from the sensor.)
- Building blocks (any, for mounting)(Solid surface to place components on.)
- Levers/Buttons(Optional manual triggers for testing.)
- Marker blocks (e.g., wool)(Helps layout experiments and keep sensors aligned.)
- Scenic blocks for testing area(Keep a quiet area for vibration tests.)
Steps
Estimated time: 1-2 hours
- 1
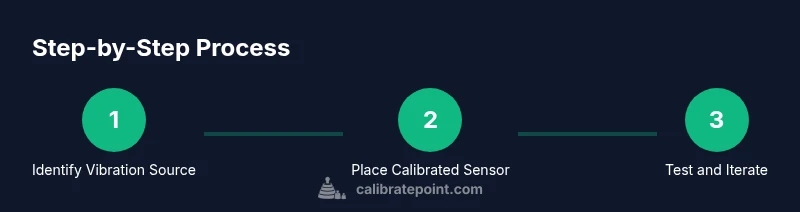
Identify a vibration source
Choose a reliable vibration source in your testing area, such as a pressure plate or block movement. Mark the source and ensure other luminous blocks or nearby sensors won’t introduce noise during calibration.
Tip: Test with a single vibration event first to understand baseline readings. - 2
Place the calibrated sensor
Mount the calibrated sculk sensor on a solid block with a clear line of sight to the vibration source. Keep the sensor stable to avoid accidental false readings from minor platform shifts.
Tip: Avoid placing on moving machinery; stabilize the platform before calibrating. - 3
Configure the calibration level
Access the sensor’s calibration setting and select a starting level (low for quiet environments, higher for busy areas). If your setup triggers unintended responses, dial the level down and re-test.
Tip: Document the starting level and adjust in small increments. - 4
Wire into redstone
Connect the sensor’s output to redstone components: a comparator to measure strength, then a repeater or torch to drive a downstream device like a lamp or door.
Tip: Test with the minimum viable circuit before expanding to complex networks. - 5
Test and observe
Trigger the vibration source and watch the redstone response. Note the signal duration, strength, and any unintended activations. Repeat with the calibration level adjusted.
Tip: Keep a log of responses for different calibration levels. - 6
Calibrate for reliability
Refine the level to strike a balance between sensitivity and selectivity. If multiple sources trigger the circuit, reduce sensitivity or add a small delay to prevent rapid toggling.
Tip: Incrementally adjust by small steps and retest after each change. - 7
Create a repeatable test routine
Develop a standard test sequence: press a lever, drop an item, then step on a plate. Repeat to confirm consistent readings across sessions.
Tip: Use identical test blocks for comparability. - 8
Document the setup
Record the exact placement, calibration level, and wiring. Include screenshots or schematic notes to help future adjustments or world transfers.
Tip: Back up your world before major calibration experiments.
Questions & Answers
What is a calibrated sculk sensor in Minecraft?
A calibrated sculk sensor is a variant of the sculk sensor with adjustable sensitivity to vibrations. It lets you control how easily vibrations trigger a redstone signal, enabling more precise automation.
A calibrated sculk sensor lets you tune how easily vibrations set off a redstone signal, for more precise automation.
How do I calibrate the sensor?
Place the sensor, access its calibration setting, and start with a low level. Gradually increase sensitivity while testing each increment until the circuit responds as desired. Keep notes of each change.
Place the sensor, start with a low setting, test, and increase slowly while noting results.
Can calibrated sensors detect specific vibration types?
Yes. By adjusting the calibration level, you can shape which vibrations trigger the sensor, helping to avoid false positives from unintended movements. It’s about matching the signal to your build.
You can tailor the sensor to respond to certain vibrations by adjusting the level, reducing false triggers.
Is calibration affected by world settings or game updates?
Calibration behavior can be influenced by changes in game behavior or updates that alter vibration mechanics. After major updates, re-test key setups to ensure they still perform as designed.
Updates can change vibration behavior, so re-test your calibrations after updates.
What should I do if the sensor doesn’t respond?
First, verify wiring and power, then re-check the calibration level. If the issue persists, test with a known vibration source and re-calibrate from a fresh baseline.
Check wiring and calibration, then test with a known vibration source and re-calibrate if needed.
Watch Video
Key Takeaways
- Calibrate step-by-step and test actively.
- Tune levels to balance sensitivity and reliability.
- Document every setup for repeatability.
- Use a simple test routine to validate behavior.